Tuesday, December 11, 2007

Christmas Fruit Cake


Fruit cake has been my husband's as well as my favorite cake. We had bought 3 packets from India this time. But it got over in no time and we were craving for more. It was then I decided to bake one, not being sure whether I would be able to bring the authentic taste out of the one I bake. The recipe using which I baked was too good. I got the recipe from Mishmash who has the recipe for this wonderful cake. The cake came out so well that I had already soaked two batches of tutti-frutti in rum!

Fruit in Custard


Recently made this simple dessert using the store bought Custard Powder. followed the instructions on the Custard Powder box, then chopped apples,bananas, orange, grapes and added the custard to the fruits. We had it warm after our dinner.

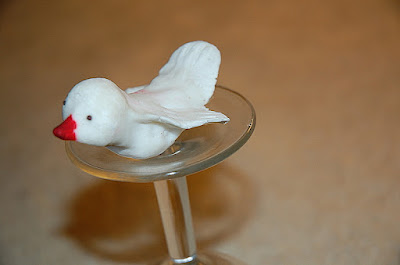
My cutie bird :)


When I was making Idiyappam, I had some rice paste left in the Idiyappam press towards the end which I didn't feel like discarding. I always used to love playing with chapatti dough as a child. My mom used to purposely leave a ball of dough for me whenever she made rotis. So this time I decided to revive those memories and made this cutie bird out of the rice dough. Tinted its beaks with some red food color and used mustard seeds for the eyes :)

Appam


I got the recipe for this from one of the blogs:


Kozhukkatta


Here is the photo of the Kozhukkatta I made one of these days. The recipe can be found here

Vermicelly Upma


Ingredients:

Vermicelli (available in most Indian stores) : 1 cup
Vegetables- peas,carrot,corn, Onion chopped finely
For tampering: Curry leaves, Mustard seeds, Cumin seeds, Slit green Chilli
oil for tampering
Water for cooking the vermicelli (usually it is 2 cups for a cup of vermicelly. However if you are adding more vegetables, increase the water accordingly)
Salt as per taste

Method:

Saute the vermicelli in a tablespoon if oil on medium fire until all the vermicelly turns light brown. Take care not to burn them. In another vessel, add a tablespoon of oil and add the tamperings, then add the veggies and salt. Wait until veggies are cooked. Add water and a little bit more salt. Add vermicelly, lower the fire. Wait until vermicelly is fully cooked and all the water is absorbed. Vary the fire until all water is absorbed. Garnish with grated coconut. Best served hot.

Cabbage Polo (Cabbage dosa)


Easy to make and instant dosa, I love having it even just like that:)

Ingredients:

Cabbage (chopped finely): 6 leaves
Onion: 1 chopped finely (optional)
Dry Red Chilli : 10 nos
Rice flour (or raw rice soaked for 1hour): 1 cup
Thuvar dal soaked for 1 hour: 1/2 cup
Salt: to taste
Hing (asafoetida) : to taste
Grated coconut: 1 cup
Water to grind

Method:

Grind everything except Cabbage and Onion to a smooth batter. Add Cabbage and Onion to the batter and stir well. Heat a tawa with one tablespoon oil. Reduce flame when tawa is heated to medium. Pour a laddle full of batter and try spreading the batter to make the dosa as thin as possible (its tough to do that with the cabbage and onion in the batter. I am planning to add the cabbage and onion after I pour the batter on the tawa another time I make cabbage dosa). Increase the flame and cover the tawa for the dosa to cook. When the top part of the dosa and the sides are brown, flip the dosa carefully. Reduce the flame and let it cook for another 20 seconds before tranferring it to a plate. Best served hot.

Sunday, December 2, 2007

A healthy homely meal


This is what we had for our dinner one of these days. A healthy meal including rice, My husband's trade- secret dish, Moong-dal, Odi (that delicious thing was given by my cousin:) , and Plantain Flower upperi.

My husband's trade secret:)


I name it so because I have no information as to how my husband brings out the best taste in this dish. He prepares it very well and its the best food I like:) Anything prepared with love is the best food in the world and for me its my husband's trade-secret dish:) Its prepared with sprouted green - gram with onions and the tampering. Unfortunately I cant write down any further details. Guess its only possible if you can come over to our home and taste it and then ask him for the recipe;)

Fish Curry in coconut milk


This is a easy dish which has a very nice taste because I used thick coconut milk using the store bought coconut paste. It tasted like the nadan meen curry from kerala . I sauteed thinly sliced onion, tomato, ginger, garlic in 2 tablespoons coconut oil, until the oil separated varying the stove temperature between high and medium to get a nice paste out of the above added ingredients. I also added a pinch of salt and garam masala powder to coat the mixture on the stove. I then added the fish pieces (which were marinated in turmeric powder (a pinch) , coriander powder(1 teaspoon), pepper powder, lemon juice and salt for 1/2 hour) and carefully gave a light stir to combine everything uniformly. Then I added a bit of thin coconut milk to prevent anything from getting burned in the vessel. It also helps it to infuse the coconut milk flavor in the dish if they are added bit by bit and stirred in between. I added this thin coconut milk just to cover the fish pieces. Waited for the fish pieces to be cooked completely and then added the thick coconut milk. and lowered the fire to medium and gave a nice stir. Switch off the stove. Add one tablespoon of coconut oil and to finish garnish with curry leaves,thinly sliced fried shallots, and red chilli tampered in oil. When you hear the sizzling sound of heated coconut oil while you add the tampering, you know you just cant wait to gobble the whole thing with steamed rice or steamed tapioca:)

Vaazhakkoombu upperi (A dry vegetable side dish using Plantain flower)


Its one of the most popular recipes of Kerala. I especially loved the taste (it brings back lots of good ol' memories of mom's cooking). I have never actually noticed how my mom chops the Plantain Flower (Vazhakkoombu) for making this dish, so I took for granted that it just has to be chopped as it is without removing its first few outer leafy segments. These days after my India visit I became an expert in preparing the plantain flower for cooking. My fil taught me the exact way , which was by first removing the few outer leaves of the PF (Plantain flower) and as you remove you will notice the short segments below each leaf. Don't throw it away. Collect those. They are to be chopped later. After removing the first few leaves. Cut the sharpened tip of the PF to get a flattened surface. Then with your knife start putting small cuts on the surface and on the sides too. Then put the PF horizontally on the chopping board and slowly chop away the cuts you made on the PF using the knife. This ensures you get very small pieces. (I used to cut the same way for raw papaya when mom used to make Papaya upperi). When the cuts are no longer visible on the flat surface you get after chopping away, again make the cuts and repeat the same process, all the while managing to hold the PF steady and taking extra care not to cut your fingers if the knives are very sharp (I use a bit blunt knife to make the cuts and a sharper knife to chop away the cuts ;) (That's my idea, not my fil's ;) .......As and when you chop away the bits of PF, put the chopped bits in water. At the end chop the short segments I was talking about and add it with the rest of the chopped PF. Chopping PF stains your hands black, but I found a nice tip for avoiding that and that is to use a stainless steel blade knife. Drain the water. In a vessel heat 2 teaspoons oil,mustard seeds , cumin seeds (wait for them to splutter).....then add dry red chili, and curry leaves....then add the chopped up PF, salt to taste and on medium heat, cover the vessel and cook until done. It cooks pretty fast. It turns pale and the raw taste is gone when it is cooked.

Pongal


This is another dish I learned from my fil. Liked it as it was nutritious and easy to make. Here goes the recipe:


Moong Dal (the yellow color smaller in size dal) : 1/2 cup

Raw rice: 1/4 cup

Water to cook the above two ingredients together

salt: to taste


Tampering:


Oil:2 tablespoons

Mustard seeds: 2 teaspoons

Cumin seeds: 2 teaspoons

Crushed pepper: 1/2 teaspoon or according to taste

Curry leaves: a few


Method:


Dry roast dal and rice until they are a golden brown on medium flame. Add water and salt and cook dal and rice together until all water is absorbed. In another vessel, heat oil and add the rest of the ingredients in the order mentioned. Add the cooked dal-rice mixture and stir well to combine everything. Serve it along with raita or pickle.

Egg Cutlet


I had come across this recipe from Seena's blog and found it very tempting to try. It came out well and we enjoyed it lots. It was something which I never could think of doing. For the original recipe, you may refer Seena's blog.

Thursday, November 29, 2007

Chakkooli (Murukku)

Chakkooli


After the oil stopped producing bubbles


Deep frying the chakkooli


Chakkooli made on the board before deep frying


Making chakkooli using the mould


The mould used to make chakkooli


The chakkooli dough

I can have this snack day and night without any limits:) I am that crazy about chakkooli. Though the initial attempts were total failure, I was determined to master it somehow as I just craved for this snack and didn't want to keep spending money to buy packets that contained limited number of chakkooli ;) .....Anyways here goes the recipe:

Ingredients

Rice Flour: 1 cup
Urad flour : 1/4 cup
Besan flour: 3 tablespoons
Butter: 2 tablespoons
Cumin seeds : 2 tablespoons
Pepper : 1 tablespoon / to taste
Water for making the chakkooli dough which is similar to chappathi dough
Salt : to taste
Oil for deep frying

Method:

Form a dough similar to a chappathi dough using all the ingredients except butter and oil. Add the butter to the dough and knead again. Heat the oil in a vessel. Fill the mould (the mould used to make idiyappam) with the dough (before filling make sure to change the bottom plate of the mould to the plate with a star shape impression. Make chakkooli using the mould on a plate. Meanwhile if the oil is heated, reduce the flame to medium before frying the chakkooli. This is to prevent the chakkooli from burning. Deep fry the chakkooli in oil. The chakkooli is done when the oil stops producing bubbles.

Tip: Its always better to make the chakkooli using all the dough as quickly as possible on the plate as the dough tends to harden and that makes it difficult to squeeze through the mould. So if you finish making the chakkooli on the board, you just need to fry it later taking your own time. So make the chakkooli on the board during the small breaks you get while frying the chakkooli.

Monday, November 19, 2007

Adai


This is a wonderful recipe I learned from my fil. I keep making it so often these days that I am sure to hear the words "Stop" soon from my hubby who is very well aware of my repetitive cooking when something comes out well:)) .......But iam trying to avoid it by making some variation when I make the adai. When I first heard about adai from my father-in-law I used to think its something we make using coconut and jagerry filling and a rice paste covering in plantain leaf. But I was wrong. It was then I realized the differences in the meaning of words used in different parts of kerala. Towards the north (Ernakulam-from where I am) adai is meant to be a sweet similar to kozhukatta, but different in shape and the way it is cooked (its covered in a plantain leaf for cooking). Towards the south (Trivandrum- from where my husband is), it is a dosa made from lentils and rice and the wonderful thing about it is , it doesnt require fermentation. It just requires the lentils and rice to be soaked in water overnight. So I am very glad that I can make it in US during winter too!

Here is the recipe:

To soak overnight (Update: One of the readers pointed out that it is enough to soak for an hour, which might also work, I would give it maybe 2 - 3 hours just to ensure that all the lentils and grains have absorbed water well) :

Thuvar dal - 1/2 cup
Channa dal - 1/2 cup
Urad dal - 2 tablespoons
Raw rice - 1/2 cup
Boiled rice or Idli rawa - 1/2 cup
Red Chilli - 7 nos or according to taste
Turmeric - a pinch
Methi seeds - one teaspoon
Grind these together the next day together with enough water to make a very smooth batter (just like dosa batter). Usually adai is not prepared like dosa (its thick and the contents are not ground to a smooth paste), but this is my fil's version and I liked this one better :) . Add salt to taste and some asafoetida powder to enhance the taste. Mix well. You may let it sit for like 15 -30 minutes or more so that the batter turns a little bit sour. Start making dosas or you can store this batter in fridge for upto a week (though in my house it doesnt last that long as it gets over long before that ;)) . I make the dosa very thin and crisp , coz thats how we like it. I also made masala dosa with this batter and it was lovely. Usually adai is served with aviyal, but I made a chutney with garlic and onion. You can serve it with any other side dish also like sambhar, chutney, pickle, dosa podi.

Aloo Paratha


Stuffed parathas (no matter what the stuffing is) has been both me and my husband's favorites. Aloo stuffing is something I never could make properly. This time during my India visit, my husband's uncle had learned few tricks of the trade in cooking from his wife and taught me the same. I should mention a special thanks to chaachi (uncle's wife) who was the person to teach uncle. I was so amazed as I never was spilling any of the stuffing and making a mess while making the parathas and parathas came out so well. These are the tips I learned:

Cooked potatoes should be mashed really well. It should form a paste (dont add water)

The balls made from the dough should be quite larger (a little smaller than a rubber ball) than the normal ones we make for chappathi.

After making the balls, before adding the stuffing, using both your palms and fingers start flattening the dough after generously rolling in the wheat flour. While flattening the ball , do it in a way so that it forms a slight depression in the middle. Dont flatten it too much,just flatten it slightly so that the edges can cover the potato filling which is to be kept.

After keeping the stuffing, bring all edges towards the top and though there is no correct way to close these, the final mission is to actually seal the edges by gathering the edges on the top. Dont use water to seal.
After sealing the edes, the ball should now look like a "Chinese Momo dumpling" (the shape ofcourse) . Now generously roll the ball in the flour and again slowly flatten it using your fingers, but this time make sure not to create the depression, the mission is to gently spread the potato stuffing evenly. Just flatten it a bit and then roll it using a rolling pin. Generously dip in flour in between. (I didnt have to dip it in flour much as it was really easy to roll than the regular chappatthi!! ) . I then realized that aloo paratha is not a rocket science dish to make. Its easy to make. Just try it out and let me know too! I didnt click the step by step pics. I will post the same another time I make aloo paratha.

Note: I had used 2 1/2 cups wheat flour, 1 medium sized potato, 1/2 medium sized onion, minced green chilli, salt.

Nankhatai


Hi dear friends,
I have been meaning to make nankhatai from long time. By the way, I was always disappointed with preparing other versions of cookies which contains egg. I did a bit of research and what I learned is as follows:

The cookie doesnt become as crisp or crunchy because of the following culprits: egg-white, more of liquid in the recipe, butter melted and added when it is warm.

The cookie usually hardens after it is cooled

When you see the edges getting slightly browned remove it from the oven and keep it for cooling on a cool surface. Even if the surface of the cookie feels uncooked, it usually hardens when it is cools down.

Do not melt butter in microwave and add it immedietly to the recipe. Let the butter come to room temperature and then mash it with a spoon to soften it.

I hope these tips are useful. I jotted it from my personal experience. I havent been successful in making a cookie whose recipe calls for eggs. So "Nankhatai" is the first cookie which was my success at cookie making. There was one thing which I didnt like about the cookie I made and that is the strong flavor of butter that was in the cookie as I am not fond of the flavor of butter in anything. But I guess the rest of you might like it. I got the recipe from Trupti's version of nankhatai .
One more update: I did not bake it for 20-25 minutes as the recipe calls for. I took the cookie out of the oven as soon as the edges started turning golden brown. I allowed the cookies to cool and it hardened and became the right texture. Also I kept the oven for preheating just 10 minutes before I made the cookie balls from the dough and also I kept the oven temperature at 350 F instead of the 375 F . Oven temprature is something which varies depending on the oven at your home. Mine had caused so many burns on the previously experimented cookies. So this time I decreased the temprature.

Sunday, November 18, 2007

Glad to see my kitchen after a long long time

Hi dear friends, I was in India for two months. Now I am back and so happy to see my husband and my kitchen after a long long time:) For people like me who are so fond of cooking, there are no words to describe the happiness I get in just seeing my kitchen after a long time, maybe Iam becoming very nostalgic here, but yes I have been that way, having an emotional attachment towards anything I have been using for a long time, even a keychain which I used to have from my working days in India.......
I am very greatful to everyone who were visiting my blog to see any updates. I am sorry I could not respond back to your comments during my absense. I have replied to all your comments now and I hope I would be able to post more treats from my kitchen soon. Once again "Thanks a lot friends !! "

Tuesday, September 4, 2007

Back from Montana with a ssssighh.....

The "Rawhide Restaurant" from where we had delicious dinner
Local Rodeo


The Glacier: this pic was taken from a high zoom level with our camera, coz we were nowhere really near to the Glacier as seems from the pic


Hello friends:) I am back from Montana.....and yes as mentioned above with a ssssighh......I wish I could live forever in that heavenly place! Lots of everlasting memories.
Me and hubby flew to Montana on 30 Aug. We boarded two planes and reached at 11 pm mountain time. We couldnt see the place while driving in our rental car in the night to reach our hotel room. But definitly we got a feel of Montana in the plane from Minneapolis which we boarded as our fellow passengers were all were cheerful, somewhat innocent type of people, and moreover I always used to have a soft corner while interacting with people from the Wild Wild West:) They somehow appear to me as very jovial and free spirited:) Thats what Montana made me feel.

We stayed at Hampton Inn the night we reached Montana and left for Kalispell Glacier National Park the next day early morning where we were going to stay at the Apgar Village Lodge. Wow the scent of the country side atmosphere made me go crazy:) I was just liking this place more and more while passing each road, freshly cut grass, ranch with horses seen from a far distance, .....Just loved it. and cudnt wait to see more! Infact my hubby had thoughtfully carried our tripod along with us , using which we were clicking snaps almost on every road we stopped because of the breathtaking beauty of the place.

We had a really great time in Montana. Most of the time we were amazed at the beauty of the place. We went horseback riding and that was the first time I sat on a horse. His name is Rockefeller and he took care of me very well:) What I meant was I didnt feel scared or anxious:) He used to stop in between to have a snack and I had to lift his head up and kick him hard (that was what the guide told us to do when the horse was slowing down or stoping for a snack in between the ride) , ....it was a fun ride :) I enjoyed it, it was only at the end when we got down of our horses, did we realize that we had muscles on our base too :) It was paining hehehe :) , infact we had that pain for next 3 days...but its nothing compared to the fun we had:) Later that evening we went to see Rodeo, which was the traditional Rodeo . Me and hubby had once been to a sponsored Rodeo show and it cost us 35 bucks each! But here since it was a local Rodeo show where only the local people came, we just spend 8 dolars per person! and to top it we got a warm welcome and thanks from the entire Rodeo crowd and the people present when they knew we were from India :) That was a memorable occasion for hubby and me.

We had also been to a local town restaurant called "Rawhide" Believe me the name of the Restaurant has nothing to do with the food served coz me and hubby were left craving for more food inspite of filling our stomach with that delicious authentic country side food. Be sure to try the Grilled Fish , Pulled pork (this my hubby ate, and he had a good review abt it), and the salad bar ...

The last day at Kalispell, we went for Whitewater Rafting in Lake McDonalds, ....oh my god, that was super adventurous:) I was doing it for the first time and I loved every bit of it:) It was the best excercise one can get , we rowed for 3 hours, breaking in between for a few minutes, and the ripples and waves were fun and adventurous:)
We both felt very sad leaving Montana the next day morning...It was so much fun and somehow the place relaxes you with its atmosphere....I wish I could live forever in a place like Montana... Will always love you Montana for your lovely people and your scenic beauty!

I have been tagged :) - Whats in a name?

This is the first time I have been tagged and it definitly feels nice :) . I have been tagged by Joelen of "Joelen's Culinary Adventures" . The tagging requires me to post these rules. So here they are:


-- Players, you must list one fact, word or tidbit that is somehow relevant to your life for each letter of your first or middle name.

-- When you are tagged you need to write your own blog-post containing your own first or middle name game facts, word or tidbit.

-- At the end of your blog-post, you need to choose one person for each letter of your name to tag. Don’t forget to leave them a comment telling them they’re tagged, and to read your blog.

-- So if I've tagged YOU, please join in on the fun!


So here is my name facts:


R - Restless mind : I always keep thinking something or the other,its rarely resting, though I wish I could let it. Its either thinking about cooking up new recipes, or about how to tactfully persuade my hubby dear to agree to buy a new kitchen gadget ;) Right now I am thinking how I can pursuade him to buy me a sandwhich maker....hope he is not reading this ;))

O - OverIndulgent: When I start cooking something and when it really pleases my palate or my husband's, I keep cooking it at a stretch that I dont put a full stop until I hear the words "My dear wife, dont you think we ate a lot of "Pathrodo" last two weeks??"

O - "Optimistic" - If I dont put "Optimistic" in quotes, I am sure to get some teasing comments from my better half. Yes honestly I am not so optimistic most of the times. But thats coz I dont like sad surprises, so I feel if I am expecting something, to be ending in a not-so-good way, I dont feel the hurt so much later. Its like I dont like that phrase in hindi "Zor ka jhatka dheere se laga" :) But yes when it comes to certain decisions in life, I choose to be optimistic. The fact is I chose to always also consider the "worst -case-scenario":) Guess i shud be called cautious instead, but i dont have a letter C in my name, so i chose to include it in O :)

P - Playing in water : These days, me and hubby were indulging in lots of water adventures like canoeing, whitewater rafting,... one of them was most unforgettable as we both fell in water while canoeing and I didnt know swimming!

A- Aromatic: I am instantly put in a good mood when I get the aroma of any dish I like. Its like a instant thing which puts me at ease. Its also the fragrance associated with anything like a soap bar, perfume, or even the detergent soap we use, makes me feel very good:) . I was so crazy about Pears soap when I was a kid, that I asked my mom, is there anything wrong in geting a bite of this soap? Since I obviously could not taste the soap, I kept collecting its soap cover and hiding it in my school textbooks so that each time I opened the book, I could get the fragrance of it :)

So thats my side of the story , I want to tag the following people to know their stories as well:)

Here goes: according to the rules, I understand I have to tag people whose names start with a letter in my name:

R - Renu of Adukkala

O - Once upon a Tart

O - Oishii

P - Priya's Kitchen

A - Asha of Aroma

Wednesday, August 29, 2007

Going for a short vacation, back on 4th sept!

Hey guys, I will be on a short vacation. Me and hubby going for a vacation to Montana tomorrow to visit the Glacier National Park. Will be back on 4th Sept. And yes,ofcourse will let tell you how the visit was :) ....Take Care :)

Sunday, August 26, 2007

Here comes Onam !!

Onam is here finally :) and honestly siting in this hotel room in Maryland, I miss being in Boston (so you can imagine, how much I miss being in my native, Kerala), where I could have atleast prepared a mini Ona Sadya ! Today all that me and hubby is gonna do is go and watch a Mohanlal Show here in Maryland. Thats gonna be my Onam. Moreover, this time, our Onam is quiet not well, with my dad passing away ....

However, this cant stop me from reviving my good ol memories of Onam. Let me tell you what I used to do for Onam. Onam Festival falls during the Malayali month of Chingam (Aug - Sep) and marks the homecoming of legendary King Mahabali.


A reference form the above link:
The Legend : Story goes that during the reign of mighty asura (demon) king, Mahabali, Kerala witnessed its golden era. Every body in the state was happy and prosperous and king was highly regarded by his subjects. Apart from all his virtues, Mahabali had one shortcoming. He was egoistic. This weakness in Mahabali's character was utilized by Gods to bring an end to his reign as they felt challenged by Mahabali's growing popularity. However, for all the good deed done by Mahabali, God granted him a boon that he could annually visit his people with whom he was so attached.

It is this visit of Mahabali that is celebrated as Onam every year. People make all efforts to celebrate the festival in a grand way and impress upon their dear King that they are happy and wish him well.

Infact its not that one just celebrates on the day of Onam. Its like a season to celebrate Onam. People start preparing for Onam one month back. Its like the Holiday season . A time to get-together with family, friends and have a good time sharing happiness. Children just enjoy like anything as they get their most looked forward Onam Holidays (school-pootal) Thats what is referred to holidays becoz of the holiday season, be it Onam , or Christmas or the Summer Holidays. Usually its like 10 days. I remember this because it used to bring so much joy to me and my brother after our Ona-Pareeksha (the mid-term exam in school just before the Onam holidays start):)

My family, being Konkani, we usually just took part in the celebrations , by going to the Onam fair, ...infact we used to get-together with our relatives at our native place in Aleppey. That used to be fun, coz I used to have a great time with my cousins, all of us playing, chatting, sometimes even gossipping:)) . I had actually wanted to celebrate onam the traditional way my malayali neighbors did. So, once even I tried my hand in putting a floral decoration in front of our house:) It was fun and though it took me several hours to make a simple design, it was worth the effort of celebrating the actual Onam.

Going back to school after the 10 days was the saddest day of all:)) , but it used to be fun when it lasted, and people always had so many things to share and we were often asked by the teacher to narrate to the class, about "How I celebrated Onam" :)
Such sweet memories, hard to forget !

I miss being in Kerala with my family!

Wednesday, August 22, 2007

Got an award!

I just received a news which really made my day , and that was from Seena of Simple and Deliciuos who has passed on the "Rocking Girl Blogger" award . Thanks a lot Seena:)


“The Rocking Girl Blogger Award” is for blogger’s ,who are girls or women, who blog and who Rock!!.”

I would like to pass on this to Maria of Maria's Menu , Ginger and Garlic and Writing at the Kitchen Table who all have a really nice blog going on, with a variety of dishes.

Wednesday, August 15, 2007

Eggless Chochlate Cake


I wanted to make a simple eggless chochlate cake from such a long time. Though I had posted a eggless recipe using tofu before, I was not completly satisfied and I was not so fond of tofu. So I was finding a way to make eggless cake and ice creams. What I was exactly searching for was for the rising agent in the eggless cakes, coz most of the eggless cake recipes I came across did not have a rising agent, I had tried some and it was so dense and did not rise at all. I then came across this particular site and several others too which had good information, I made the cake as per the recipe and made a few changes (like adding lemon extract), and I made it in a single cake pan coz I didnt have two ...and it tasted great and looked great too. I added a nice frosting too and overall cake got a good review among my close relations who got to taste it. The rising agent was the chemical reaction between the baking soda and buttermilk. I also substituted the applesauce mentioned in the recipe with the lemon extract. Though I think it was not necessary as the buttermilk itself is sufficient for the cake to rise. The cake is quiet dry though, but adding the frosting and applesauce helps to add moisture. So here is the recipe:
Ingredients:
        
  •  1 2/3 cup all purpose flour
  • 1 cup sugar
  • 1 tsp baking soda
  • 1/2 tsp salt
  • 8 tbsp cocoa powder
  • 1/2 cup vegetable oil
  • 1 cup buttermilk or soured milk
  • 3 tbsp applesauce (optional . helps adding extra moisturiser to the cake due to the absence of the egg)
  • 2 tsp vanilla extract
Frosting
  • 2 cups powdered sugar
  • 1/4 cup cocoa
  • 1/4 cup butter
  • 1/4 cup milk
  • 1 teaspoon vanilla
Method:
  • Preheat oven to 350 F
  • Sift the dry ingredients
  • Mix together the wet ingredients
  • Add the wet ingredients to the dry ingredients slowly, stirring and combining well to avoid lumps. I use a wooden spoon to combine.
  • Transfer contents to a well greased pan.
  • Bake for 20 to 25 minutes.
  • Do not open the oven door in between as it may affect the cake to stop rising.
  • Wait for 5 minutes after switching off the oven before transfering it to cool outside the oven
  • When it is cooled tranfer it to a refrigerator until cake is completly cooled before adding the frosting
For making frosting:
Combine all ingredients on medium heat and stir until the mixture becomes the consistensy of very gooey and quiet thick.

Monday, August 13, 2007

Eggless Ice Cream


I finally made my own ice cream :) I weanted to make it form long time. And this time I searched a lot on internet about making ice cream without the Ice cream maker machine. The commong thing I found is if you are not using an ice cream maker, you need to just keep beating the mixture every hour or so. It came out well. I made it using my homemade sweetened condensed milk, the recipe for which I will post along with this recipe. It was really easy to make.
Ingredients:

For sweetened condensed milk:
I got this recipe from Paula Deen's recipe on food network:

1/3 cup boiling water
4 tablespoons butter
3/4 cup sugar
1/2 teaspoon pure vanilla extract
1 cup powdered milk

Using an electric mixer or blender, blend together water, butter, sugar, and vanilla. Add powdered milk and blend until thick. Store in refrigerator for upto one week.
For ice cream:
Sweetened condensed milk (1 can)
1 1/2 cups sugar
1 cup milk
1 cup whipping cream
2 tablespoons vanilla essence
Method:

  • Add sugar to the sweetened condensed milk and bring it to a boil until sugar dissolves, lower the heat and then stir until it becomes thicker.
  • Remove from heat. Add milk and vanilla essence and whipping cream.
  • Beat the mixture until everything is perfecly blended. (Beat for say, 2 minutes).
  • Transfer contents to a metal container and freeze. Beat again after an hour and freeze again.
  • Every half hour beat again for a a minute for two and half hours (2.5 hours)
  • Then freeze overnight.
  • Your ice cream is ready to eat with a dollop of whipped cream if you like , or even chochlate syrup:)

Stuffed Bell Pepper (Stuffed Capscicum)

"Eat Me " screams the pepper The cheese topping all melted while cooking
Mr and Mrs Pepper :)


All cooked to be eaten :)


Ready to get cooked


Putting the pepper lid back


Finally topping with cheese


Filling the stuffing


After cleaning the Bell Pepper

I have always wanted to make Stuffed Veg (or Non-Veg) dishes. Somehow I either used to forget or didnt have the ingredients. This time I had some bell peppers handy and I was getting bored of using them in rice dishes and other gravy dishes. This time my memory and ingredients were at the same place at the same time hehe . Hence I decided to make stuffed Bell pepper. You can also use Brinjal in place of Bell Pepper.

Ingredients:

Bell Pepper or Capscicum - 2 nos
Parmesan cheese: 4 tablespoons

Stuffing:
------

Oil for sauting
Garlic and Ginger grated : 2 tablespoons
Curry leaves sliced into very thin pieces
Green chili minced : 2 teaspoon (according to your taste)
Tomato cut finely : one tomato
Onion cut into very small pieces: 1 large onion
Spices: Cinnamon powder , Garam Masala
Lima beans (you can add other veggies too) : 1 cup
Salt
Cooked Rice : 2 cups

Method:


  1. Cut the top of the bell pepper very carefully. Dont discard it as its to be used as the lid while cooking the bell pepper. Scrape and clean the inside of the peppers carefully. You can cut these into very small pieces and dd it to the stuffing mix later.

  2. Keep the bell peppers aside. In another vessel, heat oil and saute the stuffing mix in the order shown by stirring after each ingredient is added.

  3. Add the shredded Parmessan cheese at the bottom of the bell pepper. Then add the stuffing till the brim. Spread cheese at the top and cover with the top of the bell pepper which was cut earlier. Place all the peppers in a cooker and steam until peppers turn soft and pale and the stuffing is cooked. It might take around 20 minutes or less. You can also cook it in a preheated oven at 350 F for 30 minutes. Serve it hot with raita .

Please do not copy

All contents in this blog cannot be copied without written permission from the blog author.

LinkWithin

Related Posts with Thumbnails
baby