Monday, December 21, 2009

Microwave Pineapple Upside down cake


When Cham announced the MEC event , I thought, Wow she announced it at the right time. I am indeed trying to make better use of my Microwave than just to reheat food. As I wrote in my previous post this month, most of the Microwave recipes I saw online was chocolate based and I didn't want to make one. I recently purchased a book called "Microwave Cookbook The Complete Guide" by Pat Jester which I got for unbelievably low price from a library book sale near our place. There are lots of good recipes and tips in it and the author writes tips where she admits that Microwave cannot be used for making all things which can be made in an oven or stove top and lists the consequences too. That's what I like about this book. Honest facts !


I wanted to make something in the microwave which would not waste the resources used, hence further researched about the wattage of the microwave I use. We got this microwave from a friend of ours when we bought our house. It didn't come with a user manual, so had to call up the manufacturer to get the wattage info. I saw this website online which has very good information about the different wattage of microwaves available and how to convert the time needed for cooking in a 600-700 watts (most microwave recipes that's available online are for 600-700 watts microwave) to suit the wattage of your microwave. I never expected my microwave to be 1100 watts as I thought since its quiet an old one and small size without any grill feature, it should be less than 600-700 watts, but was truly surprised to find that it was more than that. So I recommend that you check the wattage with your microwave manufacturer before proceeding with baking or heavy duty cooking in it. So after much research I decided to bake a Pineapple upside down cake.

Here goes the recipe (which is suited for a 1100 watts microwave, hence if your microwave has a different wattage, you can use the website I listed above in hyperlink to convert the cooking time. The recipe remains same, just the cooking time varies). The original recipe (refer hyperlink at the end of this post) was for 600-700 watts (the cooking time being 9 minutes) and I converted the cooking time to suit a 1100 microwave.:

Ingredients:

Topping
  • 1/4 cup unsalted butter
  • 1/4 cup brown sugar
  • 6 pineapple slices
  • cherries/raisins
Cake
  • 1.5 cups cake flour
  • 2 tspns baking powder
  • 3/4 cup butter
  • 3/4 cup sugar
  • 1 tsp vanilla
  • 3 eggs
  • 1 tbspn warm milk
Method:

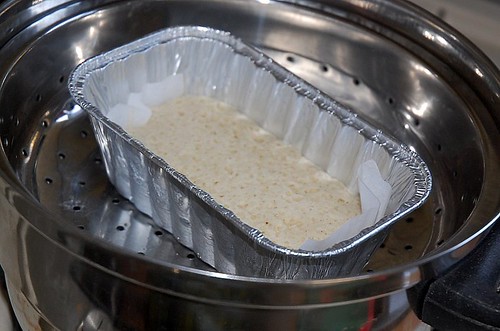
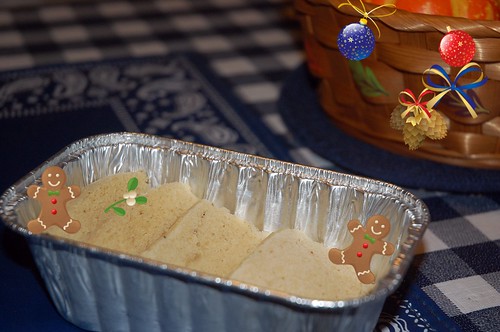
  • Melt butter in a 9 inch bundt/flute pan
  • Arrange pineapple slices, raisins evenly at the bottom of the pan
  • Sprinkle the brown sugar on the fruits
  • Sift flour and baking powder
  • Beat butter and sugar until fluffy
  • Beat the eggs one by one into the butter/sugar mixture
  • Fold in the flour mixture alternatively with vanilla and warm milk
  • Pour the batter into the pan so that the batter is spread evenly
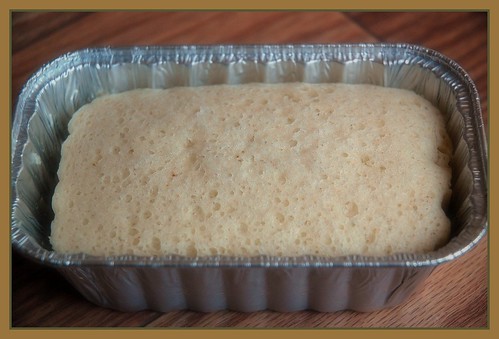
  • Microwave for 5 minutes 44 seconds.
Note: The cake might seem to look uncooked on the top but let it sometime inside the oven. If the cake doesnt get cooked on the watery surface, add 1 minute more.
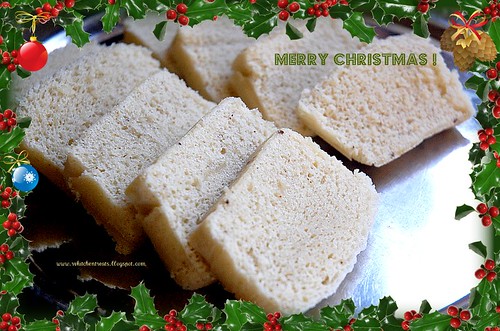
Verdict: The cake was moist and soft. Its best served when it cools down.

I am sending this to the MEC Festive Food event organized by Cham and started by Srivalli


Recipe source: Microwave recipes

Wednesday, December 16, 2009

Steamed Vanilla cake


I was/is on a mission searching for alternate ways to satisfy my craving for baking something as my oven gave up. I searched a lot for alternative ways to bake a cake without using the oven. I got a lot of microwave based recipes, but I read that most of the cakes baked in microwave use cocoa/chocolate chip a lot and V doesn't like chocolate cake so much, in fact he would take just a bite so that I don't feel bad after I all the effort I put into making one :D ...the rest of the recipes that doesn't use cocoa/chocolate were the ones which wasnt rated or reviewed , and i didn't want to ruin my day with such a recipe as this would be the first time I would be baking something without an oven. I then came upon this recipe on allrecipes.com about a steamed Chinese cake. It had good ratings and I followed some advice from some reviewers about substitutions. I 'baked' (steamed) this cake in a vegetable steamer, and the outcome was surprisingly the softest sponge cake I ever had :) It was moist, sweet, and held its shape well. I initially thought that a steamed cake would be like a dumpling or something, but this turned out to surprise me a lot. When I felt the cake first with the knife, I thought the texture resembled the outcome of Idli ;) , but when the cake was cool, it hardened a bit more on the base and formed some crumbs too. I was more than satisfied with the outcome, and hence have bookmarked it. Here is the recipe I found with my substitutions:


Ingredients:

4 eggs
1 cups white sugar
3 tablespoons orange juice
1 1/2 cups cake flour
1/2 teaspoon baking powder
2 tsp vanilla extract and 1/2 tsp almond extract
1/4 cup confectioners' sugar for dusting


Method:

Keep a vegetable steamer or Bamboo steamer over simmering
water. Make sure it is large enough to hold the baking pan. I used a loaf pan. But the recipe calls for a 9 inch square pan. Line it with wax paper.


Separate the eggs. Beat the yolks along with the juice and sugar with an electric mixer on medium speed until the mixture has increased about three times in volume. Sift together the flour and the baking powder. Sift it again over the egg mixture, and fold in gently. Blend in the vanilla and almond extracts.


Whip the egg whites in a clean bowl to stiff, not dry, peaks. Fold into yolk
mixture. Pour the batter into the prepared pan, and smooth out the edges. Tap the
pan gently on the counter to get rid of large air bubbles.


Place the pan into the steamer. Cover the top of the steamer with a kitchen
towel/parchment paper (parchment paper causes bubbles as I experienced it in my attempt), and place the lid on top; the towel will absorb any steam that collects
on top from dripping onto the cake.


Steam for about 20 minutes, or until a
toothpick inserted into the centre comes out clean. Cool on a wire rack. Dust
with confectioner's sugar. Tada...your steamed cake is ready !

Wednesday, November 18, 2009

Thai Basil Chicken

Hi everyone !!

I am back after quiet a long gap. We went to India for a while and was busy this whole year with our new house. I wasn't attempting any new ventures in my kitchen all this while. But now when the holiday season is coming near, I am slowly getting into the mood :) .

Now before I get into the details of this dish, I want to tell about when I had my first experience with Thai cuisine. When we were on the lookout for houses, we came across an ad on Internet and went to see a place. It was late in the evening, and was dark, and hence we couldn't see the neighbourhood very well, what we did see was this very convenient strip mall right across the neighbourhood, and a Thai restaurant in the same mall !! I had heard that Thai cuisine is similar in taste to Indian cuisine as they use coconut a lot. I wanted to have food there so badly after seeing the restaurant and I told V that I never tasted Thai before. That day, though we were not sure about the neighbourhood or the house we came to see , we both dined at the Thai restaurant and it was like getting a taste of the neighbourhood :) It was the best ! 1 month and few weeks later we signed the papers and moved into the same neighbourhood . Though the restaurant is still there, we don't always go there , as it turns out to be a bit expensive. Its a once in a while treat when friends come home. Whomever we took to the restaurant , enjoyed the food. As for me, I have a special affection for the Thai Basil Chicken Fried Rice. Even before the waiter asks for the spice level, I tell " 5 chillies or more " :) . They make it perfectly with the authentic Thai holy Basil that the owner gets from Quincy, Boston.


So when I saw the recipe posted on Suma's blog, I was thrilled. There is something else too, I got my treats from the Asian Food Grocer Tastemaker program through Foodbuzz. The Asian Food Grocer have a wonderful website with lots of interesting items used in the Asian kitchen. The ease of using it , was one thing which I liked. I had never shopped online, and I should say Asian Food Grocer became my first time and I felt a sense of accomplishment after that :D .

My V is so fond of chopsticks, that when I got the opportunity to use the gift certificate, that's what I ordered (3 pairs), along with other goodies : 2 rice bowls, 1 tea cup, 2 soup spoons, 1 box of Korean ginseng tea, 1 bottle Dashi, 1 bottle fish sauce. I have tried to capture all of them in these pictures.

I love the fish sauce, ask me why? Because it matches with the saying "You don't know what you have been missing until it arrives" and that's what I felt after I used it in Asian stir fries. I am not familiar with Dashi, I ordered it because I saw that its used in authentic soups. And I am a fan of soups. I would be glad to have someone who have used it/or know about Dashi, enlighten me about it.

After I ordered all the stuff, the total came to $31 and I used my debit card to complete the check out. I got an e-mail from them that I would be receiving it in the next 5-6 business days. I eagerly waited for my package to arrive by Fed Ex. The day it arrived, it was V who collected it and surprised me after I woke up from a short nap. The packing was neat. I especially liked the box that contained the Korean Ginseng Tea bags. Perfect for display !

The fish sauce will last a long time for me :) I never thought I would get such a generous amount :) . I recommend this website to all my readers who are interested to try some authentic Asian grocery. I thank Foodbuzz and the Asian Food Grocer for this opportunity to try something new in my kitchen.


So lets come to the dish. As I wrote above, I saw it on Suma's blog. I tried the same way she did, except use grated peel of lemon instead of Kaffir Lime leaves as I didn't have it. Suma, thanks for the wonderful recipe. I am posting it again here for my future reference :)


Ingredients:

  1. 1 lb minced chicken
  2. 4-5 basil leaves , chopped
  3. 10 garlic pods
  4. Kaffir lime leaves/ Grated Lemon peel - 2 leaves or 1/2 teaspoon peel
  5. 1 Onion
  6. 1 teaspoon soy sauce
  7. 2 Tablespoons Fish Sauce
  8. Salt and Pepper to taste
  9. 2 tablespoons oil
  10. 5-6 Slit Green Chillies
  11. 2 Capsicums (Bell Pepper) cut into strip lengthwise


Method:

  1. Heat a pan with oil. Add garlic, onion, Bell Pepper and stir fry for a minute. Add a pinch of salt (not too much as fish sauce and soy sauce will compensate for the saltiness later during the preparation) . The bell pepper should remain crunchy in this dish, so don't cook it all the way through (I have not mastered this art, hence if you are a pro at it, please share that with me too :) .
  2. Add the chicken and green chillies and stir fry until chicken is cooked and turns light brown.
  3. Now add the soy sauce and fish sauce and stir well so that the entire dish is coated with the sauces. Now add some pepper and the chopped basil leaves and stir until leaves are wilted. Turn off the fire and close the dish. Serve hot with rice /noodles/roti.
Verdict : The pungent aroma of basil leaves infused with the fish sauce and the chicken makes one want to savour the dish immediately.


Monday, July 27, 2009

Lauki (Bottlegourd), Breadfruit (Sheema chakka or Kadachakka) Erisseri


I had recently purchased Lauki (Bottlegourd) for the first time. I had seen a lot of blogs posting recipes with this wonder vegetable, so I wanted to try it too. Recently I got a nice piece of Breadfruit from my cousin's place. So I wanted to make something special. Hence this Erissery came up in my mind. Here goes the recipe:

Ingredients:

  1. Lauki and Breadfruit cut into cubes - 2 cups
  2. Canned Beans (or pressure cooked beans) any variety, I used Pink Beans - 1 can/1 cup after cooking: reserve 1/4 cup to be used for grinding (as told below)
  3. To grind to a paste:
  • Grated coconut: 1 cup (save some for garnishing at the end)
  • Garlic and Ginger
  • 1/4 cup of canned Beans (any variety can be used, I used Pink Beans)
  • Dry roasted Cumin powder (1tspn), Coriander powder (1tspn), 5-6 Dry red chilli
4. For tampering:

  • 1 tablespoon methi seeds
  • 1 tspn mustard seeds
  • Hing (Asafoetida) : a pinch
5. For the tangy flavor: Make a thick paste (approximately 1/4cup) of tamarind soaked in hot water.
6. Salt to taste and water as needed for gravy


How to make:

In a deep bottom vessel, on high heat, add 1 tablespoon oil. When the oil heats up, lower fire to medium and add all the tampering, then add the vegetables and fry them until they are a bit soft on the outer. then add sufficient water to cook , wait for the water to come to a boil and then close the vessel and let it cook. Add salt when they are almost cooked, that way you don't add more salt. When the vegetables are completely cooked, and there is just the right amount of water for gravy, add the ground paste, remaining canned beans and stir well. Then cook for 2 more minutes. Now add the tamarind pulp and stir again. Check for salt again. Cover cook for another minute and then switch off fire. Sprinkle the remaining grated coconut. Serve hot with Rose Matta rise like I did :) or with any other variety of rice.

Tuesday, July 14, 2009

Microwave Milk Peda

Well, I guess I am just disappearing too often from blogging world. I don't know the real reason behind it. But there is something called 'external factors', which , for me (and I am sure for all other bloggers), simple things like a proper table to sit and type , the tidiness in the room, and light, affects my mood to blog and hence, if this maybe considered an excuse, well, so be it, because, now with a brand new computer table which has lots of space to arrange files and other paperwork and a high end memory (thanks to V) upgraded computer, I am all set to blog again. Last weekend me and V assembled our computer table, took an hour. I love it when we both work together to assemble things like this, its always lots of fun :) . We almost ended up fixing the wrong wooden plank on one side of the table, then had to unscrew the whole thing and start over :D. I like the way the system works here, especially the do-it-yourself projects. It always helps to learn new things. And especially after buying a house, these projects are very handy.


Well, coming to the sweet , I made this on our 4th wedding anniversary on July 3rd. It was a quick fix , but the taste was too good. I always bake cakes on our wedding anniversary, but this time I had to settle for this sweet as our oven has quit its job :(. It smokes all the time when we switch it on . Hence I am on an adventure, I must say, to try making some satisfying sweets/snacks using my other working appliances :) You will be surprised to know some of the things I tried.

I found the recipe for Microwave Milk Peda in Sify. There are other blogs too out there which have made these sweets, and I liked each one of them. This sweet is a favorite of V. And I was happy to make it on our special day.


Ingredients:

1 can condensed milk
3 cups milk powder
1 stick butter (8 tablespoons)
Cardamom powder - a pinch

Method:

  • Melt butter in a microwave safe plate
  • Add all the rest of the ingredients and stir well
  • Microwave for 2 minutes. Remove, and stir
  • Repeat the above step for every 2 minutes until it turns from yellow to light brown
  • It takes approximately 6 minutes for making pedas this way
  • Make balls out of the pedas and shape as desired


Hey I have one good news to share with you. I was lucky to be the 'The Foodie Blogroll - Stir, Laugh, Repeat Cookbook Cookbook Giveaway : Winner for June, 26 2009' . I got the Stir, Laugh , Repeat cookbook written by Martha Cleves (shown in the picture above). It has a lot of recipes which is written in a simple, and fun to way. I loved all the little anecdotes which she has shared under each recipe. There are also some interesting tips which can be used to make life easier. Being the first time I won any lucky draw contest, I was so happy, that I felt a bit emotional when I got this book by mail, signed by the Author herself :) Thank you Martha, and Thank you Queen of Foodie Blogroll for hosting such an event !

Thursday, May 28, 2009

Microwave Besan Laddoo

Hello dear readers,

I am back after a long break. We were busy shifting to our new home here. Yes, we bought a townhouse here in Ashland. It was a moment of great joy the day the papers were signed. I was busy for the last two months trying to arrange and decorate our nest :) .
Many friends kept asking me whether I stopped blogging altogether :) . I found that I was giving excuse after excuse, and yesterday night I decided, enough was enough, I am going to blog, because deep inside I was missing my blogging buddies a lot ! So here I am with a sweet start :D

Sweet start with Besan Laddoo. Did you know that this sweet can be made with ease in a microwave in few minutes? I was surprised too when I found this recipe at the following blogs:

Saffron Trail
Bhaatukli

I instantly fell in love with the mouth watering pictures of these laddoos on their blogs. I tried the recipe at Saffron Trail as she tells it takes 5 minutes only, and yes indeed it took only so much time when I prepared the laddoos. I also liked the tip given at 'Bhaatukli' by Tee, where she tells that 'the powder should not be too dry , else it will not hold shape'. Thanks Tee, it really helped.

Now let me share the recipe I used: I used butter instead of ghee as we don't use ghee in our house, but it didn't make a significant difference to us, as me and V enjoyed the delicate taste of melted butter and roasted Besan in the laddoo. You may use ghee as that's what the original recipe calls for in Saffron Trail's blog. I also added a little bit of Nutmeg powder to get an added flavor.

Ingredients:

1 cup Besan
1 stick butter (1/2 cup butter, or 8 tablespoons butter)
1/2 cup powdered sugar
1/2 teaspoon powdered cardamom
1/4 teaspoon powdered nutmeg


Method:

  1. Mix besan and butter (cut in cubes if there are straight from the fridge) in a microwaveable safe flat dish. If you have a dish where the food doesn't stick to the plate after microwaving , it would serve the purpose much better. For eg: I used my silicon baking pan (its freezer safe, and microwave safe too). It made the in between stirring easier.
  2. Microwave for 5 minutes , stirring the mixture a little after every minute. As suggested at Saffron Trail, you may increase your time to additional 2 minutes if your microwave power is low.
  3. At the end of 5 minutes, take the pan out of the microwave and wait until it cools down (it should be cool, not cold, so don't rush and keep it in the fridge ;) ]. It should take half hour to cool down.
  4. Add powdered sugar, cardamom and nutmeg to the mixture and stir well and then make round laddoos ( don't worry the first time if you don't get it right, it takes a little practice, that's all. my laddoos didn't turn out the perfect round when I initially tried it).
  5. I stored these laddoos in the fridge after there were formed for around 1 hour. This helps in setting the laddoo.
  6. Store laddoos in the fridge if you are serving them at a later time.
  7. Enjoy :)
Hope you too will like these when you make them !

Monday, March 9, 2009

Low calorie Banana (Plantain) Chips and Potato Chips (can be Oil-free , Salt free ) using Microwave

I love my Microwave (not exactly mine, but our apartment's) ! and the person who invented it too ! That's what I can say after I made these easy, low-calorie munchies last week. I was surprised to find that the crispiness was no different than when fried in oil. You can even use a low calorie oil spray and a wee bit of salt to enhance the flavor. After making these I swore, I would never deep fry Banana or Potato Chips in oil in my kitchen. Let me share my excitement with you now:


Here is how I made it: Its easy, breezy tasty :)

Gadgets needed:

  • A microwave
  • A mandolin slicer (in India its called 'Chips maker' in some places, popular brands include 'Anjaly'). You can get a Mandolin slicer in US too, I got these from a Calphalone store, but we just bought it as a side purchase after buying a gorgeous Calphalone Infused Anodised Stir Fry Pan. The Mandolin cost just $10, but its worth buying as its a great addition to your kitchen gadgets. This one even had a handle to hold the food while slicing, thus giving extra safety.

If you don't have a 'Chips maker' , no worries, you have your knife to your aid. Cut slices as thinly as possible , make sure they are of equal length as it helps providing uniform heat in the microwave while 'they turn to' Chips ;)


Plantain chips


Seasoning:

Oil just a pinch or can be totally avoided
Salt, a very tiny pinch, or can be totally avoided.
Chilly powder, Asafoetida - a pinch

Note: I have used very little seasoning, as while using Microwave , you should be very careful while seasoning, if you are doing it before Microwaving it, as a pinch of seasoning has very very potent flavor while cooking in Microwave. Its best to add these after the Chips are done and when they are just out of the Microwave.

Vegetables that can be used : Potatoes (Preferably Potatoes good for frying purpose, else they may lose color and turn brown, but taste is intact though), Raw Banana (Plantain), Taro, Bitter gourd.

Potato Chips (don't mind the color as I used a Red Potato variety which I didn't find quiet good for frying because of the color they turn into, but taste was equally good)


Method:

Slice the vegetable into very thin uniform slices. Spread the slices on a Microwave safe flat bottom vessel, (I used my Silicon Baking Pan which is also Microwave safe). Arrange in such a way that no two slices overlap each other . A little overlapping here and there is alright if space is a constraint.

Microwave under high power for 4 minutes if you have filled the plate with the slices in every nook and corner , or 2-3 minutes if less slices are used. Keep checking in between. This can give you an approximate time for cooking these.
Tadaa ! Your chips are ready to savor !

This way of making chips has more of advantages than disadvantages I feel:

Advantages:

  • Control over the amount of oil, salt, or other seasoning
  • Less power , as I read somewhere that Microwave consumes less energy than other electric appliance.
  • Less fume and hence less cooling of the kitchen needed when compared to deep frying on a cooking range.
  • Less cleanup, and nil wastage of oil
  • No guilt feeling of storing the same oil for frying the next time, as no oil / very negligible amount of oil was used in microwave
The only thing I noticed was, if you have a small microwave/ small microwave vessel, then you can 'fry' only so much chips at a time. But then I don't think it matters so much.

Hope you all will like these.

I am sending these and one of my previous entries (look below this sentence) to (Microwave Easy Cooking)MEC-Savoury Snacks (started by Srivally of Cooking for all seasons) and hosted this time at Priya's Easy and Tasty Recipes.

My previous entry participating in this event are:

Bittergourd Fritters

I am planning to post a Cake recipe next time, so wait and watch dear readers :) Till then, wave a 'bye bye' to the Winter (today it snowed here in Framingham, I think this might be the last snow of this winter) and welcome crisp Spring !

Love
RV

Friday, February 20, 2009

V day with a Chinese touch - Sweet Corn Chicken soup, Chicken Chopsuey


This time for Valentine's day I decided to go Chinese. We have this Chinese restaurant called Eonoodles near our place. Both me and V do take-outs or have lunch occasionally and whenever we go there, we love to have the Chicken Chopsuey dish. The way they make it has never failed to amaze me. I always wanted to ask the restaurant owner about the secret recipe, but never did as I was too embarassed to ask. Have you people asked a restaurant chef for your favorite dish he/she makes?

I then started to analyze the ingredients visually and nasally ;). I found in Internet that the word Chopsuey in Chicken Chopsuey meant the veggies added to the dish along with Chicken. I kept up my determination to recreate it in my kitchen. It didn't satisfy my expectations the first time I made.

I realized it was mainly because of the substitute ingredients I used. In addition to Chicken Chopsuey, I decided to make Sweet Corn Chicken Soup for appetizer and Pumpkin Pie for dessert. Being Valentine's day I decided to use the exact ingredients. I made a quick stop at the nearest Stop n Shop and made the necessary purchases. This is how I made it:


For Sweet Corn Chicken Soup:

Ingredients:
  • Skinless Boneless Chicken breasts sliced and diced into very small cubes : 1 cup
  • Sweet Corn Cream Style: 1 can
  • Corn: 1/2 cup
  • Chicken Broth: 1 can
  • Whole Mushroom stem and top (I purchased the canned version found in the Asian isle): 1/2 can
  • Minced Ginger and Garlic: 2 teaspoons
  • Olive oil: 2 tablespoons
  • Soy Sauce: 2 tablespoons

Method:
  1. In a wide bottom vessel, on medium high heat, add olive oil. When it heats up add the Chicken pieces. Saute it with minced ginger and garlic , 2 tablespoons of Soy Sauce , until chicken is cooked evenly.
  2. Transfer the chicken to a separate plate.
  3. Add Sweet Corn Cream Style Corn and Corn to the same vessel in which the Chicken was sauteed. When the contents are cooked, add the chicken-ginger-garlic to the corn mixture and mix well. Add the Chicken Stock and let the soup come to a boil, and then let it simmer for 10 minutes.
  4. If the soup is too watery to your taste: Mix one tablespoon of cornstarch with 2 tablespoons of water and add to the soup and lower the heat to minimum. Stir until the soup gets the desired thickness.
  5. Add salt and pepper as desired. Serve hot.

*******

For Chicken Chopsuey:

Ingredients:
  • Boneless skinless Chicken breasts cut in thin bite size slices: 1 cup
  • Julienne sliced Onion: 1 small
  • Canned/Fresh Water Chestnuts: 1 can
  • Whole Mushroom with stem and top: 1/2 can
  • Bamboo Shoots: 1/2 can
  • Sliced Carrots: 1/4 cup
  • Bean Sprouts: 1/2 cup
  • Sliced Garlic: 1 clove
  • Chicken Broth: 1 can
  • Salt and Pepper
  • Soy Sauce: 3 tablespoons
  • Olive oil: 2 tablespoons


Method:
  1. Follow the steps from 1 and 2 as in Sweet Corn Chicken Soup, excluding the part of adding Ginger.
  2. Add the veggies onto the same vessel in which the chicken was sauteed. Saute them until the veggies are soft and almost cooked on medium fire.
  3. Add the chicken to the veggies, add the chicken broth and bring the mixture to a rolling boil. Then let it simmer. Thicken the mixture by using cornstarch as I wrote in the Sweet Corn Chicken Soup above.
  4. Add salt and Pepper as desired.
  5. Serve hot with rice or noodles.

For Pumpkin Pie:

I followed the recipe on the back of a Canned Pumpkin puree. I also used a pre-baked Pie crust. The Pie turned out great. Here is Libby's Famous Pumpkin Pie recipe:

Ingredients:
  • 1 can (15 oz.) LIBBY'S 100% pure Pumpkin
  • 1 can (12 fl.oz) CARNATION Evaporated Milk
  • 1 unbaked 9-inch (4-cup volume) deep dish pie shell
  • 3/4 cup sugar
  • 1/2 tsp salt
  • 1 tsp ground cinnamon
  • 1/2 tsp ground ginger
  • 1/4 tsp ground cloves
  • 2 large eggs


How I made:
  1. Mix sugar, salt, cinnamon, ginger, and cloves in small bowl. Beat eggs in large bowl. Stir in pumpkin and sugar-spice mixture. Gradually stir evaporated milk.
  2. Pour into pie shell
  3. Bake in preheated 425 degree F oven for 15 minutes. Reduce temperature to 350 degree F, bake 40-50 minutes or until knife inserted near center comes out clean. Cool on wire rack for 2 hours. Serve immediately or refrigerate.
*******

Sandya of http://www.third--eye.blogspot.com/ has tagged me for "25 random things about you".

The rules: Once you've been tagged, you are supposed to write a note with 25 random things, facts, habits, or goals about you. At the end, choose 25 people to be tagged. You have to link the person who tagged you.
  1. Favorite movies: "Father of the Bride", "The Odd Couple", "Bend it like Beckham", "Big"
  2. Favorite TV channels: Food network, HGTV, DIYnetwork, LMN,CBS,USA
  3. What I do during my free time: Go window shopping, browse diynetwork.com to see interesting projects such as clutter management, storage ideas.
  4. I love spicy hot food, and this has caused me troubles sometimes. I recently swallowed a hot steaming piece of potato while trying to see if its cooked. As a result I have a small lump. I am hoping it would go in another two weeks.
  5. I love gardening, I have just started with container gardening and looking forward to growing a wonderful vegetable garden someday.
  6. I used collect all things that smelled good as a child, such as bathing soap cover, incense stick cover, and store it in a box, so that I could smell them time to time.
  7. Diary writing was an amusing play time for me as I used to quote so many amusing facts and incidents from my personal life. My brother used to have a fun time teasing me when I used to proudly show him my stories. I still write diaries.
  8. I always used to have this thing for collecting names, girl name and boy names. Each year, I updated the list too. I don't know why I did this, but it was fun. Its like a database or something .
  9. Owning an aquarium or a bird as pet is what I am hoping in the future. We both love to have these, hence we always keep visiting Pet stores, just to gaze at the products and accessories available. We will soon own one as we are in the process of a major shifting process.
  10. Favourite kitchen gadgets: Sandwich maker, Mandolin slicer, Preethi Mixie, Microwave,Hand blender, Rose shaped Silicone Baking pan,Salt and Pepper grinder.
  11. My challenge: Control my appetite for unhealthy spicy snacks, Too much worrying
  12. I dream of living in a farm house with a spacious kitchen , with lot of fresh air, and quiet atmosphere, and a market at walking distance.
  13. I would love to travel to Japan, China, and Thailand sometime as I love their cuisines.
  14. I talk loud, especially when I talk on phone or to someone I am close with. I have often found myself getting embarrassed when I talk over the phone in public, its as if I am talking to the entire world, and not just to the person on phone.
  15. Snack I always crave: Vegetable Cutlet
  16. I strongly believe that God does all in his/her power to help us and we should be thankful for even the shortest time of peace, relief , and happiness.
  17. I don't like the smell of butter, ghee, or cheese, yogurt. I eat them when they are not served directly, such as in cakes, or sweets, shakes. I don't like the tangy flavour in food either.
  18. I was born left-handed,its strange that my mother and my late father were not lefties. My dad didn't want me to be different , hence changed me to do some things with right. He did it so well without any scolding that I never remember regretting it or complaining about it. Hence I only write, eat, and, brush my teeth with my right hand. And rest of the things with my left hand. I wonder how my kids would be, but one thing for sure is I would not change them as I realize there are some serious risks involved which my dad didn't know about. And moreover its cool to be a leftie too :)
cant think of anymore...
    Ok, now I would like to tag these people for the "25 random things about you":

    Ranji of Ranji's Kitchen Corner
    Cham of Spice Club
    Sudha of Bombay Bistro
    Teena of Kaipunyam.com
    Easycrafts
    Varsha of Will-O'- the Wisp
    Seena of Simple and Delicious
    Divya of Easy Cooking
    Priya
    Ashwini
    Yasmeen

    Thursday, February 5, 2009

    Eggless Peanut - Coconut cookies

    Since Valentine's Day is nearing, I decided to warm up my oven for making goodies. There are a lot of cookies baking these days in blogging world. I was drooling on all the yummy cookies which participated in JZ's event. I have not been much successful in baking cookies. If you see my past posts, you would realize that I have posted just one cookie recipe which is Nankhatai. When I bake cookies, it always expands/burns/too crispy. However, I did not feel like totally giving up on baking cookies as the pictures in other blogs have always tempted me. I decided to try one of the Eggless cookie from Prav's blog. I did not have Almonds, hence I used Peanuts. The taste and texture came out good. I was glad that I could finally make a proper cookie.


    Source: Pravs's Coconut-Almond Cookie

    Ingredients:
    ------------
    • 1 cup Maida/All Purpose flour
    • 3/4 cup Peanuts (I used the roasted unsalted Peanuts)
    • 1/2 cup Butter at room temperature
    • 1/2 cup Sugar
    • 1/2 cup grated Coconut


    How to make:
    ---------------

    1. Preheat oven to 350 F/170 C
    2. Crush Peanuts to a coarse texture. Tip: Put Peanuts in a Zip-lock bag and crush them coarsely by using a rolling pin.
    3. Mix Butter and Sugar until it is well combined
    4. Add Peanuts, grated Coconut, and All Purpose flour to the Butter and Sugar mixture
    5. Chill the dough for 15 minutes or make sure the dough is in a cool place and nowhere near the oven as the butter in the dough would start melting and cause the cookie to spread before you shape them and bake.
    6. Make small balls out of the dough and flatten them a little. Press a half Peanut into each cookie. Again while making the balls, do not keep them between your palms for long time, as cookie dough needs to be cool when they go in the oven.
    7. Arrange these balls with one long finger space between each cookie , on a parchment paper on a cookie sheet/tray
    8. Bake them in the preheated oven for 12-13 minutes or until the bottom of the cookie becomes light brown.
    9. Transfer the tray to a cool place for the cookies to cool. The cookies would not be done immediately out of the oven. But they harden and become crunchy when cooled.


    Proud to display my cookie jar on my kitchen shelf ;)

    Hope you enjoy these cookies the same way I did :)

    Similar recipes from other blogs:

    Divya's Almond Coconut cookies
    Madhuram's Eggless Butter Pecan Cookies

    Renuka's Eggless chocolate cookies/biscuits


    Friends , my dear friend Varsha Vipin of Will-O'-the-Wisp passed me this lovely Butterfly award :) Thank you so much Varsha !

    I am passing it on to these dear friends in blogging world:

    Cham of Spice Club
    Ranji of Ranji's Kitchen Corner
    Teena of Kaipunyam.com

    Tuesday, January 20, 2009

    Pasta - Potato Salad

    We had recently been to one of our favourite restaurants in Framingham, Ruby Tuesday. Both of us love the salad bar in Ruby Tuesday. That alone is enough to fill your stomach halfway before your main course arrives. You can have unlimited amount of salad from the salad bar and hence I always make sure to make frequent trips towards the salad bar :) . I love the pine nuts, and the pasta salad, and potato salad.

    Salads have been my favourite since my childhood, I used to love having raw cabbage leaf, carrot, tomato, onion and green chilli combo along with curd. Also I was the only one in my house who used to love having raw sprouted green moong. My mother was happy as well as quiet amused and surprised to see me hogging those sprouted green moong which she used to sometimes purposely make just for me :) After few years she used to make a simple salad with sprouted green moong, minced onion, tomatoes, green chilli, coriander and bit of salt and lemon juice. I loved it.


    Coming to Potato salad, I don't remember where I first had it, but I remember where I first saw it. It was in my office cafeteria in India. I am proud to say that our office cafeteria was one of the best. They had a very good menu. I had seen egg salad, potato salad, pancakes, everything for the first time over there. I was not so fond of Mayo that time . I didn't like it that time. Things change when you come to US though :) . I was determined to make this at home as I had tasted this in several restaurants (especially Ruby Tuesday) and had become a great fan. I wanted to keep it light and towards the healthier side. Hence this is what I did:

    Ingredients:

    Pasta (whole wheat variety)- 2 cups of pasta cooked according to package instructions. I used the Rottini variety.

    Potatoes (I used the red skin variety) : 2 medium sized, boiled until just done so that it doesn't lose shape while slicing into medium segments.

    Frozen spinach : 1 cup, which is to be thawed before using

    Frozen green peas (optional): 1/2 cup, thawed before using

    Canned Tuna in water (optional) : 1 can

    Minced Garlic: 2 tablespoons

    Low-fat seasoned Mayonnaise: Refer my post for the recipe

    Soy Sauce - 1 teaspoon or as per your taste

    Seasoning:

    Dry Basil Leaves
    Oregano powder
    Minced Coriander leaves
    Lots of freshly cracked pepper


    Method:

    In a deep bottom vessel on medium high heat, add thawed spinach, canned tuna (along with the water), and garlic. Saute them on medium-low fire until everything is cooked. There is no need to add any oil for sauteing the above spinach and tuna mixture as the water from the tuna helps the cooking process. [as far as the Tuna goes, Chunk light tuna in water is one of the lightest canned variety fish]

    Season the already sliced potatoes with a little pinch of salt and lots of freshly cracked pepper, dry basil leaves, and a little oregano. Add these seasoned potato, pasta and mix well until everything is well combined. Switch off the fire and transfer to a serving dish. Add the Mayonnaise combine well again. Add a generous amount of seasoning ( I add lots of cracked pepper as there is no other source of heat in this salad and I like my salad a little spicy. Freshly cracked pepper gives a whole lot of flavour to this salad. ) Serve it immediately or refrigerate it and serve cold along with low-calorie saltines/crackers and some vegetable sticks.

    Monday, January 19, 2009

    Low-fat seasoned Mayonnaise


    As I wrote in my previous post, I am trying to follow a low-fat cooking diet. I have this book I got recently from library called Low-Fat Cooking for good health by Gloria Rose which I follow for some of her low-fat recipes. One such recipe I made from the book was Low-Fat Mayonnaise, which is referred to as "Our" Mayonnaise in this book :) Its really easy and I used it as a dressing in other recipes. Here is the recipe which I modified by omitting certain ingredients and adding different herbs and seasoning.


    This recipe calls for refrigerating overnight, hence this is a make ahead recipe.

    Ingredients:

    ---------------

    4 tablespoons low-fat Cottage Cheese
    1 egg white (preferably use fresh eggs)
    2 tablespoons vinegar
    2 tablespoons lemon juice
    1 teaspoon Dijon-style mustard
    3/4 teaspoon onion powder
    1 teaspoon soy sauce
    1 teaspoon minced garlic
    Bit of coriander leaves
    Dry Basil powder (optional)


    Method:

    1. Place all ingredients in a blender/food processor and process until smooth, and creamy.
    2. Transfer contents to a glass bowl and refrigerate overnight.
    3. Can be used as a salad dressing or as a dip.
    Lasts for 2-3 days.

    luv
    Roopa

    Friday, January 16, 2009

    Stir fry mixed vegetable peanut noodles


    Happy New Year to everybody !! I know I am a bit late , but better late than never. This year I made a resolution to eat healthy (as most of the people I see on weight loss ads on TV) :)) . Let me see how much I can control my cravings. I followed one diet, learned few good things and few not so good things about that diet. I have a book purchased on low-fat cooking andthat's something I look forward to everyday these days.


    Recently we bought some Imitation Egg Noodles for the first time. Both me and V are great fans of Maggi Noodles, and every time we do our Indian grocery , V makes sure he buys at least 3 Maggi packets. This time we did our Indian grocery in a Chinese store (have to say, they sell it much cheaper than the Indian stores). They had all sorts of Asian spices and condiments. In the Thailand Isle (yes they had Korean, Thai, Philippines, Japanese, and Indian (have to say most of their customers were Indian ;-) ] we found this imitation Egg noodles for just 99 cents. We thought of trying this out.


    I am very fond of Chinese food (not like a daily basis), especially their delicious Soup and spicy dishes like Kung Pao , and Lo Mein. I love Kung Pao mainly because of the spicy and tasty peanuts they put. It adds a nice crunch to the whole dish. Lo Mein is another of my favorite dish. I decided to make a vegetarian version of Lo Mein (Indian style). I sliced and diced one Red Bell Pepper , Onion, Carrots, Mushroom, a little tofu. Slit 5-6 green chillies, mashed some garlic and grated fresh ginger.

    Cooked the noodles in lots of water with a 2 tablespoons olive oil and a little salt, until soft and done and drained. Then I added 3-4 tablespoons olive oil to a hot wok, spread the oil to coat the entire wok. Added the peanuts, green chillies , garlic, and ginger, reduced flame to medium, stir fried until chillies become a bit pale. Then I added the rest of the vegetables, diced tomatoes, and salt and stir fried until everything cooked, added tofu , spices (1/2 teaspoon of coriander powder, chilly powder), 2 tablespoons of soy sauce, 1/4 teaspoon sugar. Stir fried and mixed everything until cooked. Lowered the fire to medium-low. Added the noodles, mixed well with the rest of the ingredients. Stir fried Noodles ready.

    Please do not copy

    All contents in this blog cannot be copied without written permission from the blog author.

    LinkWithin

    Related Posts with Thumbnails
    baby