Showing posts with label Chicken. Show all posts

Friday, July 23, 2010

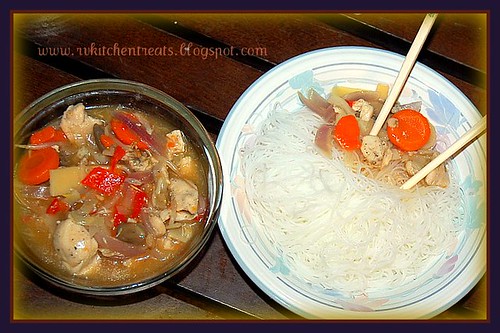
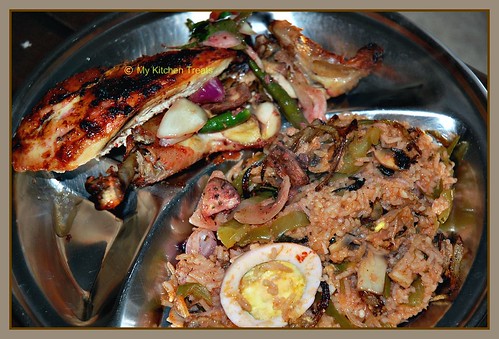
Vegetable Hakka Noodles with Tandoori Chicken Broiled/Baked in Oven


On our recent visit to the Asian grocery store, we purchased authentic Chinese noodles which is inexpensive and worth buying as you get a lot for $1. Me and V love Maggi noodles, but compared to these Chinese noodles, they turn out to be more costly. We had purchased these before too, and I had found out a very tasty way to utilize these noodles, ie, by making Vegetable Hakka Noodles. The Hakka noodles I am referring to here is Indo-Chinese. I like Indo-Chinese food and my favorites are Gobi Manchurian, and Sweet Corn soup.


 The Veg Hakka Noodles I am going to write here about is a very simple recipe, and can be made fast. I hope you try it sometime :)  I have eyeballed the serving of ingredients, hence I haven't mentioned the same.

 Here is the recipe:

Ingredients:


  •  Noodles 
  • Water to cook the noodles
  • Onion chopped finely
  • Vegetables : Thinly sliced cabbage, carrot, green beans, corn, peas. You may partially cook them and set aside to reduce the cooking time later.
  • Green chilly slit and cut into julienne
  • Ginger-Garlic paste/crushed
  • Sauces : Tomato ketchup, Soy sauce/Worcestershire sauce, Green chilly sauce (available in Indian grocery store), Fish sauce (optional, I use it when I want a Thai flavor, but it can be completely omitted) 
  •  Spices : Red chilly powder, White/Black Pepper powder
  •  Lemon juice/Citric acid crystals
  • Salt 
  • Oil ( I used sesame oil)

Method:

  • Lightly crush the noodles if you are like me and V whole like the noodles slightly crushed in dishes. Else don't bother
  • Cook the noodles in boiling water with a teaspoon of oil, as per the instruction on the packet or until it is soft to touch. Strain the noodles and keep them aside

  • Keep a frying pan on medium high heat and add 3 tablespoons of oil. 
  • When the oil is hot, add Green Chilly and Ginger-Garlic Paste and saute for a minute. 
  • Add Onion, and the rest of the vegetables. Add some salt. Increase the heat to high
  • Stir well and stir quiet fast, until the veggies are almost cooked, but still crunchy. 
  •  Add the spices and again stir well to combine.
  •  Reduce the heat to medium. Add the drained noodles, Sauces, and Lemon juice/citric acid crystals in the same order. 
  • Turn up the heat to medium high and stir well, and fast to combine everything for about two minutes. 
  •  Check for salt. 
  • Serve with tomato ketchup/tandoori chicken baked in oven (recipe follows) ;-)
Tandoori Chicken made in oven
We sometimes buy Halal Chicken during our grocery shopping. It has been a while since I posted about any non-vegetarian dish. I thought this was a good opportunity to post about it. Though I didn't have the Tandoori masala, I made my own by combining whatever spices I had in my pantry. We both thoroughly enjoyed the outcome of this dish. Here goes the recipe which I partially referred from here :

Note: It is best if you have enough time (at least 3 hours, to make it easier,you may marinate it overnight if you wish to prepare it ahead of time) to make this because here the marination of chicken is very important to get the full flavor.

Ingredients:


  •  1 whole Chicken cut into small pieces (we had bought Halal chicken which we told the butcher to cut into small pieces). Making big slits in bigger pieces helps set the marinade inside.
  • Baking tray coated with oil (best to use a non-stick baking tray instead of lining the tray with foil as the chicken would stick to the foil and make a mess while trying to turn over
  • Marinade : 
  1. Yoghurt : 1/2 cup
  2. Tandoori Masala powder: 1 tspn each of red chilly powder, cumin powder, coriander powder, garam masala powder, amchoor powder (dry mango powder (optional))
  3. Finely chopped Mint leaves                                      
  • Salt

Method: 
  •  Marinate the Chicken in the above Marinade along with salt for atleast 3 hours or even overnight
  • Preheat  oven to 450 degree F and set your oven to the Bake mode (my toaster oven has a Bake mode, Broil mode, Toast mode, and a Keep warm mode).
  •  Once preheated, transfer the marinated Chicken pieces to the oiled Baking tray and keep it in the oven.
  •  Close the door of the oven and let it initially bake for 15 minutes. 
  • After 15 minutes, turn to the Broil mode and Broil for 10 minutes.
  • After this, take out the baking tray out of the oven, and drain any oil/liquid that oozed out of the Chicken on to the tray. 
  •  Turn over the Chicken pieces to cook the other side
  •  Turn the oven to Bake mode and bake for 10 minutes. 
  • After that, turn oven to broil mode and broil for 5 minutes.
  • By now the Chicken pieces would have changed to a nice tandoori color. To make it further brighten, take the tray out and drain any liquid/oil from the tray and turn over the chicken pieces.
  • Transfer back to the oven and broil for another 5 minutes. 
  • Tandoori Chicken baked/broiled in oven is now ready to be served.

Wednesday, November 18, 2009

Thai Basil Chicken

Hi everyone !!

I am back after quiet a long gap. We went to India for a while and was busy this whole year with our new house. I wasn't attempting any new ventures in my kitchen all this while. But now when the holiday season is coming near, I am slowly getting into the mood :) .

Now before I get into the details of this dish, I want to tell about when I had my first experience with Thai cuisine. When we were on the lookout for houses, we came across an ad on Internet and went to see a place. It was late in the evening, and was dark, and hence we couldn't see the neighbourhood very well, what we did see was this very convenient strip mall right across the neighbourhood, and a Thai restaurant in the same mall !! I had heard that Thai cuisine is similar in taste to Indian cuisine as they use coconut a lot. I wanted to have food there so badly after seeing the restaurant and I told V that I never tasted Thai before. That day, though we were not sure about the neighbourhood or the house we came to see , we both dined at the Thai restaurant and it was like getting a taste of the neighbourhood :) It was the best ! 1 month and few weeks later we signed the papers and moved into the same neighbourhood . Though the restaurant is still there, we don't always go there , as it turns out to be a bit expensive. Its a once in a while treat when friends come home. Whomever we took to the restaurant , enjoyed the food. As for me, I have a special affection for the Thai Basil Chicken Fried Rice. Even before the waiter asks for the spice level, I tell " 5 chillies or more " :) . They make it perfectly with the authentic Thai holy Basil that the owner gets from Quincy, Boston.


So when I saw the recipe posted on Suma's blog, I was thrilled. There is something else too, I got my treats from the Asian Food Grocer Tastemaker program through Foodbuzz. The Asian Food Grocer have a wonderful website with lots of interesting items used in the Asian kitchen. The ease of using it , was one thing which I liked. I had never shopped online, and I should say Asian Food Grocer became my first time and I felt a sense of accomplishment after that :D .

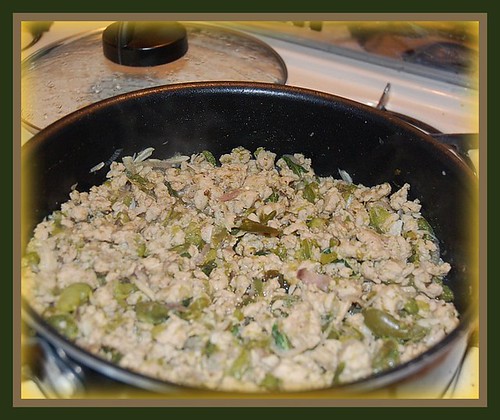
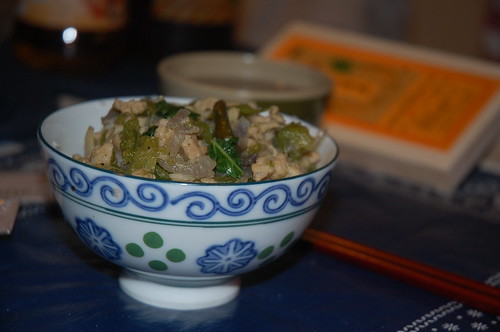
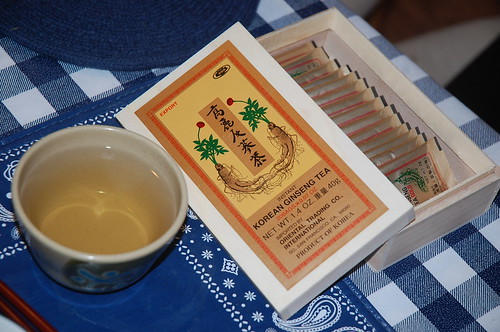
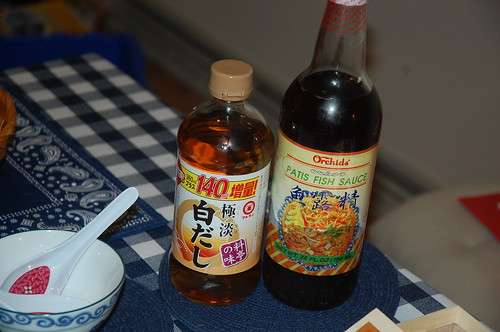
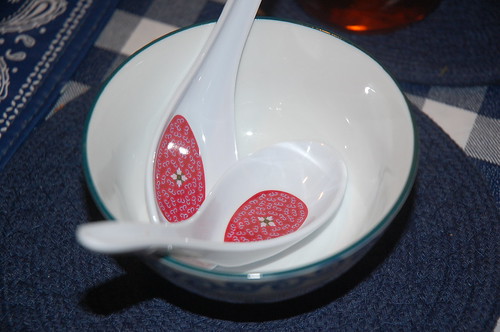
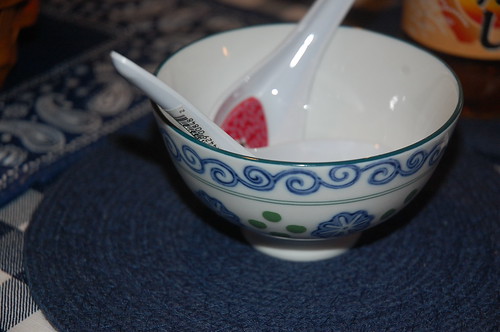
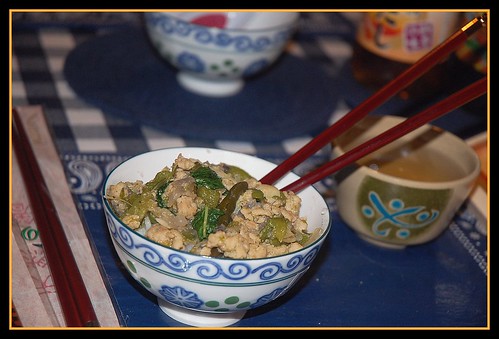
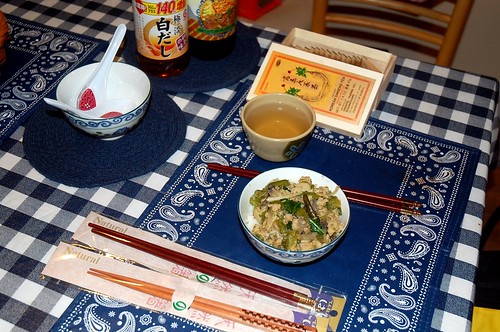
My V is so fond of chopsticks, that when I got the opportunity to use the gift certificate, that's what I ordered (3 pairs), along with other goodies : 2 rice bowls, 1 tea cup, 2 soup spoons, 1 box of Korean ginseng tea, 1 bottle Dashi, 1 bottle fish sauce. I have tried to capture all of them in these pictures.

I love the fish sauce, ask me why? Because it matches with the saying "You don't know what you have been missing until it arrives" and that's what I felt after I used it in Asian stir fries. I am not familiar with Dashi, I ordered it because I saw that its used in authentic soups. And I am a fan of soups. I would be glad to have someone who have used it/or know about Dashi, enlighten me about it.

After I ordered all the stuff, the total came to $31 and I used my debit card to complete the check out. I got an e-mail from them that I would be receiving it in the next 5-6 business days. I eagerly waited for my package to arrive by Fed Ex. The day it arrived, it was V who collected it and surprised me after I woke up from a short nap. The packing was neat. I especially liked the box that contained the Korean Ginseng Tea bags. Perfect for display !

The fish sauce will last a long time for me :) I never thought I would get such a generous amount :) . I recommend this website to all my readers who are interested to try some authentic Asian grocery. I thank Foodbuzz and the Asian Food Grocer for this opportunity to try something new in my kitchen.


So lets come to the dish. As I wrote above, I saw it on Suma's blog. I tried the same way she did, except use grated peel of lemon instead of Kaffir Lime leaves as I didn't have it. Suma, thanks for the wonderful recipe. I am posting it again here for my future reference :)


Ingredients:

  1. 1 lb minced chicken
  2. 4-5 basil leaves , chopped
  3. 10 garlic pods
  4. Kaffir lime leaves/ Grated Lemon peel - 2 leaves or 1/2 teaspoon peel
  5. 1 Onion
  6. 1 teaspoon soy sauce
  7. 2 Tablespoons Fish Sauce
  8. Salt and Pepper to taste
  9. 2 tablespoons oil
  10. 5-6 Slit Green Chillies
  11. 2 Capsicums (Bell Pepper) cut into strip lengthwise


Method:

  1. Heat a pan with oil. Add garlic, onion, Bell Pepper and stir fry for a minute. Add a pinch of salt (not too much as fish sauce and soy sauce will compensate for the saltiness later during the preparation) . The bell pepper should remain crunchy in this dish, so don't cook it all the way through (I have not mastered this art, hence if you are a pro at it, please share that with me too :) .
  2. Add the chicken and green chillies and stir fry until chicken is cooked and turns light brown.
  3. Now add the soy sauce and fish sauce and stir well so that the entire dish is coated with the sauces. Now add some pepper and the chopped basil leaves and stir until leaves are wilted. Turn off the fire and close the dish. Serve hot with rice /noodles/roti.
Verdict : The pungent aroma of basil leaves infused with the fish sauce and the chicken makes one want to savour the dish immediately.


Friday, February 20, 2009

V day with a Chinese touch - Sweet Corn Chicken soup, Chicken Chopsuey


This time for Valentine's day I decided to go Chinese. We have this Chinese restaurant called Eonoodles near our place. Both me and V do take-outs or have lunch occasionally and whenever we go there, we love to have the Chicken Chopsuey dish. The way they make it has never failed to amaze me. I always wanted to ask the restaurant owner about the secret recipe, but never did as I was too embarassed to ask. Have you people asked a restaurant chef for your favorite dish he/she makes?

I then started to analyze the ingredients visually and nasally ;). I found in Internet that the word Chopsuey in Chicken Chopsuey meant the veggies added to the dish along with Chicken. I kept up my determination to recreate it in my kitchen. It didn't satisfy my expectations the first time I made.

I realized it was mainly because of the substitute ingredients I used. In addition to Chicken Chopsuey, I decided to make Sweet Corn Chicken Soup for appetizer and Pumpkin Pie for dessert. Being Valentine's day I decided to use the exact ingredients. I made a quick stop at the nearest Stop n Shop and made the necessary purchases. This is how I made it:


For Sweet Corn Chicken Soup:

Ingredients:
  • Skinless Boneless Chicken breasts sliced and diced into very small cubes : 1 cup
  • Sweet Corn Cream Style: 1 can
  • Corn: 1/2 cup
  • Chicken Broth: 1 can
  • Whole Mushroom stem and top (I purchased the canned version found in the Asian isle): 1/2 can
  • Minced Ginger and Garlic: 2 teaspoons
  • Olive oil: 2 tablespoons
  • Soy Sauce: 2 tablespoons

Method:
  1. In a wide bottom vessel, on medium high heat, add olive oil. When it heats up add the Chicken pieces. Saute it with minced ginger and garlic , 2 tablespoons of Soy Sauce , until chicken is cooked evenly.
  2. Transfer the chicken to a separate plate.
  3. Add Sweet Corn Cream Style Corn and Corn to the same vessel in which the Chicken was sauteed. When the contents are cooked, add the chicken-ginger-garlic to the corn mixture and mix well. Add the Chicken Stock and let the soup come to a boil, and then let it simmer for 10 minutes.
  4. If the soup is too watery to your taste: Mix one tablespoon of cornstarch with 2 tablespoons of water and add to the soup and lower the heat to minimum. Stir until the soup gets the desired thickness.
  5. Add salt and pepper as desired. Serve hot.

*******

For Chicken Chopsuey:

Ingredients:
  • Boneless skinless Chicken breasts cut in thin bite size slices: 1 cup
  • Julienne sliced Onion: 1 small
  • Canned/Fresh Water Chestnuts: 1 can
  • Whole Mushroom with stem and top: 1/2 can
  • Bamboo Shoots: 1/2 can
  • Sliced Carrots: 1/4 cup
  • Bean Sprouts: 1/2 cup
  • Sliced Garlic: 1 clove
  • Chicken Broth: 1 can
  • Salt and Pepper
  • Soy Sauce: 3 tablespoons
  • Olive oil: 2 tablespoons


Method:
  1. Follow the steps from 1 and 2 as in Sweet Corn Chicken Soup, excluding the part of adding Ginger.
  2. Add the veggies onto the same vessel in which the chicken was sauteed. Saute them until the veggies are soft and almost cooked on medium fire.
  3. Add the chicken to the veggies, add the chicken broth and bring the mixture to a rolling boil. Then let it simmer. Thicken the mixture by using cornstarch as I wrote in the Sweet Corn Chicken Soup above.
  4. Add salt and Pepper as desired.
  5. Serve hot with rice or noodles.

For Pumpkin Pie:

I followed the recipe on the back of a Canned Pumpkin puree. I also used a pre-baked Pie crust. The Pie turned out great. Here is Libby's Famous Pumpkin Pie recipe:

Ingredients:
  • 1 can (15 oz.) LIBBY'S 100% pure Pumpkin
  • 1 can (12 fl.oz) CARNATION Evaporated Milk
  • 1 unbaked 9-inch (4-cup volume) deep dish pie shell
  • 3/4 cup sugar
  • 1/2 tsp salt
  • 1 tsp ground cinnamon
  • 1/2 tsp ground ginger
  • 1/4 tsp ground cloves
  • 2 large eggs


How I made:
  1. Mix sugar, salt, cinnamon, ginger, and cloves in small bowl. Beat eggs in large bowl. Stir in pumpkin and sugar-spice mixture. Gradually stir evaporated milk.
  2. Pour into pie shell
  3. Bake in preheated 425 degree F oven for 15 minutes. Reduce temperature to 350 degree F, bake 40-50 minutes or until knife inserted near center comes out clean. Cool on wire rack for 2 hours. Serve immediately or refrigerate.
*******

Sandya of http://www.third--eye.blogspot.com/ has tagged me for "25 random things about you".

The rules: Once you've been tagged, you are supposed to write a note with 25 random things, facts, habits, or goals about you. At the end, choose 25 people to be tagged. You have to link the person who tagged you.
  1. Favorite movies: "Father of the Bride", "The Odd Couple", "Bend it like Beckham", "Big"
  2. Favorite TV channels: Food network, HGTV, DIYnetwork, LMN,CBS,USA
  3. What I do during my free time: Go window shopping, browse diynetwork.com to see interesting projects such as clutter management, storage ideas.
  4. I love spicy hot food, and this has caused me troubles sometimes. I recently swallowed a hot steaming piece of potato while trying to see if its cooked. As a result I have a small lump. I am hoping it would go in another two weeks.
  5. I love gardening, I have just started with container gardening and looking forward to growing a wonderful vegetable garden someday.
  6. I used collect all things that smelled good as a child, such as bathing soap cover, incense stick cover, and store it in a box, so that I could smell them time to time.
  7. Diary writing was an amusing play time for me as I used to quote so many amusing facts and incidents from my personal life. My brother used to have a fun time teasing me when I used to proudly show him my stories. I still write diaries.
  8. I always used to have this thing for collecting names, girl name and boy names. Each year, I updated the list too. I don't know why I did this, but it was fun. Its like a database or something .
  9. Owning an aquarium or a bird as pet is what I am hoping in the future. We both love to have these, hence we always keep visiting Pet stores, just to gaze at the products and accessories available. We will soon own one as we are in the process of a major shifting process.
  10. Favourite kitchen gadgets: Sandwich maker, Mandolin slicer, Preethi Mixie, Microwave,Hand blender, Rose shaped Silicone Baking pan,Salt and Pepper grinder.
  11. My challenge: Control my appetite for unhealthy spicy snacks, Too much worrying
  12. I dream of living in a farm house with a spacious kitchen , with lot of fresh air, and quiet atmosphere, and a market at walking distance.
  13. I would love to travel to Japan, China, and Thailand sometime as I love their cuisines.
  14. I talk loud, especially when I talk on phone or to someone I am close with. I have often found myself getting embarrassed when I talk over the phone in public, its as if I am talking to the entire world, and not just to the person on phone.
  15. Snack I always crave: Vegetable Cutlet
  16. I strongly believe that God does all in his/her power to help us and we should be thankful for even the shortest time of peace, relief , and happiness.
  17. I don't like the smell of butter, ghee, or cheese, yogurt. I eat them when they are not served directly, such as in cakes, or sweets, shakes. I don't like the tangy flavour in food either.
  18. I was born left-handed,its strange that my mother and my late father were not lefties. My dad didn't want me to be different , hence changed me to do some things with right. He did it so well without any scolding that I never remember regretting it or complaining about it. Hence I only write, eat, and, brush my teeth with my right hand. And rest of the things with my left hand. I wonder how my kids would be, but one thing for sure is I would not change them as I realize there are some serious risks involved which my dad didn't know about. And moreover its cool to be a leftie too :)
cant think of anymore...
    Ok, now I would like to tag these people for the "25 random things about you":

    Ranji of Ranji's Kitchen Corner
    Cham of Spice Club
    Sudha of Bombay Bistro
    Teena of Kaipunyam.com
    Easycrafts
    Varsha of Will-O'- the Wisp
    Seena of Simple and Delicious
    Divya of Easy Cooking
    Priya
    Ashwini
    Yasmeen

    Thursday, November 27, 2008

    RM2- Day 27- Thanksgiving Roasted Chicken


    Happy Thanksgiving to all my dear Readers and Friends ! On this occassion I would like to thank each and everyone of my readers who kept up my spirits with their inspirational comments. I would also take this opportunity to thank my Family, especially my husband Vijay who has been a constant source of encouragement. My late father and God for everything.
    This is mine and V's first time trying to roast a whole chicken. I was actually inspired by Ina Garten who demonstrated how to roast a whole chicken. Her show has always fascinated me. We decided to choose chicken as it was just the two of us at home and Turkey would have been too much on the table :) And this being our first time celebrating Thanksgiving, we decided to keep it simple :) .
    Roasting a whole chicken was not as difficult as I imagined. We had purchased 2 whole chickens from BJ's. Today morning, V kept it in the refrigerator for thawing. I was in full enthusiasm in the morning to start the Thanksgiving cooking:) . After a cup of refreshing coffee made by V, I entered my Kitchen :) .
    The chicken was taking a long time to thaw, hence I put the plastic covered chicken in a vessel with warm water. After it was completly thawed, I removed it from the cover and washed it in cold water. I cleaned it completly and wiped it dry. Then I generously marinated it outside and inside with salt , pepper and any other spices I could find in the kitchen. I cut the butter in small cubes (around 2 tablespoons) and put it inside the chicken. Then I rubbed the chicken with olive oil outside and inside. Its important to generously season and grease inside and outside the chicken if you need a good flavor.
    I cut small slits in some parts of the chicken. Then I also seasoned it with the Tandoori paste. I stuffed a variety of vegetables (shallots, green chilli, lemon juice (or cut lemon), mushroom, coriander leaves, curry leaves, sliced onion) inside the chicken. Tied the legs of the chicken as shown in the picture with a thin piece of cloth (usually a twine is used for this purpose, but we didnt have any, hence it was V's idea :) and it worked very well).
    Placed the chicken, breast side up, inside the oven , 375 degrees F. Roasted it for 1 hour, 10 minutes. To check the chicken for doneness, cut the hardest muscle part of the chicken (mainly around the thighs). If the juices flow clear, it means the chicken is ready.
    For extra safety, I decided to broil the chicken for 10 minutes. For that, I removed the cloth tying the legs, and kept it in the oven, which I turned to broil setting.

    The color of the chicken was too good. Me and V were so excited. V carved the chicken after it was done. I had made Egg Biriyani and we had a nice heavy lunch :) I must say it was quiet tiring, but, its a nice way to celebrate the essence of Thanksgiving:) I look forward to doing it every year :)

    RM2-Day 27- I cant wait to see what my fellow marathoners have made :


    1) Siri, 2) Srivalli, 3) Ranji, 4)PJ, 5) Curry Leaf, 6) Medha,
    7) Priya, 8) Bhawna, 9) Raaji, 10) Ruchii, 11) Anu, 12) Kamala,
    13)DK, 14) Divya Kudua, 15) Rekha, 16) Divya M, 17)Lakshmi,
    18)Raaga , 19) Lakshmi Venkatesh , 20) Sripriya, 21) Viji,
    22) Kamalika, 23)Pavani,>,24)Karuna,25)Roochi

    Tuesday, November 4, 2008

    RM2- Day 4- Chicken Drummettes Lollipop

    When you say the name of this dish aloud, it sounded to me like those toys of little soldiers with drums and sticks singing their song:) ..........maybe its because of the word Drummettes and Lollipop :) .... Drummettes are the mini drumsticks you get from the wing part of the chicken.

    This is my Day 4 entry for Recipe Marathon 2. I made these for a potluck recently and the plate on which it was served was emptied within an hour of serving it !
    This was also the first time I used the broil setting in my gas oven. I have to say, its only when you try something new , will you know what you were missing all this time. And that was what I realised when I used the broil setting. Not much mess to clean, less oil used , so healthier than the deep fried version, and food gets cooked fast, and the most important, I loved the look of the Chicken drummettes after they were fully done. Especially the well done look when you do it on charcoal , the ones you get when you order tandoori chicken in restaurants. I was proud to accomplish that in my kitchen and should I say how much glad V was , when he was the first one to taste (as always, lol) my new ventures in kitchen :)

    This is how I made Chicken Drummettes Lollipop:

    Ingredients:

    Chicken Drummettes (I did not get drummettes in a package, so I bought the entire packet of chicken wings and cut the drummettes from the wings) - 10 drummettes

    Aluminium foil : To use as a baking foil on top of the grill plate. I cut small portions of these foil after I broiled the chicken on them to cover the exposed bone area of the chicken drummettes to give a nice finish to the chicken drummettes :) Its worth the effort to do that if you want to impress other people :) Also less mess on hands while eating these lollipops :)

    Marinade :

    3 whole tablespoons yogurt
    Grind to a paste- a few bunches of coriander leaves, mint leaves, ginger, garlic, green chillies
    Onion powder - 1 tablespoon
    Garlic powder - 1 teaspoon
    Tandoori masala paste - 2 teaspoons
    Red chilli powder - 1 teaspoon (or more if you want them extra spicy)
    Oil - 2 tablespoons
    Salt - to taste
    Freshly ground pepper - 1 teaspoon
    Fennel powder - 1 teaspoon

    The above picture is the left over wing portion that I marinated along with the drummettes. It was a good difference from the regular Buffalo wing flavor this time.

    Method:

    a)Preparing the drummettes for lollipop:

    Hold the small end of the drummette, and then cut a small incision and insert knife in that incision to further widen the cut and pull the meat away from the bone a bit, also , scrape and push meat down along the bone towards the thick end. Pull skin and meat over the end of the bone to look like a lollipop. Or in other words, cut, pull, scrape the meat from the thinner part of the drummet towards the chunky part until the bone area around the thinner area is exposed so that the drummette resembles a lollipop. When all the drummettes are prepared this way, they look like lollipops :)

    b) Marinate the drummettes in a mixture of the marinade, overnight in the refrigerator.

    c) Take the drummettes out of the refrigerator at least 1/2 hour before broiling. Line the broiling tray with aluminium foil. Spray some oil on the sheet to prevent sticking of food at the end. Set the oven to broil mode or according to the instruction on your oven manual.

    d) Arrange the drummettes on the aluminium foil, a little space between each drummette. Spray a little oil on each drummette before they go into the oven. Broil them on one side until they change color to the well formed black areas on the surface, be sure not to burn them altogether. Turn them over and again broil them until all sides cook evenly. For me it took approximately 30 minutes to finish cooking the drummettes in two batches (I had also marinated the left over wing portion of the drummettes along with the lollipops).

    c) Preparing the lollipop : (The aluminium foil can be changed while broiling in batches if they are too messy.) But don't yet discard the not-so-messy parts of the aluminium foil used for broiling. Cut them in small squares and wrap them around the stick part of the lollipop as I have done in the pictures here.

    d) If you are preparing it ahead of time like I did, store it preferably in a aluminium tray (the ones you get for cheap in market), cover with aluminium, prick some holes with a knife and keep it in warm oven. Before serving, remove the aluminum cover and broil the chicken until you hear the sizzling sounds coming from the oven. Maybe it will take around 5-10 minutes. Sprinkle some lemon juice and serve :)


    I hope you will also enjoy this when you prepare.

    Don't forget to check out what my Marathon buddies are up to in their kitchen on Day 4 of Recipe Marathon :-)

    1) DK

    2) Siri

    3) Srivalli

    5)PJ

    6)Curry Leaf

    7)Medha

    8)Priya

    9)Bhawna

    10)Raaji

    11)Ruchii

    12)Anu

    13)Kamala

    14)Ranji

    15)Divya Kudua

    16)Rekha

    17)Divya M

    18)Lakshmi

    19)Raaga

    20)Lakshmi Venkatesh

    Monday, November 3, 2008

    RM2- Day 3-Kadai Chilli Chicken with deglazed gravy

    You must have guessed by now that Chilli chicken is my favourite among chicken dishes. Yes I admit it:) this is the third time I am posting about it:) ...But this time I am using some different spices and adding a different method of cooking towards the end. This is my third dish for RM 2

    We had purchased a Calphalon Infused Anodised skillet and its become one of my favourite kitchen utensils. initially I was not aware how to use it the proper way. I was so fed up with food sticking to the skillet and potatoes not getting cooked in dry curries and stuff. To add to it, we could not even return it back to the Calphalon store from where we purchased. That irked me and V so much that we promised we would never buy from the factory outlet store of Calphalon. To conclude, we spend a fortune and were stuck with it. What really surprised us was there was not even one bad review about this product anywhere on Internet. It was considered a premium brand. So that got us thinking and I started experimenting cooking in the skillet. Slowly I learned the way to get food cooked in the skillet. I have to say I learned the hard way as I was not familiar with the term deglazing until I started cooking with this skillet. In few words, Deglazing according to Wikipedia, allows the cook to scrape the dark spots from the bottom of the pan, and dissolve them creating a rich sauce.


    Kadai Chilli Chicken is something that came out very tasty when cooked in this skillet. In fact I did a bit of deglazing towards the end to avoid wastage of spicy and tasty gravy :) Here is how I made it:

    Ingredients

    Chicken (I used thigh pieces) - 3 chicken thighs cut in bite size cubes
    Onion - 1 onion cut in small cubes
    Whole peeled tomatoes - 1
    Garlic cloves - 3 big cloves cut in thin slices
    Green chilli - 3 to 4 slit in the middle
    Asafoetida- a pinch
    Oil - 4 tablespoons for sauteing

    Marinade:

    1 tablespoon lemon juice
    2 tablespoons Tandoori masala (I used the paste)
    1 tablespoon freshly ground pepper
    Garlic powder- 1 teaspoon
    Onion powder - 1 tablespoon
    1/2 teaspoon turmeric powder
    Salt
    Oil- 2 tablespoons

    Garnish:
    Few coriander leaves
    Few pudina leaves chopped finely
    1 teaspoon fennel powder
    1/2 teaspoon Garam masala powder

    Method:

    Wash and prepare the chicken thighs using the marinade ingredients. Marinate the chicken for at least an hour in refrigerator.

    In a preheated skillet, on medium flame, add oil. Once the oil is preheated, add asafoetida and immediately add the green chillies and garlic. Saute for 5 seconds and add the chicken pieces and onion.

    Saute for 10 seconds to mix everything. Then cover the skillet and let it cook at medium heat for 2 minutes. Reduce the fire to medium-low, stir well. Increase flame to medium and cover again and let it cook for 2-3 minutes until the water content in the skillet reduces allowing the chicken to turn brown. The chicken would have started to turn brown now. The onions we added initially along with the chicken would have cooked well and that's how I make it with chilli chicken. Add the tomatoes now, Mix well, reduce flame to medium-low. Cover and let it cook for another 2 minutes. Uncover, add the chopped coriander, pudina leaves. Stir lightly. Then sprinkle and fennel powder and garam masala powder. Cover the skillet and turn heat to low. Allow the flavor of the garnish to spread inside the dish and then turn off the flame and keep it covered for 2 minutes.

    How I deglazed the chilli chicken:

    After I transferred the chicken to a serving plate, I switched on the flame under the skillet at medium-low and added less than 1/4 cup of water and increased flame to high and when the water started boiling, I started scraping the remains of the chilli chicken from the bottom and sides of the skillet, after I scraped it clean, I added a a pinch of cornstarch and a pinch of salt and switched off the flame and allowed the deglazed gravy to thicken. Then I added it to the chicken on the serving plate.


    I had this with Kanji and pickle. I loved every bit of it, so did V who took it for lunch that day. I hope you too would like it.

    Day 3 Recipe Marathon dishes of my buddies:

    1) DK

    2) Siri

    3) Srivalli

    5)PJ

    6)Curry Leaf

    7)Medha

    8)Priya

    9)Bhawna

    10)Raaji

    11)Ruchii

    12)Anu

    13)Kamala

    14)Ranji

    15)Divya Kudua

    16)Rekha

    17)Divya M

    18)Lakshmi

    19)Raaga

    20)Lakshmi Venkatesh

    Sunday, November 2, 2008

    RM2- Chicken Puffs

    This will be second dish for Recipe Marathon. Its very handy when you have some store bought Puff Pastry. You can prepare a variety of dishes with it. I always loved the Egg Puffs, Veg Puffs, and Chicken Puffs which were sold in a bakery near our school in Elamakkara, Kerala. After a tiring day at school, sometimes I used to purposely skip the school bus so that I could stop over at this bakery and have these crunchy, munchy snacks along with cool Lemon juice,mmm...those were the days I miss now. I should say I miss my school days more than college days , maybe because school was closer to my home and after a tiring day, it was good to have good home-made food from my mother's kitchen than from the college hostel canteen.

    I was glad after I made the chicken puffs as they tasted too good and I could relish it and make it anytime I wanted to as its really simple to make. The only work needed is to make the filling in advance. I precooked the chicken in advance, but that's optional, as you can shred it and cook it later too.


    Here is how I made it:

    Ingredients:

    Shredded cooked (skinless,boneless) chicken thighs - 3 chicken thighs
    Coriander (cilantro) leaves- a small bunch
    Onion chopped finely- 1 small onion
    Ginger-garlic paste- 1 teaspoon
    Tomato paste - 1 teaspoon
    Asafoetida - 1/4 teaspoon
    Garam masala- 1 teaspoon
    Green chilli thinly sliced- 4 nos
    Oil- 1 tablespoon
    Salt - as per taste

    For making Puffs:
    Frozen Puff pastry sheet (I used Pepperidge Farm brand)


    Method:

    To make the filling:

    Keep a wok on the fire and add 1 tablespoon oil. When the oil is hot, add Asafoetida and green chillies and saute for 10-15 seconds. Then add onion, ginger garlic paste and chicken and saute until chicken pieces start browning, turn fire to medium and add garam masala and tomato paste and cook for another 5 minutes. Meanwhile allow the puff Pastry sheets to thaw according to Package instructions. Check for salt and let it cook another 2 minutes and then remove from fire.

    To make puffs:

    This you may cut it according to your choice. I cut it square shape and then tried my best to make all the puffs look the same shape, though I know they don't look much. Bake according to instructions on Package. It took around 17 minutes to make these puffs in the oven. They came out flaky and tasty :)


    My other marathon buddies have been cooking up a feast, check their blogs:

    1) DK

    2) Siri

    3) Srivalli

    4) Ranji

    5) PJ

    6) Curry Leaf

    7) Medha

    8) Priya

    9) Bhawna

    10) Raaji

    11) Ruchii

    12) Arundathi

    13) Kamala

    14) Divya Kudua

    15) Rekha

    16) Divya M

    17) Lakshmi

    Thursday, May 1, 2008

    Chilli Chicken - Dry version, Gravy version

    Its been quiet a long time since I posted any non-vegetarian recipes. I decided to experiment with making Chilli Chicken, the Indian restaurant style, in my style in my kitchen :) .

    Though the dry version of Chilli Chicken didnt get that restaurant flavor, I learned a new way to prepare chilli chicken. You can see my other versions of Chilli Chicken here. I am sending this Monthly Mingle- Bollywood Cooking hosted by Meeta of "Whats for Lunch Honey"


    Ingredients:
    --------------

    Perdue Chicken thighs (the ones you get in individual mini packets) : 1 packet (it contains about 2 thighs)

    Marinade:

    Salt: 4 teaspoons
    Soy sauce: 3 tablespoons
    Vinegar: 3 tablespoons
    Paprika (the not so spicy chilli powder you get in American grocery stores, it gives a fiery red color, but at the same time doesn't make you feel like grabbing the fire extinguisher to your mouth :D ) [(You can substitute it with the usual Indian Chilli powder if you want some fire in your mouth :) ] : 2 tablespoons
    Bread crumbs: 2 tablespoons


    For the gravy:

    -Onion: 1 big
    - Capsicum: 1 big: Cut into thin stripes. I used this only for the dry version of Chilli Chicken.
    -Tomato puree: 3-4 tablespoons (this too helps to add that fiery red color)
    -Green chillies: 6-7 green chillies (you can vary the number according to your needs. I added more of this as this was the only source of the spicy taste when I made as I had used the harmless red paprika :))
    -Ginger sliced and cut into very small pieces: 2 tablespoons
    -Garlic chopped to very tiny pieces: 3 tablespoons
    -Coriander powder: 1 teaspoon
    -Turmeric powder: a pinch (avoid if you don't like the color)
    - Oil: 1/4 cup

    The next ingredient below added the most fierce to the "Chilly" part in the Chilli Chicken :) Its called "Kandyacha Masala" which is a spicy dry chutney made of Onion, Garlic and other ingredients. As Trupti is written in her blog, its used as a spice powder in various curries. It can also be had (by mixing it with little oil) along with Roti, Dosa. You may add it if you want that "Hot" flavor :) I enjoyed it ! I got this powder as a part of "Aruvusai Friendship Chain" from dear blogger friend "Trupti of Recipe Center". She also send me Maharashtrian Garam Masala. Thank you so much Trupti !

    -Kandyacha Masala (Maharashtrian Onion-Garlic dry chutney powder) [For the complete recipe details please refer to Trupti's blog : Recipe Center] : 1/2 teaspoon (or as per taste)

    How I made :

    Cut chicken to bite size pieces. Then marinate it in the marinade. Let it marinate for at least 15-20 minutes, while you prepare the rest of the ingredients for the dry gravy.

    For Chilli Chicken (Dry) (as in the above picture):

    In a deep pan, heat 1/4 cup oil to high, then lower it to medium. Add Ginger, Garlic, Green Chillis and saute for 30 seconds. Add the Chicken pieces and saute it until it is half cooked. Add Onion and saute until it is quiet soft (1-2 minutes). Then add 1 teaspoon Coriander powder and saute it well with the rest of the ingredients. Add Capscicum. Stir well to combine. Add a pinch of turmeric powder and stir well. Then add the Maharashtrian Garam Masala and the Kandyacha Masala, stir well. Add the Tomato puree and reduce fire to Medium-Low. Stir well until all the ingredients starts to cook. Make sure the Capsicum is fully cooked. Switch off the fire. Serve hot just like that or as a side dish along with Roti, Chapathi, Rice,Idiyappam. Refrigerate the left over and finish it by next day by heating it before using it.


    For Chilli Chicken (Gravy):

    In a deep pan, heat 1/4 cup oil to high, then lower it to medium. Add Ginger, Garlic, Green Chillies and saute for 30 seconds. Add the Chicken pieces and saute it until it is half cooked. Add Onion and saute until it is quiet soft (1-2 minutes). Then add 1 teaspoon Coriander powder and saute it well with the rest of the ingredients. Add a pinch of turmeric powder and stir well. Then add the Maharashtrian Garam Masala and the Kandyacha Masala, stir well. Add the Tomato puree and reduce fire to Medium-Low. Stir well until all the ingredients starts to cook. Then add 1 - 1.5 cups water, change the fire to high, and stir until the pan ingredients starts to thicken, then lower fire to Medium-Low, simmer for 1 minute.


    The result is a thick rich gravy with Chicken.
    Serve hot along with Rice, Roti,Idiyappam, Chapathi. Refrigerate the left over and use it by next day by heating it before using it. I had it alongside Idiyappam which is a rocking combination! I have posted the Idiyappam recipe here.

    Tuesday, February 26, 2008

    Homemade KFC (Kentucky Fried Chicken)


    Well, here is something I relish when we have friends come over to our place. Its super easy, and the taste just keeps your hands hooked to the plate it is served on :D ...

    Though I could not post this during the Superbowl season, I would definitly want to share it with you so that you can get ready to prepare it to cheer up the Red Sox :) (Yes I am from Boston, hence I am for the Red Sox :)


    V was very happy and loved it lots. So I am looking forward to fry this soon another time as now we are on a vegetarian diet as of now (lets see till when it will last :D ) .

    I learned quiet a lot of tips from the Food Network guys. Some of them I have incorporated in this recipe, such as the method of coating the chicken with the bread crumbs, flour and a very nice way to drop the chicken in the oil without having the chicken stick to the bottom of the vessel initially when it is dropped. Here is the recipe:

    Ingredients:

    Chicken breast (or thighs) (skinless and boneless) cut into bite size pieces : As per your requirement

    Marinade:
    Chilli powder
    Coriander powder
    Garam masala powder
    Freshly cracked pepper (Try not to substitute this with the store bought powdered pepper, it just takes away a lot of taste)
    Ginger-garlic paste
    Lemon juice (or extract) : a little to coat all pieces

    Coating:

    Wet coating: Egg wash or a loose paste formed with all purpose flour and water

    Dry coating: 1 cup bread crumbs + 1/2 cup all purpose flour + (optional)2 tablespoons freshly cracked pepper
    Method:

    Clean the chicken pieces. Marinate the chicken for an hour. Prepare the dry coating by all the dry ingredients and transferring them into a Ziploc bag. I got this tip and many others from watching the Food Network people. The Ziploc bag is a good idea to store a lot of things which gets perished if not stored properly.

    Take each chicken piece and cover it with wet coating and then and drop it in the Ziploc bag. After you put two or three pieces, zip the bag and shake it to coat the pieces. Then unzip the bag and transfer the rest of the chicken into the bag.
    If you have too many chicken pieces, prepare the dry ingredients in the second zip lock bag and add the rest of the chicken pieces into the second bag.

    Properly zip the bag start shaking it to coat all the chicken pieces, (believe me you don't need a bag full of dry coating to coat many chicken pieces because when you zip the bag and start shaking it hard (you can even shake it upside down without fearing any mess in the kitchen. Just make sure that the Ziploc bag is properly zipped). I guess you can do this even in a air tight container. I haven't tried it though. Store the Ziploc bag in the refrigerator to marinate the chicken pieces overnight with a good dry coating.


    The next day, you find that the chicken pieces have got a really good coating. Don't try to shake off the excess bread crumb coating , off the chicken pieces too much. Remember that it was stored in the refrigerator to get a nice thick coating. Heat oil for frying in a deep frying pan. Now the next step is yet another tip I got, and that is when the oil is heated, hold the chicken piece to be fried with a fork, slowly dip the chicken piece into the hot oil, when the chicken is half way into the oil, with a knife slowly pull off the chicken from the fork to drop it in the oil. This sounds too many steps to just fry a chicken :) but believe me it makes things easier to clean and take care of later.


    Fry the chicken evenly. It might take approximately 5 to 10 minutes minutes to fry a piece if you have not put too many chicken pieces in the oil at once. Also, smaller pieces tend to fry faster than bigger ones.


    Once chicken is fried, drain them on paper towels or cotton cloth. Serve it with onion and tomato sauce. Tadaa ..you are ready for that fun evening with friends coming over or just enjoy it on your own :)

    Thursday, January 24, 2008

    Garlic Chicken


    Hi I am posting this after a long time. I was very busy renovating our apartment to make it look good:) . This easy dish can be prepared fast.

    Ingredients:

    Shredded chicken (breast or highs or fillets) : 2 cups
    Crushed Garlic : 1 whole Garlic
    Minced green chili: I use a lot, you can use according to your taste
    Salt: according to paste
    For garnish: Coriander leaves,Whole peppercorns crushed: 1 teaspoon, Spring onion sliced in thin circles
    Spice Powders: Curry powder (you get in your local Indian store or some American stores (in the asian section) . You can even use Sambhar powder :) (try it, its quiet different)
    Onion cut in thin slices : 1 whole
    Tomato: 1 medium size
    Oil :

    Method:

    Add oil to a pan, and when its heated, add onion, half of crushed garlic and stir well, then add the minced green chilli and stir well again. Then add tomato and stir on medium-high heat until a paste of all the ingredients is formed, then add the shredded chicken and combine well, add all the spice powders, salt and pepper and stir well at low-medium heat. Cover the vessel and let the chicken cook . Then at the end when the chicken is cooked, add crushed pepper, and coriander leaves.

    Please do not copy

    All contents in this blog cannot be copied without written permission from the blog author.

    LinkWithin

    Related Posts with Thumbnails
    baby