Showing posts with label Low-calorie. Show all posts

Friday, May 14, 2010

Oven baked Idli fry and Moru Kachiyathu (Curry made with well beaten yoghurt (curd))


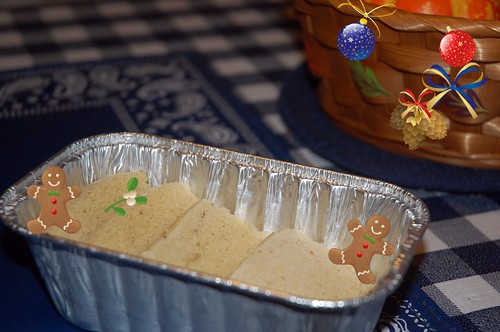
Recently I had some left over Idlis that had become hard as stone after a day in the fridge :D .... What I often do is I roast them on the stove by applying few strokes of oil using a brush (I found this method of using a brush to apply oil better than spoon). This time I wanted to use these idlis in a different way. Hence I thought of baking these Idlis in a way similar to making Oven Baked French fries. The result surprised me as the look made it hard to differentiate it from French fries , and the texture was crisp and maybe even better than oven baked potato fries! If you add some seasonings before baking these, the bland taste of idli will be improved :) Here is how I made it:

Ingredients:

Left over Idli (cut into long pieces like in French fries)
Oil (you may use spray can oil , so that less oil is used )
Seasonings and salt to taste


Method:
  1.   Preheat oven to 400 deg F.
  2.   Spray the Idlis with the oil and combine the Idlis with seasoning and salt
  3.   Arrange these on a oven proof tray laid with Aluminium foil
  4.   Bake in the preheated oven upto 30 minutes (depends on the oven) while turning the tray during half time
  5. Serve along with ketchup or as is :) Done !


Moru Kachiyathu
-------------------------------

Unlike my V, I was never a fan of curd when it come to having it as is along with rice. But Moru Kachiyathu always tempted me to try curd. So when I felt like having it one of these days, I searched the Internet and found this simple recipe b Annita of My Treasures and My Pleasures who made it even more tempting by saying that this goes well with not just rice but various other dishes that accompany rice.


The only change I made to her recipe was the tampering ingredients where I added Okra (Ladies Finger, Bhindi) along with the tampering in the hot oil and fried until everything turned brown  (tip from fil ;-)

Wednesday, December 16, 2009

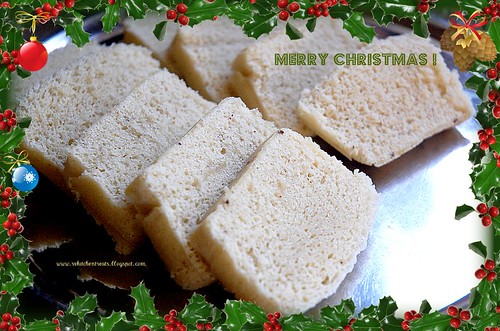
Steamed Vanilla cake


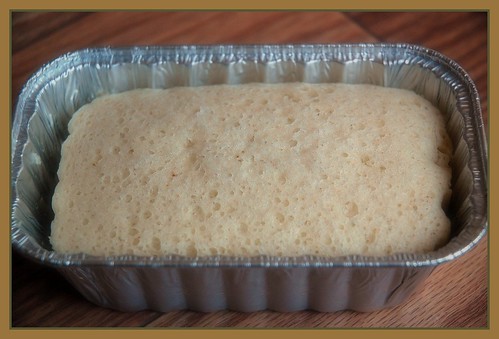
I was/is on a mission searching for alternate ways to satisfy my craving for baking something as my oven gave up. I searched a lot for alternative ways to bake a cake without using the oven. I got a lot of microwave based recipes, but I read that most of the cakes baked in microwave use cocoa/chocolate chip a lot and V doesn't like chocolate cake so much, in fact he would take just a bite so that I don't feel bad after I all the effort I put into making one :D ...the rest of the recipes that doesn't use cocoa/chocolate were the ones which wasnt rated or reviewed , and i didn't want to ruin my day with such a recipe as this would be the first time I would be baking something without an oven. I then came upon this recipe on allrecipes.com about a steamed Chinese cake. It had good ratings and I followed some advice from some reviewers about substitutions. I 'baked' (steamed) this cake in a vegetable steamer, and the outcome was surprisingly the softest sponge cake I ever had :) It was moist, sweet, and held its shape well. I initially thought that a steamed cake would be like a dumpling or something, but this turned out to surprise me a lot. When I felt the cake first with the knife, I thought the texture resembled the outcome of Idli ;) , but when the cake was cool, it hardened a bit more on the base and formed some crumbs too. I was more than satisfied with the outcome, and hence have bookmarked it. Here is the recipe I found with my substitutions:


Ingredients:

4 eggs
1 cups white sugar
3 tablespoons orange juice
1 1/2 cups cake flour
1/2 teaspoon baking powder
2 tsp vanilla extract and 1/2 tsp almond extract
1/4 cup confectioners' sugar for dusting


Method:

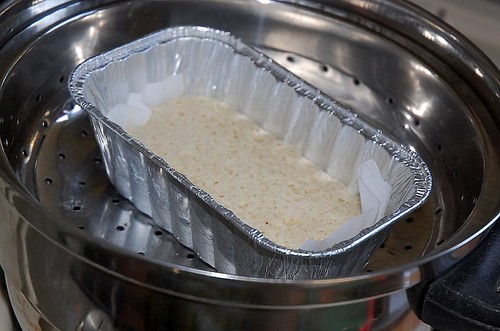
Keep a vegetable steamer or Bamboo steamer over simmering
water. Make sure it is large enough to hold the baking pan. I used a loaf pan. But the recipe calls for a 9 inch square pan. Line it with wax paper.


Separate the eggs. Beat the yolks along with the juice and sugar with an electric mixer on medium speed until the mixture has increased about three times in volume. Sift together the flour and the baking powder. Sift it again over the egg mixture, and fold in gently. Blend in the vanilla and almond extracts.


Whip the egg whites in a clean bowl to stiff, not dry, peaks. Fold into yolk
mixture. Pour the batter into the prepared pan, and smooth out the edges. Tap the
pan gently on the counter to get rid of large air bubbles.


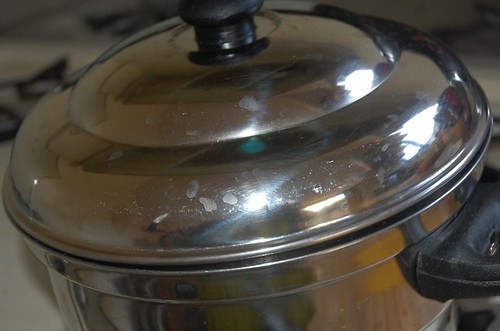
Place the pan into the steamer. Cover the top of the steamer with a kitchen
towel/parchment paper (parchment paper causes bubbles as I experienced it in my attempt), and place the lid on top; the towel will absorb any steam that collects
on top from dripping onto the cake.


Steam for about 20 minutes, or until a
toothpick inserted into the centre comes out clean. Cool on a wire rack. Dust
with confectioner's sugar. Tada...your steamed cake is ready !

Monday, March 9, 2009

Low calorie Banana (Plantain) Chips and Potato Chips (can be Oil-free , Salt free ) using Microwave

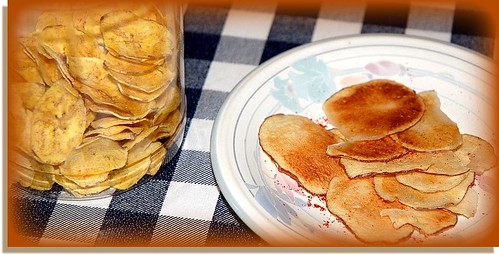
I love my Microwave (not exactly mine, but our apartment's) ! and the person who invented it too ! That's what I can say after I made these easy, low-calorie munchies last week. I was surprised to find that the crispiness was no different than when fried in oil. You can even use a low calorie oil spray and a wee bit of salt to enhance the flavor. After making these I swore, I would never deep fry Banana or Potato Chips in oil in my kitchen. Let me share my excitement with you now:


Here is how I made it: Its easy, breezy tasty :)

Gadgets needed:

  • A microwave
  • A mandolin slicer (in India its called 'Chips maker' in some places, popular brands include 'Anjaly'). You can get a Mandolin slicer in US too, I got these from a Calphalone store, but we just bought it as a side purchase after buying a gorgeous Calphalone Infused Anodised Stir Fry Pan. The Mandolin cost just $10, but its worth buying as its a great addition to your kitchen gadgets. This one even had a handle to hold the food while slicing, thus giving extra safety.

If you don't have a 'Chips maker' , no worries, you have your knife to your aid. Cut slices as thinly as possible , make sure they are of equal length as it helps providing uniform heat in the microwave while 'they turn to' Chips ;)


Plantain chips


Seasoning:

Oil just a pinch or can be totally avoided
Salt, a very tiny pinch, or can be totally avoided.
Chilly powder, Asafoetida - a pinch

Note: I have used very little seasoning, as while using Microwave , you should be very careful while seasoning, if you are doing it before Microwaving it, as a pinch of seasoning has very very potent flavor while cooking in Microwave. Its best to add these after the Chips are done and when they are just out of the Microwave.

Vegetables that can be used : Potatoes (Preferably Potatoes good for frying purpose, else they may lose color and turn brown, but taste is intact though), Raw Banana (Plantain), Taro, Bitter gourd.

Potato Chips (don't mind the color as I used a Red Potato variety which I didn't find quiet good for frying because of the color they turn into, but taste was equally good)


Method:

Slice the vegetable into very thin uniform slices. Spread the slices on a Microwave safe flat bottom vessel, (I used my Silicon Baking Pan which is also Microwave safe). Arrange in such a way that no two slices overlap each other . A little overlapping here and there is alright if space is a constraint.

Microwave under high power for 4 minutes if you have filled the plate with the slices in every nook and corner , or 2-3 minutes if less slices are used. Keep checking in between. This can give you an approximate time for cooking these.
Tadaa ! Your chips are ready to savor !

This way of making chips has more of advantages than disadvantages I feel:

Advantages:

  • Control over the amount of oil, salt, or other seasoning
  • Less power , as I read somewhere that Microwave consumes less energy than other electric appliance.
  • Less fume and hence less cooling of the kitchen needed when compared to deep frying on a cooking range.
  • Less cleanup, and nil wastage of oil
  • No guilt feeling of storing the same oil for frying the next time, as no oil / very negligible amount of oil was used in microwave
The only thing I noticed was, if you have a small microwave/ small microwave vessel, then you can 'fry' only so much chips at a time. But then I don't think it matters so much.

Hope you all will like these.

I am sending these and one of my previous entries (look below this sentence) to (Microwave Easy Cooking)MEC-Savoury Snacks (started by Srivally of Cooking for all seasons) and hosted this time at Priya's Easy and Tasty Recipes.

My previous entry participating in this event are:

Bittergourd Fritters

I am planning to post a Cake recipe next time, so wait and watch dear readers :) Till then, wave a 'bye bye' to the Winter (today it snowed here in Framingham, I think this might be the last snow of this winter) and welcome crisp Spring !

Love
RV

Please do not copy

All contents in this blog cannot be copied without written permission from the blog author.

LinkWithin

Related Posts with Thumbnails
baby