Showing posts with label Kerala Recipes. Show all posts

Monday, December 3, 2012

Carrot thoran (Carrottache sukke)


Hello reader :-)

How are you doing? :-) ....here I am trying to incorporate as much veggies into our diet for the sake of our toddler :-) , who by the way is not that picky, but it's just certain days every month he goes on a food strike against almost everything ! :-) ....until he feels a real hunger pang and then nothing can stop him from eating :-D

Anyways, this dish Carrot thoran (aka `Carrot sukke` in Konkani ) is a favorite of everyone :-) , and since "somebody" in our house really loves carrot juice :-) , I decided to experiment with doing something different with carrots. Here is the recipe :

Carrots chopped finely (I used my food processor) : 2 cups
Garlic crushed lightly and minced : 5 cloves
Grated coconut : 3/4 cup
Cumin : 1 tablespoon
Chilli powder : 1/2 teaspoon
Hing (asafoetida) : 1/4 teaspoon
Turmeric powder : 1/4 teaspoon
Salt
Coconut oil : 2 tablespoons
Mustard seeds: 1 teaspoon
Curry leaves : 4, 5
Urad dal : 1 teaspoon

How it's done :
Mix everything except oil, mustard seeds, urad dal, and curry leaves until
everything is mixed and coated well. Make sure to mix everything as if you are kneading a dough, but not too much, just enough to get everything a bit softer, maybe "knead" for a minute :-) . This is my mother`s tip. She tells that this way is to get the coconut all mellow, so that it releases it's flavors when cooked. Now add salt and mix it well again. Hear the oil in a pan, add the mustard seeds followed by urad dal , hing, and curry leaves. Add the carrot coconut mix, stir well, reduce flame, and keep it covered to cook, until carrot softens. Switch off flame. Serve as a accompaniment with steaming hot rice, and dal :-)

Happy holidays
Roopa

Friday, September 3, 2010

Moong Dal Payasam (Moong dal pudding)


                                                         (pic courtesy: Sri Krishna )
Happy Krishna Janmashtami to all my readers :) So how did you celebrate darling Sri Krishna's Birthday ?
Though I didn't have plans to make this dessert, by evening, my mind changed and I decided to go for it. I was surprised, at how easily it could be made and how easily it got over too :)) .......I am planning to make again sometime. I am not a big fan of payasam, so rarely make it, but after this attempt, I am motivated to make more varieties, especially because I found they are more nutritious and healthier than cakes/cookies. And I was craving for something sweet which doesn't have gluten or dairy predominantly as its ingredients as I have developed a slight intolerance towards these from past few months. I didn't use sugar in this dessert, instead I used Jaggery. I used coconut milk instead of regular milk. Since Jaggery available in the Indian stores here are cleaner than most of  the ones in India, the task to skim away the dirt while melting the Jaggery can be omitted. The cooking time mainly was that of the Moong dal which fairly cooks fast, maybe 30-40 minutes or less (didn't note the time accurately). The rest of the process can be completed in less than 20 minutes. So here goes the recipe:


 Ingredients: 2 cups
  •  Yellow Moong Dal : 1 cup
  • Water to cook dal : 2.5 cups - 3 cups
  •  Jaggery (I used the light brown color jaggery that comes in cubes) : around 4 to 5 cubes
  • Water to melt jaggery : 1/2 cup
  •  Coconut milk (I used the canned coconut milk) : 1 - 1.5 cups
  •  Raisins lightly blanched in 1 tablespoon butter/ghee (just melt butter/ghee in a saute pan and add the raisins and in low fire, just keep stirring with a spoon until all the raisins have plumped up) : 1/2 cup
  •  Garnish : powdered cardomom, grated nutmeg : 1/2 teaspoon each
Method:

  •  Cook the Moong dal in water until it reaches a very mashable state (if you like the pudding to have some moong dal bits to bite, then dont cook until its totally in the pureed stage. I like them very much cooked and mashable)
  • Melt the jaggery in the water and add it to the Moong dal which is on medium low fire, keep stirring until everything is well combined.
  • Now add the coconut milk and reduce fire to low and keep stirring.
  •  Add raisins, and the garnish. Stir to combine.
  •  Serve hot/chilled 

PS: I had mine with pappad (popadum) as that's one traditional way of having payasam which is called 'Payasam Pappadam' :)

Happy Labor Day weekend !

Luv
Roopa

Friday, May 14, 2010

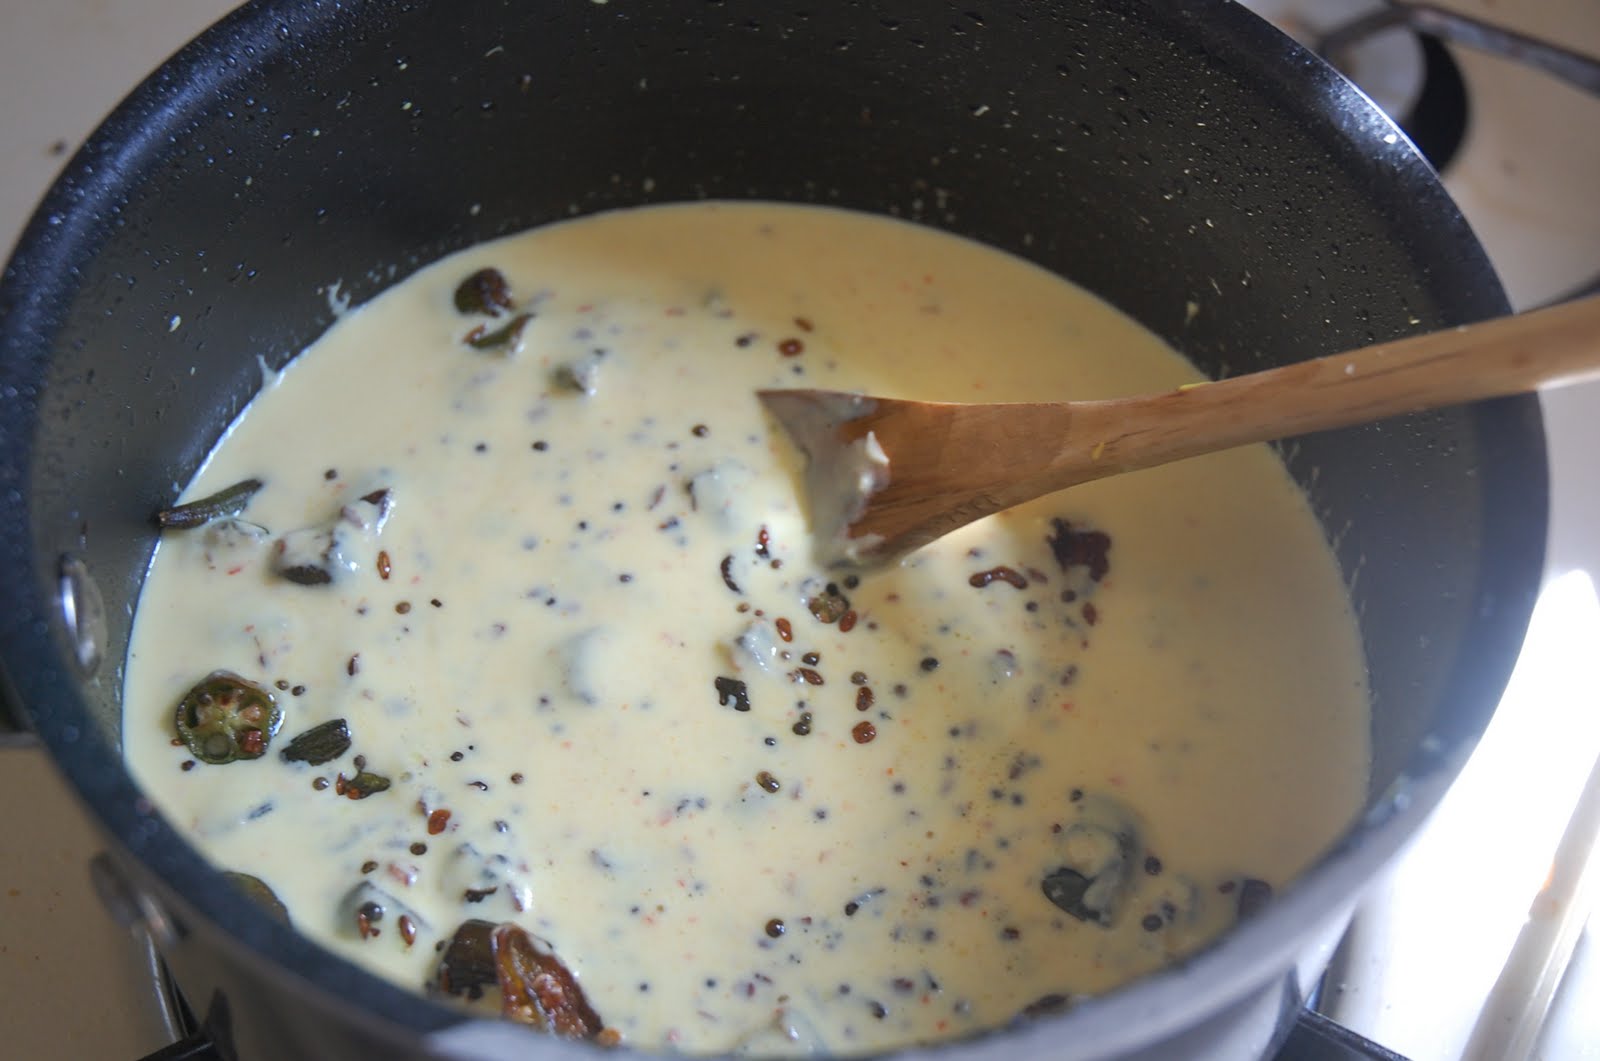
Oven baked Idli fry and Moru Kachiyathu (Curry made with well beaten yoghurt (curd))


Recently I had some left over Idlis that had become hard as stone after a day in the fridge :D .... What I often do is I roast them on the stove by applying few strokes of oil using a brush (I found this method of using a brush to apply oil better than spoon). This time I wanted to use these idlis in a different way. Hence I thought of baking these Idlis in a way similar to making Oven Baked French fries. The result surprised me as the look made it hard to differentiate it from French fries , and the texture was crisp and maybe even better than oven baked potato fries! If you add some seasonings before baking these, the bland taste of idli will be improved :) Here is how I made it:

Ingredients:

Left over Idli (cut into long pieces like in French fries)
Oil (you may use spray can oil , so that less oil is used )
Seasonings and salt to taste


Method:
  1.   Preheat oven to 400 deg F.
  2.   Spray the Idlis with the oil and combine the Idlis with seasoning and salt
  3.   Arrange these on a oven proof tray laid with Aluminium foil
  4.   Bake in the preheated oven upto 30 minutes (depends on the oven) while turning the tray during half time
  5. Serve along with ketchup or as is :) Done !


Moru Kachiyathu
-------------------------------

Unlike my V, I was never a fan of curd when it come to having it as is along with rice. But Moru Kachiyathu always tempted me to try curd. So when I felt like having it one of these days, I searched the Internet and found this simple recipe b Annita of My Treasures and My Pleasures who made it even more tempting by saying that this goes well with not just rice but various other dishes that accompany rice.


The only change I made to her recipe was the tampering ingredients where I added Okra (Ladies Finger, Bhindi) along with the tampering in the hot oil and fried until everything turned brown  (tip from fil ;-)

Monday, April 5, 2010

Bittergourd Potato dry curry (in konkani: Karathe ukkeri, in malayalam: Pavakka Mezhukkupuratti)


Basically this dish is made only with Bittergourd. But if you want a richer taste to go along with the bittergourd, potato can be added. I always add potato to this curry because its become a hit with my husband. He loves the caramelized well done flavor of potato and bittergourd combo in this curry. Water is a strict no-no in such curries as it can make the curry mushy.

I make this to go with hot rice, dal, rice soup (the water in which the rice is cooked), and some homemade crisps (these are called vattal in malayalam , mostly the ones I eat are made by my mom, she makes these from so many varieties of veggies, such as okra, cluster beans, etc..)...it tastes heavenly and the term Comfort Food stands out in such dishes :)

Ingredients:

  • Bittergourd - 2
  • Potato - 2 
  • Green chilli slit - 3
  • Salt
  • Oil - 1 teaspoon
  • Mustard seeds - 1 - 2 teaspoon


Method

  1. Slice the bitter gourd into small long thin slices, each slice about a little smaller than your tiny finger
  2. Slice the potato the same way 
  3. In a hot pan, add oil, reduce heat and add mustard seeds and green chilli, saute until the green chillies get small white patches (meaniing they are fried a little), then add the bittergourd and potato.
  4. Turn up the heat to medium and give everything a stir. 
  5. Add a little salt (not the amount you require at this point as its sometimes better in such cases to add the salt towards the end of the curry), so that it helps the water in the vegetables to ooze out and help the cooking process without any additional water. Give it a stir. 
  6. Then keeping the fire at medium-low cover the pan and let it cook until the vegetables are almost cooked (especially the potato). In between the cooking time, stir the pan one or two times to avoid any food to stick to the bottom of the pan, also check for salt, when the veggies are getting to almost cooked stage, this helps adding the right amount of salt. 
  7. When the veggies are cooked, turn the heat to medium-high and give it a stir. After a minute, stir again and if you find that the potatoes are a bit caramelized (some of the bittergourds also will be caramelized), switch off the heat, give a final stir to the veggies and put back the lid. 
  8. This is best served hot as a side dish.

Thursday, March 4, 2010

Raw plantain coconut dry curry (Ethakka thoran)

I don't remember when was the first time I ate this dish. But sure enough it captured its place in my mind. After marriage, until now, I always used to either fry the chips of Raw plantain or make a simple curry with just salt and little water. I wanted to make something else with it and hence remembered the coconut version of this curry. In malayalam, when grated coconut is added to any vegetable to make a dry curry, it is either called mezhukkupuratty (മെഴുക്കുപുരട്ടി ) or thoran (തോരന്‍), mostly thoran.

Thoran is a versatile dish as it can be altered to use a variety of vegetables, like cabbage, spinach, carrot, beans, or combination of vegetables. The main ingredient common to all thoran is grated coconut.

Here is the recipe:

  1. Raw plantain cut into small thin square slices. (Before you cut a raw plantain, scrub the outside skin lightly for removing dirt, make sure you have a big bowl of water to put the slices in. ) : 1 medium sized plantain
  2. Grated coconut : 3/4 cup
  3. Turmeric : a pinch
  4. Red chilli powder : 1 teaspoon 
  5. Garlic minced : 2 cloves
  6. Tampering: 1 teaspoon each of mustard seeds, cumin seeds, fenugreek seeds, urad lentil
  7. Pinch of asafoetida
  8. Salt
  9. Water : just enough to cover the plantain slices while being cooked


    Method:

    Usually with other vegetables used in thoran, water is not used , and most of the times, all the ingredients (except the tampering) is pre-mixed and cooked together. But since raw plantain requires a longer cooking time, it is cooked until tender with a pinch of salt and very little water.

    1. Cook the plantain in very little water (just enough to cover the slices) until soft and tender.
    2. Wait until the water is all absorbed (the heat can be stepped up a notch , to quicken the process, but keep an eye to prevent any burning of the plantain)
    3. Now mix the plantain with coconut, garlic, turmeric, red chilli powder, and salt . Combine everything well with hands, taking care not to mush the plantain slices. 
    4. Now add a teapoon of oil to a hot pan, lower the heat, add the tampering and asafoetida. Saute for 5 seconds. Then add the plantain coconut mixture. 
    5. Stir well to combine everything.
    6. Close the pan with a lid, keep fire on medium. Wait for everything to be cooked and allow the flavors to combine. 
    7. After 2 minutes, open the lid and combine everything again, at this point check for salt. Close the lid, increase heat to medium -high for 30 seconds. This is to get a nice light caramalized coating on the thoran. Switch off the heat, Open the lid, give everything a final stir , put the lid back on. Best served when hot.

    Monday, November 17, 2008

    RM2- Day 17- Unniyappam (Godda Appo in Konkani meaning "Pancake Puffs made with Jaggery")

    This is one of the favorite sweets of my husband. I too like it especially when its not overly sweet, just a delicate flavor of banana and jaggery. When my in-law visited us, this was one the things I learned to make. Its easy, and quick. Though some people use rice flour to make it, I decided to go with soaking the rice method. It came out quiet well for a first timer like me. This was a good idea to use up over ripe bananas (the green skin variety, or the small yellow ones). This is my version of Unniyappam (I didnt have certain ingredients used to make traditional unniyappams such as toasted coconut bits). As you can see , my Unniyappams did not puff much and that is because I accidentally added too much water. But I hope you people will surely make much better ones than these :)

    Ingredients:

    White rice - 3/4 cup
    **Jaggery grated - 3/4 cup (The jaggery we get in the Indian store near to our place is good, no impurities found till now :) , but for safety sake, you may melt jaggery and strain it through a sieve to remove impurities.
    Very ripe bananas : 2 nos
    Baking powder - 1/4 teaspoon
    Cardamom powder - 1/2 teaspoon
    Nutmeg powder - a pinch
    Salt - a pinch


    Method:

    Soak the white rice in water for at least 5 hours. Grind it with very little water to form a little thick batter. Add the Jaggery, ripe bananas, and the rest of the ingredients and blend again to form a semi thick batter. The batter should have consistency of Idli batter.

    In a Pancake Puff pan on medium heat, add 1/4 teaspoon oil to each mold. When the oil is a little hot, add the Unniyappam batter into each mould upto 3/4th full . Cover the pan and let it cook until the Unniyappams are almost cooked on the top. Turn them over and lower heat to medium low and wait until they cook and then tranfer them to a serving plate.


    Note:

    ** I found an easy way to grate Jaggery this time. I used my grater to do it. I felt relieved using that as my hands were paining grating the Jaggery using a knife every time I wanted to make something with it.

    ** If you find that the Unniyappam batter is not sweet enough, add honey and mix well. I tried this as my batter was not sweet enough the first time, so I added honey and the next batch was sweet enough :)

    I am curious to know what my other Marathon buddies are cooking, what about you?

    1) Siri, 2) Srivalli, 3) Ranji, 4)PJ, 5) Curry Leaf, 6) Medha,

    7) Priya, 8) Bhawna, 9) Raaji, 10) Ruchii, 11) Anu, 12) Kamala,

    13)DK, 14) Divya Kudua, 15) Rekha, 16) Divya M, 17)Lakshmi,

    18)Raaga , 19) Lakshmi Venkatesh , 20) Sripriya, 21) Viji,

    22) Kamalika, 23)Pavani,>,24)Karuna,25)Roochi

    Thursday, May 1, 2008

    Rasa Vada

    I had previously posted about Parippu Vada made with Toor dal. Usually Parippu Vada is made with Channa dal. One popular snack in Kerala is to soak these vadas in hot rasam, allow the vada to soften for a few minutes and have it with a spoon in the same bowl with rasam.

    Its been a long time since I had rasa vada. As far as I can remember the last time I had it might have been during my school days. I made these recently when V was working from home.


    Ingredients:

    For vada
    -----------
    Channa dal: 1 cup
    Green chilli: 2-3 cut into thin round slices
    Onion: 1 medium size, chopped up finely
    Curry leaves chopped finely (optional)
    Ginger: cut into thin small slices- 2 teaspoons
    Salt: to taste
    Oil: to deep fry the vadas
    Water to soak channa dal

    Rasam:

    Any rasam powder available in Indian grocery stores or -->Make your own: Roast 2 teaspoons of coriander seeds, 1 teaspoon each of cumin seeds, fenugreek seeds (methi) , mustard seeds, whole black pepper, hing (asafoetida), toor dal, 5 dry red chillies together on medium flame for 1 minute. Powder them in a spice grinder.

    Water: Enough to soak the vadas
    Salt: to taste
    Mustard seeds: 1 teaspoon
    Cumin seeds: 1 teaspoon
    Curry leaves (optional): 2-3 leaves
    Dry red chillies: 2
    Crushed tomato (optional): 2 tablespoons
    Tamarind juice: 1 tablespoon

    Method:

    For making vada:

    Soak the channa dal in enough water for at least 5 hours or until the channa dal can be broken into two by using your nails. Drain all the water after soaking. Grind it into a fine paste without any water (it need not be too fine, a little coarse texture doesn't matter). Mix it with the rest of the ingredients for vada, except oil. Take a small ball and shape it to form a small disc as shown in the pictures. Then deep fry in oil until bubbles reduce in the oil.

    For rasam:

    Heat sufficient water in a vessel for, add crushed tomato, and rasam powder, tamarind juice . Cook the tomatoes well. You may optionally add some garlic cloves to the rasam. Add salt. Switch off when tomatoes are cooked. Heat a little oil in a tampering vessel, add mustard seeds, cumin seeds, red chillies and wait for mustard seeds to splutter, then add curry leaves and add this tampering to the rasam. Add the vadas to the rasam.

    When the vadas are soft, break them using a spoon and have it in the same bowl with rasam.

    Friday, April 18, 2008

    Patholi (Ada)

    Hello dear readers, I am sorry for not being a blogger who updates the blog timely. I appreciate your comments and your visits because thats what which inspires me. I check my statcounter most of the times and I feel good when I see that my first time and >10times visitors have increased :) Thanks to all of you lovely readers :) Sometimes it just takes a visit to my statcounter or my comments section of the blog to make me temporarily forget about some worries in life that is always in the back of my head. Blogging for me is become an area to express myself, vent out (though I haven't done much :DD, but you can soon expect some of it , so please bear with me ) , and I am honestly very glad to be a part of this food blogging community here. Thanks to you readers/fellow bloggers who have been a constant source of inspiration and I hope I shall be able to keep up my spirits in the future too.

    Coming to Patholi (Ada), this is a sweet treat prepared using rice flour- water paste which is spread on a plantain leaf, and then a sweet mixture made by combining jaggery, coconut, and poha (beaten rice, aval) is added as a stuffing on the rice paste. The plantain leaf is then folded into half and the ends tucked, which then goes into a steamer for 15 minutes.

    Patholi (in konkani) or Ada (in northern parts of Kerala)/Ela Ada was one of my favorite prasadam from temple , that I remember having as a kid. I also remember my mom making it very rarely, maybe during her kitchen-experimental days when we were kids :D (yeah everyone goes through that experimental phase including the expert ones hehehe..) . I also remember recently confusing it with "Adai dosa" after marriage when my fil mentioned "Adai". That's because it is known in a different name in each part of the state as I mentioned initially. In konkani it is called "Patholi". Whatever be the name, its the light aroma of the sweet wrapped in plantain leaf which makes it adorable :) . I have also posted it's cousin version in one of my earlier post (kozhukkatta). I was lucky enough to find some plantain leaves in Market Basket.
    I also want to mention that I found the method of preparing it in Sig's blog. I was glad to know that it just requires to spread the rice paste, add the filling and fold the leaf in half to get the shape ! That easy :) Coming to the recipe:

    Ingredients:

    Plantain leaf cut in square or rectangular shape according to the size of the ada you want or can fit in the steamer

    Roasted rice flour: 2 cups
    Warm Water with a pinch of salt and oil: 2 - 2 1/2 cups to make a smooth dough with rice flour

    For the filling :

    Grated coconut: 1 cup
    Grated/powdered jaggery: 1 cup
    A pinch of coconut milk (optional)


    How to make it:

    Mix coconut and jaggery with your hands very well until well combined and soft. (There should not be too many lumps of jaggery). Note: Here in US the jaggery we get doesn't have impurities, so the step to boil the jaggery to form liquid and then straining it through sieve is avoided. You may use either the light brown jaggery cubes, or the old fashioned dark brown jaggery ball. I grated the jaggery using my knife. I found it tough using a grater for this purpose though. If any other method is available, I would be glad to know.

    Next make a smooth dough using warm water with the rice flour and make a smooth dough. Clean the banana leaves and keep the steamer ready for cooking the ada. Take a small ball (like in chapathi dough) and keep it on the leaf. Start flattening it and same time spreading it on the leaf until it is as flat as possible. Then add a layer of coconut jaggery mix on top of this. Fold the leaf in half. Tuck the ends of the leaf . Place it in a steamer. Without the vent, steam the ada for about 5 - 7 minutes.

    Take the steamer from the fire. Unfold the banana leaf and delicious ada inside the leaf is ready to eat. Serve it warm or after it cools down.

    Saturday, March 15, 2008

    Palada Pradhaman

    Pradhaman is a sweet dish in the form of a thick liquid. It is made with white sugar or jaggery to which milk or coconut milk is added and cooked for a long time. [Courtesy : WikiPedia]
    Pradhaman is of various types, Jackfruit Pradhaman (chakka pradhaman), aval Pradhaman, Parippu Pradhaman, Palada Pradhaman (Ada Pradhaman) etc.. But for me , the favorite among them is Palada pradhaman:) I love this lovely Pradhaman to bits:) .

    Let me give you a short description A short description about its original preparation from "The Hindu" paper on Internet : "What is Onam (the state festival of Kerala) without the Palada Pradhaman? Like the vibrant Malayali cuisine, there are several payasam varieties, but the royalty is the palada pradhaman. There are no shortcuts to making this fabulous dish. Its preparation time is anything between four and nine hours, depending on the quantity. The rice used is a special reddish variety which is washed, dried, and powdered. A paste made of this powder is spread on banana leaves, which are rolled and tossed into boiling water. Once cooked, the leaves are plunged into cold water, and the cooked rice spread removed, and cut fine. This is the ada. Today, thanks to technology and packaging, the ada is available is a dehydrated version, but is not a patch on the fresh, flavoursome original."

    As mentioned in the article, nowadays, anyone can prepare this delicacy as we get the dehydrated "ada's" in the Indian stores. I made this recently and I never added any cream, just milk, cardomom, nutmeg and sugar and it was heavenly. Both of us finished it within few minutes of making it. Yumm I still remember the taste of the ada along with the sweetened milk. Mmm can't wait to make it again one of these days:) . Thanks to Priya , I came to know about the availability of Ada in Indian stores as I found the same type of Ada packet in her blog. I also followed her method of cooking Payasam in Pressure Cooker. But it can be cooked in any other vessel, the only thing is , it will take 1 to 2 hours of cooking. Pressure cooking fastens this process.

    Here goes the recipe:

    Ingredients:

    Ada : 1/2 cup
    Milk : 3 1/2 cups
    Sugar : 1/2 cup or as per your taste
    Cardomom powder: 1/4 teaspoon
    Nutmeg : a pinch (optional)
    Saffron (optional) strands : 2 or 3 strands


    How its made:

    Soak ada in boiling water for around 5-10 munites or until it is softened a bit but not lost its shape. In the pressure cooker , add milk, ada, and sugar. Pressure cook with the whistle for one whistle. Switch off fire, let the cooker stand like this for some time until all the pressure is released. Then open the cooker and on medium heat, start stirring the mixture, add cardomom powder and nutmeg powder and continue stirring. Stir for 5 -10 minutes or until the mixture starts to thicken.

    Remove from fire and add the saffron strands and let it sit for around 5 minutes. Serve it hot or cold , I love it :)

    This is my entry for Novel Food: Spring 2008 Edition hosted by Lisa of Champaign Taste and Simona of Briciole .

    Thursday, March 13, 2008

    Shrimp Pickle

    These days I was craving for Prawns. There isn't a place in Framingham I haven't searched for Prawns. Do any of you know where to get some nearby Framingham if not in Framingham? I had to satisfy with shrimps available here. I made shrimp pickle yesterday and it came out good.

    I was inspired from RP's blog though I have made quiet a few changes in the ingredients. The sad thing about making shrimp or any other shellfish pickle at my place is that V cannot eat it as he is allergic to shell fish. But when he has his Beef chili, what would a not-red meat eater like me savor on? So to get even I went ahead with making this shrimp pickle. V did not even come near it, so I didn't have to worry about sharing it (hehehe I am just kidding, I was actually sad because he refused to even touch it :-(
    Anyways, here is the recipe:

    Whole Shrimp : 1 cup
    Garlic : 6 cloves minced to thin small pieces.
    For marination: Red Chilli powder and Freshly cracked pepper, salt, lemon extract : as required to marinate the shrimp. I didn't note down the measurements for these
    Oil: for deep frying the marinated cooked shrimp

    Powdered mustard seeds and fenugreek (methi) seeds together : 2 teaspoons
    Chilly powder: as per your taste
    Lemon extract : as per your taste
    Asafoetida (hing) : a pinch
    Oil: 1/4Th cup
    Salt: to taste
    How I made it:

    Clean and devein the shrimp (I used the frozen shrimp, which had instructions to put the shrimps in hot boiling water until the shrimp thaws, before cleaning and deveining it). You can find the steps on this website for cleaning and deveining the shrimp. Add all the marinade on the shrimp and cook it without water on a pan on low flame. This is to make sure all the water is left from the shrimp. It just takes around 3 minutes for a cup of shrimp. Deep fry the shrimp in oil and keep them aside. Take 1/4Th cup of the oil in which the shrimp was deep fried into a pan under medium heat, add the garlic, saute it , add the fenugreek-mustard powder, chilly powder. Add mustard seeds. Wait until the mustard seeds splutter, and then lower the fire. Then add a pinch of asafoetida and saute until the raw smell of everything in the pan is gone, else the pickle will taste differently. Then add salt and the fried shrimp, mix it well, add the lemon extract (the original recipe called for vinegar, so I used lemon extract). Mix increasing the fire a little. After a minute, switch off the fire and transfer it to a dry glass bottle. Keep it open until the pickle is cooled. Cover it after it is cooled. I kept it refrigerated until I had it with my lunch, dinner, breakfast :-D Yes you have it as a side dish for breakfast,lunch, dinner :)

    Thursday, January 24, 2008

    Food for comfort


    When Meeta of "Whats for Lunch Honey?" announced Monthly Mingle event "Comfort Food", the first thing that came to my mind was Tomato Soup and Garlic Bread. Soups have always had a special place in my heart. Well, for one, they warm up the heart during a rainy day for sure:) and the other thing is, its the staple food for us whenever me or V fall sick. And I have always craved for those hot and sour, and sweet corn Chinese soups, whenever we plan to do a take out. In fact I have tried my best to taste soups from all the places we have been, which got me a pet name from my husband :) .....well the name is secret, but I can sure share with you this creamy tomato soup and garlic bread I made one of these days .


    Ingredients: Serves 1 person

    Creamy Tomato soup
    ------------------------
    Tomato- 2 medium nos
    Garlic - around 8 cloves
    Cream - 1/4 cup
    Onion - 1/2 cup chopped
    Coriander leaves - to taste (I add a lot since I like the taste)
    Cracked pepper - 1 teaspoon (to taste)
    Hot sauce (Tabasco sauce) - few drops (to taste)
    Cornstarch (cornflour) - 1/4 teaspoon
    Warm water - 1/2 cup
    Butter - 1 tablespoon
    Oil-1 teaspoon

    Garlic Bread - To make one garlic bread
    --------------
    One slice of bread - I used the whole grain bread (Any bread can be used for this)
    Garlic - 2 big cloves
    Coriander leaves - a few
    salt- to taste
    Oil - 1 teaspoon


    Method:

    To make Creamy Tomato Soup:

    Cook the whole tomato and unpeeled garlic until these can be mashed. I nuked the tomato and garlic covered in a microwave vessel for two minutes as that was quicker than the stove method. Mash the tomato and garlic until it forms like a paste. I used the electric masher for the first time for this purpose and it worked well for me. Then to another vessel on the stove, add butter and oil and caramelise the onion. Add salt, mashed tomato-garlic mixture, stir well , be careful at this time as the heat can cause the soup to splatter, reduce the heat at this time, add the cream, cornstarch and stir well to combine everything well. Add the hot sauce, coriander leaves and stir again. Once a bit cooled, transfer contents to a blender and puree the mixture. Transfer the pureed mixture to stove to heat once again for a minute or two and garnish with a bit of cream and cracked pepper. Serve along with garlic bread.

    To make Garlic Bread:

    Roast the whole garlic and coriander leaves until soft or microwave it in a closed vessel for 2 minutes. Mash it along with salt and oil until it is of spreadable consistency. Spread it on a slice of bread on one side. Fold it once and apply the rest of it outside. (Actually I had made very little paste, so I applied some of the soup I made on the outer portion of the bread after it is folded). Then keep it in a sandwich maker until its done. Serve it warm along with soup.

    The next comfort food I had in mind was the simplest comfort food which I relish anytime. It can be called a Kerala comfort food, because it has Erissery (a curry made with pumpkin (can use other vegetables also), green gram) and Cheera(Spinach)-thoran (thoran is a dish of Kerala) and I always associate it with Mom's cooking, hence its a complete comfort food for me :) The rice I use here is Matta Rice which me and V like for its Thiamine (Vitamin B content) and for its pinkish color which it imparts to the Kheer which we make out of this rice on occasions. I made Kanji (Gruel) out of the rice as its such a delight to have it during this cold weather. The mention of Kanji itself warms up the heart. For making Kanji using Matta rice, I used the pressure cooker as my rice cooker never was able to cook the Matta Rice that well. I poured two extra cups of water for cooking the rice and cooked it for 3-4 whistles.


    Ingredients

    For Erisseri:
    ---------------

    Pumpkin- a medium piece cut in small chunks
    Green Gram - 2/3 cup
    Water for cooking the green gram
    Shredded coconut- 1 cup
    Red Chilly - 2 nos
    Garlic - 2 cloves
    Tampering: Mustard seeds, cumin seeds,curry leaves,,Red Chilly, oil

    For cheera(Spinach) thoran:
    -------------------

    Spinach (I used the cut spinach from frozen section) - 2 cups
    Shredded coconut - 1/2 cup
    Garlic - 2 cloves minced
    Red chilly powder - 1 teaspoon
    Tampering- Mustard seeds, oil


    Erisseri
    Method:

    Erisseri:
    -----------
    I used pressure cooker for cooking the whole dish as I was running out of time, but I suggest you folks to cook only the green gram in pressure cooker for this recipe as the pumpkin gets mashed when cooked in pressure cooker. Anyways here is how I did it:

    In the pressure cooker, add 1 teaspoon oil, and the other tampering, then add the green gram, pumpkin (you may cook it separately) , salt and water , and cook it for three whistles. Then grind the coconut, red chilly, garlic to a course paste. Mix it to the content in the pressure cooker, stir it well and after a minute, switch off the stove.


    Cheera (Spinach)-Thoran
    To make cheera thoran:
    --------------------------

    Defrost the spinach (if you have bought the frozen ones). If you have whole spinach, chop it well. Mix it with coconut, garlic, chilly powder, and salt. In a vessel on the stove, heat a teaspoon of oil, add the tampering and then add the spinach mixture and stir it well on medium heat. Close the vessel and let it cook until the spinach is cooked.


    The above picture is the Rose Matta Rice which has been cooked with lots of water. I drained the water from the rice through a sieve before serving to V , though I prefer it without the draining. That's why you don't see the water in which it is cooked.


    Please do not copy

    All contents in this blog cannot be copied without written permission from the blog author.

    LinkWithin

    Related Posts with Thumbnails
    baby