Showing posts with label Other sites. Show all posts

Wednesday, March 2, 2011

Whole Wheat Nankhatai (Eggless whole wheat cookies) and some miscellaneous photos


Hello dear readers :) (I hope I have few left at least ??? .....) I have been so inconsistent with my postings and I owe you readers an apology for that, ....that being said, I would be doing yet another post after this and then planning to take a break the rest of the year due to personal reasons. I would resume blogging starting 2012. Since this blog has been nothing less than a 'baby' to me :) , I will never stop blogging for sure :) though at present things are a bit unsettled until next year.

Coming back to this post, I have been trying my hand at 'Nankhatai' after a long time after my last attempt to make these. Though last time gave results, it wasn't something I would brag about as it didn't actually get the desired shape I wanted  (I can be a perfectionist sometimes, especially when it comes to cooking ;-)) ....hence keeping the 'shape' factor of the nankhatai's in mind I decided to try my hand again, but this time using a recipe from 'Showmethecurry'' , a website whose recipes have never failed in my kitchen whenever I tried. I made a slight modification though, as I used Whole Wheat Flour (Golden Temple Durum Whole wheat flour brand) instead of All purpose flour (or maida) as they have mentioned. The results was so delightfully surprising, that I could not believe I too could bake a cookie which would not fall flat. They had the most perfect dome shape among the cooking I ever baked in my kitchen (I used to fret and feel disappointed whenever my cookies used to fall flat, in fact I had given up on ever baking a cookie that would hold its shape). So you can imagine how excited I was /is while typing this.


Here is the recipe:

  • Whole Wheat Flour (I used Golden Temple brand Durum Whole Wheat Flour) – 1 cup
  • Unsalted Butter – 1 stick (1/2 cup, 4 oz) at room temperature (I used salted butter, hence I skipped the additional salt which is asked for in the recipe)
  • Powdered Sugar – 1/2 cup (Use only powdered sugar that you get from stores (also known as Icing sugar/Confectioners sugar) as it has some cornstarch in it which affects the texture of the nankhatai (tip given at the above website))(*Do not manually powder the sugar you have at home and use instead of this)
  • Nutmeg Powder – 1/4 tsp
  • Cardamom Powder – 1/4 tsp
  • Baking Powder – 1/4 tsp
  • Salt – 1/8 tsp (If using salted butter, skip the salt )

Here is how I made it:
  • Preheat oven to 300 degrees F or 150 degrees C. Sift the Whole Wheat flour along with Baking powder in a bowl.
  • In a bowl, combine the powdered sugar in small quantities along with butter until it is smooth, light, and creamy
  • Then add Nutmeg and Cardamom powder, followed by the sifted flour little by little until a smooth dough is formed
  • Wrap the dough in a plastic wrap and let it rest for 15-20 minutes
  • Knead dough once again and divide into 12 equal parts 
  • Roll each portion into smooth balls taking care there is no crack at all and place these in a baking sheet lined with wax/parchment paper which has been lightly floured and greased
  • Leave space between cookies to allow room to expand (all cookies expand a little at least)
  • Bake on middle rack for 22-25 minutes while keeping an eye on the color of the cookies as they should brown just a tad on the bottom corners.
  • Remove the cookies from oven and let it rest for 5 minutes before transferring them to cooling rack
  • Let the cookies cool completely before you eat them as they might seem soft when they are still warm.
  • Store in an air tight container at room temperature


Here are some photos I took recently when I made one  of the most loved Konkani delicacy about which I have previously posted on this blog, but just didn't have good pictures, yes friends its none other than 'Pathrodo' and this time I have the pictures where I made the Pathrodo with the traditional Pathra leaves (Colocasia leaves) and not the Collard green leaves which I usually use when I don't have Pathra leaves. Enjoy this photo filled post :)

 Pathra leaves from my garden and also from a dear friend/neighbour . The pic on the right shows two leaves, one with veins intact and the other with veins  removed from the lighter color side of the leaf (the wrong side of the leaf). The veins from all the leaves must be removed at this point.
 The leaves are soaked in water mixed with turmeric and tamarind solution to take away the itchiness which the leaves are notoriously famous for.
The pic on the right is the batter for coating the leaves. Its a ground batter of White Rice (Idli rice) + Coconut + Tamarind pulp + Turmeric + Salt + Asafoetida (Hing) + Jeera +Red Chilly
 I used a cut grocery plastic cover to cover my working area while I spread the batter on the leaves as this process would otherwise make the working area messy and this trick avoids a mess and is eas to clean up ;-)
 How the leaves are arranged: two leaves arranged as shown with removed vein side up overlapping a bit on the edges.
 The batter is spread generously on this side. Then a single leaf is kept on the joint of these two leaves. The batter is spread on this leaf (the pic of applying batter is not shown)
pathrodo) I didn't have that many....hence had to satisfy with the leaves I had.

 After all leaves are stacked and battered , fold the edges lengthwise as shown on the right pic.


 Batter the folded edges.

 Keeping the battered edges intact fold the stack from bottom just like you  would fold a burrito. And apply the batter to all the non-battered areas you see while the folding takes place.Requires some patience to get a good looking loaf of leaves :))
 The battered loaf of leaves looks like this : pic on right and below.

Apply batter on the bottom and edges of the loaf at the end too so that no area is left without a generous coating of the batter. The batter is important taste wise as well as to prevent any itchiness after the Pathrodo is cooked.
 Boil water in a steamer.
 Place the loaf in the steamer.

 Cook for 45 minutes. By then the whole house was having the aroma of Pathrodo :)
 Cooked Pathrodo
 Check whether the insides are properly cooked or whether the batter is still uncooked? Cook further if necessary.
 Slice and serve with coconut oil for best taste.
 mmmmm, yummmm :) cant wait to make again....that is when I have the leaves during summer :-)


Luv,

Roopa


Sunday, July 18, 2010

Pineapple Coconut Loaf cake


Its been a while since I baked a cake in our toaster oven. I mean, from the scratch. I wanted to make a cake which had coconut flavor in too. Searching through numerous recipes online I came across Martha Stewart's website where she bakes this cake in an interesting way. She covers the cake midway with foil to avoid the toasted coconut from over-browning. Since this was a loaf cake and I had never made a loaf cake in the oven, I decided to go for this recipe by following some of the recipe suggestions given by the reviewers who made this cake. Moreover it had a good rating.


I love Martha's website, it has lots of interesting exciting ideas related to not just food, but crafts, gardening, decorating etc which has been presented to viewers in a very nice way.

Here is the recipe:

Tools needed:
1 Loaf pan
Silicon Spatula/ Any type of Spatula
Measuring cups


Ingredients:

  • 1.5 cups (1 1/2 cups) sweetened shredded coconut 
  • 1/2 cup (1 stick) unsalted butter
  • 1.5 cups (1 1/2 cups) all purpose flour (make sure you use a spoon to add flour to the measuring cup rather than just scooping it with the measuring cup as it tends to prevent addition of excess flour and thereby also helps to fold in more air).
  • 1/2 teaspoon baking soda
  • 1/2 teaspoon salt
  • 1 cup sugar
  • 3 eggs
  • 1 cup sour cream
  • 1 can (20 ounces) pineapple chunks in juice, drained very well
  • 1 teaspoon almond/vanilla extract (optional)
Method:

  1. Pre-heat oven to 350 degrees F. 
  2. Spread the coconut on a parchment paper/wax paper lined rimmed baking sheet
  3. Toast the coconut for 6-10 min until lightly browned, stirring occasionally. Set aside
  4. Butter a 9 by 5 inch (8 cups) loaf pan. Flour lightly (if needed you line it with wax paper and do the same ). Set aside
  5. Beat butter and sugar until light and fluffy. Add eggs one by one, folding each egg before adding the next egg. Add the Almond/vanilla essence
  6. Sift the all purpose flour. Fold it in three parts, along with two parts of sour cream to the egg mixture, beginning and ending with flour mixture.
  7. Using the spatula, fold pineapple and half the toasted coconut into the batter
  8. Smooth and even the top. Sprinkle the remaining coconut on the top of the batter.
  9. Bake for 1 hour 20 minutes (cover the pan foil halfway through)
  10. Do a toothpick test to confirm whether the cake is done
This cake can be stored at room temperature covered in plastic for 2 days. It refrigerates well too.

Thursday, July 8, 2010

Homemade seasoned Paneer

The sun has been blazing hot for the past couple of weeks here. There is no sign anywhere, be it weather channel or on Internet about any cool breeze coming to MA anytime soon....With temperatures as high as >90 degree F, the Air Conditioner is merrily working for longer hour these days....We are almost sure that this month's electricity bill is going to amaze us :-p.......Well to look towards the positive side, let me just say that, at least the equipment started working without making us pay in $$$$ to get it repaired when it refused to cool the house for a few weeks in May when I was fretting. Hence I am not gonna complain about the bill, that's up to us anyways !

How have you been dealing with the summer? ........Hope all of you had a great Father's day !....I wish I could say that loud, my father passed away three years back , but he still lives in my heart, hence I quietly wished him that day.


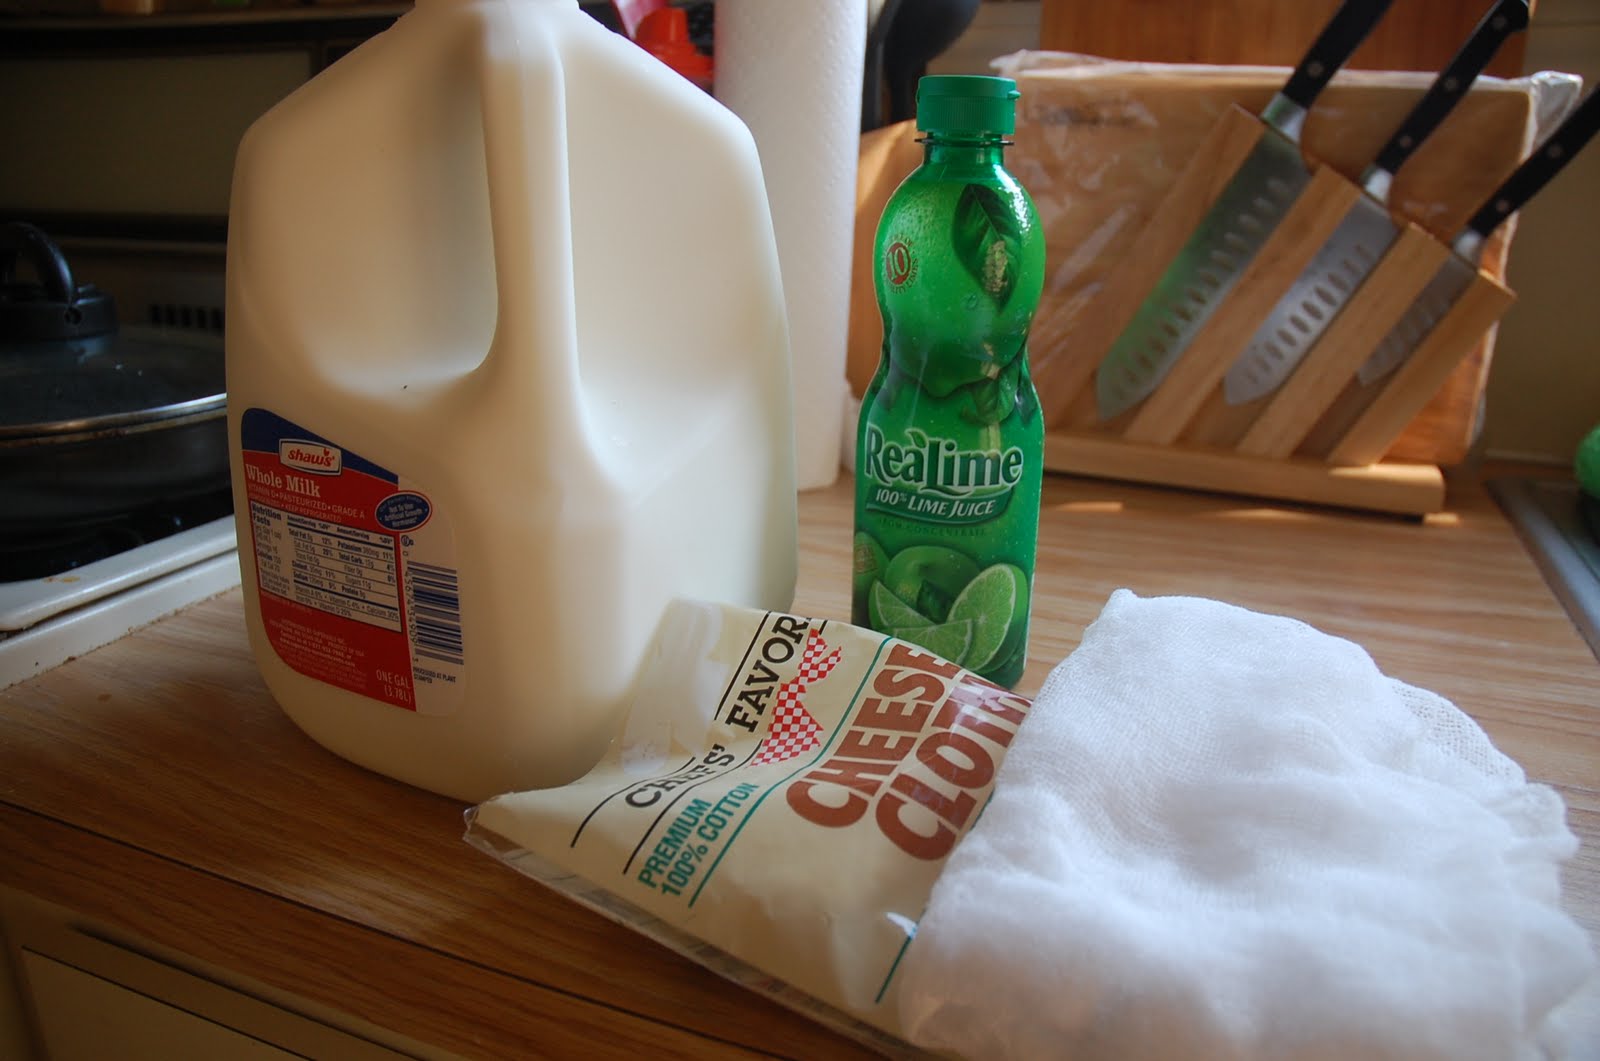
I don't know when I started craving for Paneer this summer, but it was worth it, because I learned to make the Paneer which by itself is bland when added to curries/grilled as the flavor does not get into the cheese much, even if they are marinated. I at least wanted it to have a salt taste if not anything else. I came upon the video of Hetal and Anuja of Show Me The Curry fame, when I was just browsing their website. They have indeed done a good job about showing how to make Paneer more tasty. I experimented their method of making spiced Paneer with 1/2 gallon whole milk (8 cups of milk) and 1/4 cup lemon juice and it turned out very good. I didn't have my camera handy then, so could not click any pictures. Yesterday I bought one gallon Whole Milk and made paneer with it and I went one step ahead and grilled it for better storage and also got pretty grill marks on most of the paneer cubes :) . So let me tell you how I made it exactly:

Recipe for Homemade Spiced Paneer
--------------------------------------------

Ingredients:  

Whole Milk : 1 gallon (around 16 cups of milk)
Lemon (Lime) juice (concentrate) : 2/3 cup
Salt: 1/2 teaspoon

Equipments/Accessories needed:

- Cheese cloth for sieving/straining the paneer from the whey
- 2 deep wide and deep bottom vessel which can hold more than 16 cups of milk (one for boiling milk and the other for collecting the whey)

Method:


  • Bring the milk to boil in a deep wide vessel (preferably non stick) while continuing to stir the milk

  • Add the Lemon juice and stir while adding it. Lower the fire once completely added. 


  • Add more lemon juice if the milk has not curdled well. You can verify this when you see the light greenish color water well separated from the curdled milk solids. 
  • Switch off the fire and let it sit for a few minutes (3-4 minutes)
  • Meanwhile prepare the cheesecloth on the second deep and wide vessel for straining the milk solids from the whey. The whey is a multipurpose stock which can be used in gravies, and soups. Its not compulsory to collect the whey, its up to you. I tied a rubber band around the cheesecloth binding it around the collecting vessel so that the cheesecloth doesn't collapse inside the vessel when we pour the mixture to be strained. I forgot to click that picture. I am sorry I missed it.
  
  • After all the contents in the first vessel is completely poured in the cheesecloth, gather the ends of the cheesecloth and hold them above the vessel which has the whey and squeeze to drain out the excess whey.

  • Now tie the ends or wrap the ends of the cheesecloth holding the curdled milk solids around the tap of your kitchen sink. The aim is to drain the whey using gravity of the solids on the cheesecloth when its suspended from a fixed source (in technical terms :-DD ). You may use any similar set up for straining. Leave on this way for 45 minutes.


  • Now unwrap the cheesecloth. You should get a beautiful ball of paneer which has to undergo one more step, well, can be two more if you want spiced paneer. At this point , transfer the paneer to a dry bowl. Crumble the paneer using your hand. It need not be crumbled too much, just enough to evenly spread the seasoning: that is salt. You may add other seasoning such as cumin seeds. Add the seasoning, and knead well to get a smooth dough. (Hetal gives a tip that, at this point, along with salt if 1 tablespoon All purpose flour or Maida is added to the Paneer and kneaded, the resulting paneer would have a firmer texture and will not crumble when added to curries or grilled using skewers. I forgot to add the All purpose flour, but you may try it using this method).

  • Tran fer the ball to the cheesecloth and wrap the cheesecloth with nice clean folding steps (so as to prevent the paneer from getting wrinkle marks from the cheesecloth wraps). Place some type of weight on the paneer and keep this for 2 hours. 

  • After two hours, you may cut the paneer into desired shapes and freeze it if you are not going to use it for next few days. You may also refrigerate it , if you are planning to use it in next few days. But to refrigerate, Anuja explains that paneer has to be stored the same way Tofu is stored, that is in water and changing water everyday. This did not work well for me in the refrigerator as the paneer started crumbling. Hence this time I decided to grill it and store it without water in the refrigerator.


To grill Paneer:
--------------

Tips: Do not use a aluminium foil while trying to grill in Toaster oven. I learned the hard way that, even though the foil was well greased, the paneer stuck to it in no time during the few minutes it was inside the oven. I ended up removing portions of whole paneer cubes as they were sticking.


 The one fool proof way to grill paneer is to use a non-stick grill . I didn't have to keep brushing oil every time.


And with the grill I used (George Foreman lean mean grilling machine which is an Indoor grill) the paneer never stuck. And they got beautiful grill marks too (I grilled for 2-3 minutes max. Yayy :) You may store these in a air tight container in the refrigerator or freeze it. These can be used this way in curries.


I hope you would all try this.

Love
Roopa

Friday, March 5, 2010

Cashew Biscotti with chocolate glaze


This is going to be my first homemade Biscotti. Biscotti is an all time favorite at our house. I have been meaning to make this from a long long time. The time was just right few days back, when I had all ingredients and the memory that I had to make this :) I got the recipe from 'Joy of Baking' and was surprised to know it didn't require butter or oil. Just flour, sugar,  eggs and the rest of the usual baking ingredients.


Ingredients:

1 cup (145 grams) unsalted cashews, toasted and chopped coarsely
1 teaspoon (5 grams)baking powder
1/8 teaspoon salt
2 cups all purpose flour
3/4 cup (150 grams) granulated white sugar
3 large eggs
1 teaspoon vanilla extract
1/ 2 teaspoon orange extract


Method:

Preheat oven to 300 F(150 C)
Line baking sheet with parchment paper
In a small bowl, beat the eggs and extracts together
In a separate bowl, mix the dry ingredients (except the nuts) for 30 seconds
Then gradually add the egg mixture along with the cashews
Mix until the dough comes together (It will be probably a gooey sticky dough)
Transfer the dough directly to the baking pan (the dough can be too gooey sticky to roll it on a separate surface and then transfer, hence its better to do the flattening or rolling on the prepared baking pan.
Roll the dough about 14 inches (35 cm) long and 3-4 inches (8-10 cm) wide and and bake for 30-40 minutes until firm to touch (Log will spread during baking)
Cool it on a wire rack about 10 minutes.
Transfer log to a cutting board and using a serrated knife, cut it into 1/2 inch (1.25 cm) thick on the diagonal.
Arrange the slices on the baking sheet and bake for 10 minutes. Flip over and bake for another 10 minutes.
Cool on wired rack


Once cooled prepare the chocolate glaze:


Ingredients:

1 cup semisweet chocolate chips
1 teaspoon butter

Method:

Melt both the ingredients over a pot of simmering water (double boiler method). Dip the biscotti on one side in the glaze and keep the glazed side facing up on a baking sheet. Repeat the step for all biscotti. Transfer to refrigerator to firm up the chocolate glaze. Enjoy !

Please do not copy

All contents in this blog cannot be copied without written permission from the blog author.

LinkWithin

Related Posts with Thumbnails
baby