Showing posts with label Vegetarian side dish. Show all posts

Wednesday, September 4, 2013

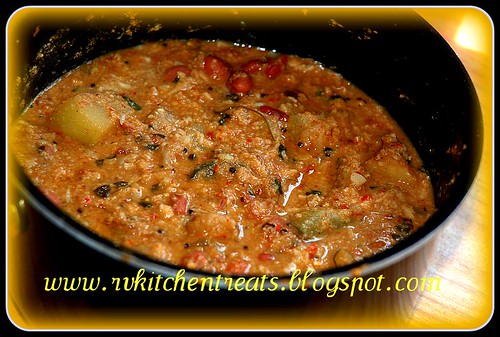
Amboose Ambat (Sour gravy)


I got this recipe from my amma when I wanted to make some authentic kerala konkani style dish. I loved how the dish doesnt feel heavy since no coconut milk is added , instead sour yoghurt (hence the name Amboose which means sour in konkani) is added. I am ssending this to Srivalli's side dish mela.


Ingredients:

Taro root (mande): 1 big scraped , cleaned and cut into chunks

Winter Melon (kuvvale): 1 medium piece cut into chunks

Yoghurt: 1 cup to which around 1/2 cup water is added to dilute it. Do not use buttermilk.

Water to cook veggies

To grind:

Grated coconut (fresh, frozen or scraped): 1/2 cup

Cumin seeds: 2 teaspoons

Green chilli : 2 to 3 (according to taste)

To temper:

1 teaspoon mustard seeds
A sprig of curry leaves

Method

In a saucepan add veggies, and some water to just barely cover the pieces. Add sufficient salt and cook at medium heat until veggies are just cooked, do not overcook them, as thats not the texture we are going for in this dish.

Meanwhile, grind the ingredients under the "to grind" section until smooth.
When veggies are cooked and water is almost all absorbed (a little left is fine, but not more than that since we will be adding yoghurt later. This is a pretty thick gravy), switch off heat, add the ground mix and yoghurt to it , mix well immedietly. Switch on heat to low, if you feel its too thick, you may add a teaspoon or more water, though thick is what we are going for. Temper ingredients in 1 teaspoon oil and add it to the gravy. Mix well.

Serve with hot rice.

Thursday, August 29, 2013

Dhev Ummaan


This side dish is one of the most popular konkani temple feast dishes. You can find it along side Ghasshi, Dali Thoy , pickle, and other lipsmacking items all served to together in a particular order in even assigned spots on a large banana leaf. But temple feast or no, I just love this dish so much I could eat it with hot rice and pappad everyday :) 
Iam sending this to Srivalli's side dish mela:


here is the recipe:

Dhev Ummaan
-----------

Ingredients

1 large taro root (you can google taro to find its image) its called Mande in konkani sliced into wedges or cubed

1 medium bitter melon (bitter gourd) (karathe) sliced thin

Potato (optional) : 1 small sliced into wedges

Water : Just enough to soak the veggies to cook almost

Thick Coconut milk (I used canned):  1.5 cups

To temper

3 Green Chillies slit
1 tsp mustard seeds
1.5 teaspoons cumin seeds
4 to 5 curry leaves
Hing
Salt a pinch to season oil
Oil 2 tablespoons

Spices

1/2 teaspoon amchur powder
Salt
Hing : 1/4 teaspoon

How to make

In a deep bottom wok, heat 2 tablespoons oil, and add mustard and cumin seeds. When they start spluttering,  add the rest of the ingredients under temper.

Now add taro root, bitter melon and potato and stir to coat with all tue temper seasoning.  Then add water,  salt and cook on a medium flame until its almost cooked all the way through. Increase heat to reduce the water content to almost dry. Them lower heat, add coconut milk and stir well. Then add amchur powder, hing,stir, and check for salt. Let it cook on low heat for a minute until it thickens a bit. Switch off , drizzle with a little coconut oil if desired to get that lovely authentic aroma of the Dhev Ummaan. Serve with hot rice.

Tuesday, August 27, 2013

Mint Thepla with Eggplant Patiala


The one constant thing I like about foodie groups on social networking websites is awesome recipes they share. I am a member of foodie group on such a social networking website. Learned so many new stuff. Theplas (a frequently viewed dish made by many members in that group) were one of them and Eggplant patiala (from a member Sudha) is another one which is now a regular once a week at my place now :)
I am sending the side dish Eggplant Patiala to Srivalli's side dish mela:

http://cooking4allseasons.blogspot.in/2013/09/announcing-side-dish-mela-with-giveaways.html?m=1
Ingredients:Mint Thepla :Wheat flour : 2 cups
Mint leaves: a handful
Yoghurt at room temperature: Enough to make a smooth dough (beware that the mint leaves add additional moisture so adjust the amount accordingly)
Onion powder to taste
Oil for greasing the thepla while roasting
Salt to taste
Eggplant patiala:
Source: This siteAround 10 small indian variety Eggplant (can try with 1 big regular supermarket variety too I believe)
Cumin seeds : 1 teaspoon
Onion: 1 medium sized slices thin
Tomato: two finely chopped
Turmeric powder: 1/4 tsp
Ginger garlic paste : 1 tablespoon
Chilli powder : to taste
Garam masala: a pinch
Oil: sufficient to roast eggplant until brown
Oil: Two tablespoons
Salt to taste
How to make:Mint Thepla:Mix everything to create a smooth dough. Let it rest for 20 minutes. Make small balls from dough. Roll roti from it and roast it on a hot griddle with ghee (optional) , oil. Done. Serve with Eggplant Patiala or raita :)
Eggplant patiala:Roast eggplant until slightly brown. Keep aside. In same pan add two tablespoons oil and add cumin seeds and onion, saute until fragrant and pink, add turmeric powder, ginger garlic paste and saute well for a minute or two. Then add tomato , chilli powder, and salt. Stir until mushy , then add Eggplant, and cook covered until its all cooked. Check for seasoning, add pinch of garam masala. Serve hot with Thepla :)
Note: The dough might get kind of too stiff if cold yoghurt is added. In that case if its too late into mixing , add slightly lukewarm water.

Tuesday, April 2, 2013

Dal fry (restaurant style)


The saying, "do not underestimate the flavor of simple food" is very appropriate for this side dish. I never used to even give a second thought or even glance when I saw dal fry in buffets or menus in a restaurant. What with all the other lip smacking names like "gobi manchurian", "paneer tikka masala", etc etc vying with each other to capture your undivided attention, truth be told, one can only contemplate the fate of dal fry who looks like "plane Jane" in this context.

"Really??, how did I miss this one?"...this was my reaction after I tasted dal fry for the first time in my life after I had to take care of the leftover food  as part of a get together we had last year at our place... And the other factor was our munchkin loves dal based gravies so much , he relished this dish with gusto, though I had to refill his glass of water as it was quite spicy. Then and there I decided, Dal fry is a must try in my list of experiments to replicate restaurant style food.

So here goes my version where I have tried to get a restaurant style taste for the same:


Ingredients:

Thur (toor) dal : 1 cup
Onion medium: 1 sliced thin
Tomato: 2 sliced
Ginger and garlic paste: 1 tspn each
Green chilli : 3 nos slit open (optional, I did not add, but it's really a flavor booster in dal fry according to me)
Salt

Spices:

1tspn each of coriander powder, garam masala powder
1/2 teaspoon cumin powder, turmeric powder, red chilli powder
A pinch of hing

For tempering:

1 tablespoon ghee (or butter, but ghee is best for  the flavor, you can melt the same amount of butter for a minute or two until it forms ghee...or refer my previous posts for making ghee in advance)
Mustard seeds: 1 teaspoon
Cumin seeds: 1 teaspoon
Hing: a pinch
Salt to flavor the ghee

How I made it:


Soak the dal atleast an hour in warm water for faster soaking. It speeds the cooking process and gives a nice buttery texture of cooked dal.


Then in a pressure cooker on medium heat (you may use a plain sauce pan, but it will take an hour to cook the dal well), add ghee, then the tempering ingredients, followed by green chilli,onion, ginger and garlic paste. Stir well until onion turns pink, then add the tomato, spices, and salt. Reduce heat a bit, and stir until the mixture reduces to a paste consistency. It will take around two minutes to achieve that.

Now add the soaked dal along with 4 cups water. Stir again. Check salt and cover pressure cooker. I allow four whistles on my pressure cooker. Switch off heat. Wait for the pressure to completely go away. Then open lid, stir everything well, check salt.


I hope you will try this since it's easy and tasty and healthy. MK

Monday, December 3, 2012

Carrot thoran (Carrottache sukke)


Hello reader :-)

How are you doing? :-) ....here I am trying to incorporate as much veggies into our diet for the sake of our toddler :-) , who by the way is not that picky, but it's just certain days every month he goes on a food strike against almost everything ! :-) ....until he feels a real hunger pang and then nothing can stop him from eating :-D

Anyways, this dish Carrot thoran (aka `Carrot sukke` in Konkani ) is a favorite of everyone :-) , and since "somebody" in our house really loves carrot juice :-) , I decided to experiment with doing something different with carrots. Here is the recipe :

Carrots chopped finely (I used my food processor) : 2 cups
Garlic crushed lightly and minced : 5 cloves
Grated coconut : 3/4 cup
Cumin : 1 tablespoon
Chilli powder : 1/2 teaspoon
Hing (asafoetida) : 1/4 teaspoon
Turmeric powder : 1/4 teaspoon
Salt
Coconut oil : 2 tablespoons
Mustard seeds: 1 teaspoon
Curry leaves : 4, 5
Urad dal : 1 teaspoon

How it's done :
Mix everything except oil, mustard seeds, urad dal, and curry leaves until
everything is mixed and coated well. Make sure to mix everything as if you are kneading a dough, but not too much, just enough to get everything a bit softer, maybe "knead" for a minute :-) . This is my mother`s tip. She tells that this way is to get the coconut all mellow, so that it releases it's flavors when cooked. Now add salt and mix it well again. Hear the oil in a pan, add the mustard seeds followed by urad dal , hing, and curry leaves. Add the carrot coconut mix, stir well, reduce flame, and keep it covered to cook, until carrot softens. Switch off flame. Serve as a accompaniment with steaming hot rice, and dal :-)

Happy holidays
Roopa

Thursday, June 3, 2010

Eggplant/Brinjal raita

These days the weather in MA is turning from warm to hot to hot and humid...well whatever be the degree of heat, I am not a big fan of summer....yes have to say that because each time I hear people around me, especially people whose origin is same as mine praising this climate/season, when they used to dislike the same hot climate back in their native country ! ...I am consistent with my opinion in that matter, I don't like the hot weather anywhere.....

On the other hand I love rains....mmm the sweet smell of grass, and earth ...that's indeed intoxicating.

Amidst this hot unbearable weather, I was searching for innovative ways to cool our stomachs. Rather than heating up the house by doing heavy stir fries, steaming, ...I decided to 'go yogurt (curd)'  literally....meaning I am now adding yogurt to whatever dish I make....starting with stir fries.

Just months before my marriage to V, when I was still a novice when it came to cooking, like any other bride-to-be, I decided to buy myself a cookbook with basic recipes to help me not to starve both of us after marriage :D
I bought two books written by the author Mallika Badrinath. One which contains Vegetarian Lunch recipes and the other, 'Tiffin' (breakfast) recipes. Months passed, years passed, and now when our fifth marriage anniversary is nearing, I chanced upon these books which I had fondly treasured along with my mom's handwritten recipe diaries :) ....I showed the two books to V and he was impressed and was gleaming when I told him I bought these books to cook for him. He then told me to cook something from the book for him. That was a moment I liked a lot :) I got all excited and made this Eggplant Raita for him. He loves yogurt with everything and I wanted something to ward away the heat, hence this recipe was perfect. Here is how I made it from the book with tiny bit of modifications from my end:

Ingredients:

  • Eggplant /Brinjal : 1 medium sized
  • To coarsely crush together: 2 tablespoons fresh grated coconut and 1 thinly sliced green chilly
  • Tampering : 1 tablespoon oil, 1 tablespoon each of mustard seeds, urad Dal, cumin seeds and 3 broken dry red chilly, a pinch of hing (asafoetida)
  • Well beaten yogurt (curd) : 1 cup
  • Salt to taste
Method:

  • Roast the whole eggplant in the oven, or over a flame (stick a fork in the eggplant and show over the flame) until the skin gets black. The inside of the eggplant turns mushy and mash-able when this happens.
  • After removing the skin, mash the eggplant (I used a hand blender for this purpose). 
  • Heat oil in a skillet, add tampering, and when the tampering splutter, lower the heat to medium, add the mashed eggplant and saute for 2 minutes. Add salt to taste
  • Add the coarsely crushed coconut and green chilly to the eggplant and stir well. 
  • Switch off the flame. Add the well beaten yogurt (curd) to the eggplant mixture and stir until the dish turns a bit watery due to the heat of the pan. 
  • Serve hot or chilled 
Variation: Vegetables that can be used: Cluster beans (kothamara, govar beans), Okra (ladies finger or bhindi), carrot (grated or thinly sliced), tomato.
Note: While making raita with the above veggies, cook them with no water (except in the case of Okra, where you may make them crisp by stir frying them) with the tampering (same tampering as in the above recipe), and when they are cooked well and follow the same procedure of adding yogurt towards the end.

Source: 200 South Indian Vegetarian Classic Lunch recipes by Mallika Badrinath

Hope you enjoyed my post as much as I enjoyed sharing it with you :)

Roopa

Friday, May 14, 2010

Oven baked Idli fry and Moru Kachiyathu (Curry made with well beaten yoghurt (curd))


Recently I had some left over Idlis that had become hard as stone after a day in the fridge :D .... What I often do is I roast them on the stove by applying few strokes of oil using a brush (I found this method of using a brush to apply oil better than spoon). This time I wanted to use these idlis in a different way. Hence I thought of baking these Idlis in a way similar to making Oven Baked French fries. The result surprised me as the look made it hard to differentiate it from French fries , and the texture was crisp and maybe even better than oven baked potato fries! If you add some seasonings before baking these, the bland taste of idli will be improved :) Here is how I made it:

Ingredients:

Left over Idli (cut into long pieces like in French fries)
Oil (you may use spray can oil , so that less oil is used )
Seasonings and salt to taste


Method:
  1.   Preheat oven to 400 deg F.
  2.   Spray the Idlis with the oil and combine the Idlis with seasoning and salt
  3.   Arrange these on a oven proof tray laid with Aluminium foil
  4.   Bake in the preheated oven upto 30 minutes (depends on the oven) while turning the tray during half time
  5. Serve along with ketchup or as is :) Done !


Moru Kachiyathu
-------------------------------

Unlike my V, I was never a fan of curd when it come to having it as is along with rice. But Moru Kachiyathu always tempted me to try curd. So when I felt like having it one of these days, I searched the Internet and found this simple recipe b Annita of My Treasures and My Pleasures who made it even more tempting by saying that this goes well with not just rice but various other dishes that accompany rice.


The only change I made to her recipe was the tampering ingredients where I added Okra (Ladies Finger, Bhindi) along with the tampering in the hot oil and fried until everything turned brown  (tip from fil ;-)

Monday, May 3, 2010

Tomato chutney and 4 years of completion !!


Well, first of all I would like to announce that 'My Kitchen Treats': my 'baby' has turned 4 years old !! :)..... I wanted to mention this milestone atleast this time as I have not acknowledged this occasion in the previous years. This blog has been a source of personal encouragement and motivation during innumerable occasions in my life. I would like to quote something here from the movie 'Julie and Julia' where Julie says (I don't remember the exact phrase, but the meaning can be summed upclose to this): "When things don't always turn out as expected in your daily life, ......there is always something you know for sure when you enter your kitchen, and that is, nothing can go wrong when you use the right ingredients in the right way to make a dish". I am sure at least some of you bloggers might agree to this. (Not that I have any plans to follow her path ;-) , just that I could relate very well to what she was telling). Iliked the movie and I had seen it just recently, hence remembered this sentence today....
Its not complete until I acknowledge, You, my readers , who have been always a source of great joy and encouragement until this milestone. It has been a wonderful journey, which I hope to continue with your support.

The picture below is from our Vishu day Vishukkani :) Thought this was a good occassion to display dear Krishna's photo here.


Coming to this recipe of Tomato Pickle, I would like to say that this was something I started to relish from my college days. The college hostel cafeteria served tomato pickles (don't know the brand as the same bottles were being re-filled over and over again). These tasted great with the afternoon meal or as a dip with Idli-Dosa or snack.

(pic below)A view of my indoor gardening experiments :) The biggest among them is the tomato plant. I am hoping to get at least one tomato this time. I have never been successful in the past. Hence this time I am giving my tomato plant special attention ;-)

The pic below shows my tomato plant in the background (the tomatoes are yet to come)


One of these past days, we bought Ginger Pickle 'Priya' brand and we both love every bit of it. I was inspired to make a similar pickle and read the ingredients. I didn't have enough ginger, hence settled for a similar pickle with tomato.

I used the same ingredients the pickle had, except that instead of tamarind I used a lot of tomatoes to make a Tomato pickle . Hence this chutney came into existence.

My hubby loves this chutney with Idli/Dosa. The version of tomato chutney I usually make has a lighter taste as it has fewer ingredients than this one. Here is how the recipe goes:

Ingredients:
  • Tomato : 3 medium sized ones
  • Onion: 1 small sliced into thick slices
  • Garlic: 1-2 cloves
  • Ginger : small piece
  • Jaggery : 1/4 cup
  • Fenugreek seeds
  • Mustard seeds : 2 teaspoons
  • Hing : 1/2 teaspoon
  • Dry red chilli : 5-8 medium sized
  • Salt to taste
Method:


  1. Fry all the ingredients except salt and jaggery, in the order of fenugreek,mustard seeds, red chilli, garlic, ginger, hing, onion,and tomato until the tomato becomes mushy and onion is cooked well.
  2. Then add jaggery and stir well to combine. Switch off fire.
  3. Allow mixture to cool
  4. Grind it to paste in mixie without adding any water. 
  5. Add water towards the end while emptying  the paste out of the mixie.
  6. Add salt to taste. Done :)

Monday, April 5, 2010

Bittergourd Potato dry curry (in konkani: Karathe ukkeri, in malayalam: Pavakka Mezhukkupuratti)


Basically this dish is made only with Bittergourd. But if you want a richer taste to go along with the bittergourd, potato can be added. I always add potato to this curry because its become a hit with my husband. He loves the caramelized well done flavor of potato and bittergourd combo in this curry. Water is a strict no-no in such curries as it can make the curry mushy.

I make this to go with hot rice, dal, rice soup (the water in which the rice is cooked), and some homemade crisps (these are called vattal in malayalam , mostly the ones I eat are made by my mom, she makes these from so many varieties of veggies, such as okra, cluster beans, etc..)...it tastes heavenly and the term Comfort Food stands out in such dishes :)

Ingredients:

  • Bittergourd - 2
  • Potato - 2 
  • Green chilli slit - 3
  • Salt
  • Oil - 1 teaspoon
  • Mustard seeds - 1 - 2 teaspoon


Method

  1. Slice the bitter gourd into small long thin slices, each slice about a little smaller than your tiny finger
  2. Slice the potato the same way 
  3. In a hot pan, add oil, reduce heat and add mustard seeds and green chilli, saute until the green chillies get small white patches (meaniing they are fried a little), then add the bittergourd and potato.
  4. Turn up the heat to medium and give everything a stir. 
  5. Add a little salt (not the amount you require at this point as its sometimes better in such cases to add the salt towards the end of the curry), so that it helps the water in the vegetables to ooze out and help the cooking process without any additional water. Give it a stir. 
  6. Then keeping the fire at medium-low cover the pan and let it cook until the vegetables are almost cooked (especially the potato). In between the cooking time, stir the pan one or two times to avoid any food to stick to the bottom of the pan, also check for salt, when the veggies are getting to almost cooked stage, this helps adding the right amount of salt. 
  7. When the veggies are cooked, turn the heat to medium-high and give it a stir. After a minute, stir again and if you find that the potatoes are a bit caramelized (some of the bittergourds also will be caramelized), switch off the heat, give a final stir to the veggies and put back the lid. 
  8. This is best served hot as a side dish.

Thursday, March 4, 2010

Raw plantain coconut dry curry (Ethakka thoran)

I don't remember when was the first time I ate this dish. But sure enough it captured its place in my mind. After marriage, until now, I always used to either fry the chips of Raw plantain or make a simple curry with just salt and little water. I wanted to make something else with it and hence remembered the coconut version of this curry. In malayalam, when grated coconut is added to any vegetable to make a dry curry, it is either called mezhukkupuratty (à´®െà´´ുà´•്à´•ുà´ªുà´°à´Ÿ്à´Ÿി ) or thoran (à´¤ോà´°à´¨്‍), mostly thoran.

Thoran is a versatile dish as it can be altered to use a variety of vegetables, like cabbage, spinach, carrot, beans, or combination of vegetables. The main ingredient common to all thoran is grated coconut.

Here is the recipe:

  1. Raw plantain cut into small thin square slices. (Before you cut a raw plantain, scrub the outside skin lightly for removing dirt, make sure you have a big bowl of water to put the slices in. ) : 1 medium sized plantain
  2. Grated coconut : 3/4 cup
  3. Turmeric : a pinch
  4. Red chilli powder : 1 teaspoon 
  5. Garlic minced : 2 cloves
  6. Tampering: 1 teaspoon each of mustard seeds, cumin seeds, fenugreek seeds, urad lentil
  7. Pinch of asafoetida
  8. Salt
  9. Water : just enough to cover the plantain slices while being cooked


    Method:

    Usually with other vegetables used in thoran, water is not used , and most of the times, all the ingredients (except the tampering) is pre-mixed and cooked together. But since raw plantain requires a longer cooking time, it is cooked until tender with a pinch of salt and very little water.

    1. Cook the plantain in very little water (just enough to cover the slices) until soft and tender.
    2. Wait until the water is all absorbed (the heat can be stepped up a notch , to quicken the process, but keep an eye to prevent any burning of the plantain)
    3. Now mix the plantain with coconut, garlic, turmeric, red chilli powder, and salt . Combine everything well with hands, taking care not to mush the plantain slices. 
    4. Now add a teapoon of oil to a hot pan, lower the heat, add the tampering and asafoetida. Saute for 5 seconds. Then add the plantain coconut mixture. 
    5. Stir well to combine everything.
    6. Close the pan with a lid, keep fire on medium. Wait for everything to be cooked and allow the flavors to combine. 
    7. After 2 minutes, open the lid and combine everything again, at this point check for salt. Close the lid, increase heat to medium -high for 30 seconds. This is to get a nice light caramalized coating on the thoran. Switch off the heat, Open the lid, give everything a final stir , put the lid back on. Best served when hot.

    Monday, July 27, 2009

    Lauki (Bottlegourd), Breadfruit (Sheema chakka or Kadachakka) Erisseri


    I had recently purchased Lauki (Bottlegourd) for the first time. I had seen a lot of blogs posting recipes with this wonder vegetable, so I wanted to try it too. Recently I got a nice piece of Breadfruit from my cousin's place. So I wanted to make something special. Hence this Erissery came up in my mind. Here goes the recipe:

    Ingredients:

    1. Lauki and Breadfruit cut into cubes - 2 cups
    2. Canned Beans (or pressure cooked beans) any variety, I used Pink Beans - 1 can/1 cup after cooking: reserve 1/4 cup to be used for grinding (as told below)
    3. To grind to a paste:
    • Grated coconut: 1 cup (save some for garnishing at the end)
    • Garlic and Ginger
    • 1/4 cup of canned Beans (any variety can be used, I used Pink Beans)
    • Dry roasted Cumin powder (1tspn), Coriander powder (1tspn), 5-6 Dry red chilli
    4. For tampering:

    • 1 tablespoon methi seeds
    • 1 tspn mustard seeds
    • Hing (Asafoetida) : a pinch
    5. For the tangy flavor: Make a thick paste (approximately 1/4cup) of tamarind soaked in hot water.
    6. Salt to taste and water as needed for gravy


    How to make:

    In a deep bottom vessel, on high heat, add 1 tablespoon oil. When the oil heats up, lower fire to medium and add all the tampering, then add the vegetables and fry them until they are a bit soft on the outer. then add sufficient water to cook , wait for the water to come to a boil and then close the vessel and let it cook. Add salt when they are almost cooked, that way you don't add more salt. When the vegetables are completely cooked, and there is just the right amount of water for gravy, add the ground paste, remaining canned beans and stir well. Then cook for 2 more minutes. Now add the tamarind pulp and stir again. Check for salt again. Cover cook for another minute and then switch off fire. Sprinkle the remaining grated coconut. Serve hot with Rose Matta rise like I did :) or with any other variety of rice.

    Tuesday, November 25, 2008

    RM2- Day 25- Kuch Khatta Kuch Meetta Malai Kofta :)

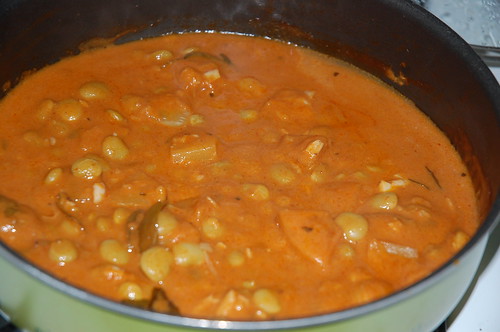
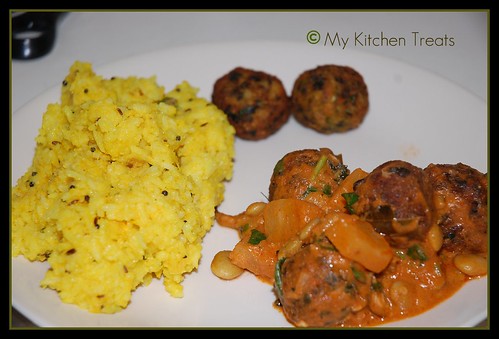
    I was tempted to try making Malai Kofta after a recent Potluck at a friend's place. I was impressed with the Malai Kofta made by one of the ladies. Malai Koftas are deep fried or baked Vegetable /Meat dumplings in a thick creamy sauce. Its the first time I tried Malai Kofta today and I am glad to say it came out really good :) I didn't have the usual Cream, so I decided to substitute it with Cream of Coconut (I named it Cream of Coconut because it looked like cream when the Canned Coconut milk solidified when I refrigerated it.
    Khatta means "Tangy" and Meetta means "Sweet" , and the ingredients I used for giving it these tastes are a combination of Tomato paste and diced Pineapple. I was anxious initially if the taste of coconut milk would be appropriate forMalai Kofta, but I was craving for this dish and hence decided to go along with the ingredients I had. I didn't want to use just plain milk. This is how I made it:

    Ingredients:

    For the Kofta
    ============

    2 cups mixed vegetables: I used peas, carrots, beans, cauliflower, spinach
    1 medium potato cooked and mashed
    Ginger garlic paste- 1 T
    Minced green chillies
    2 T Besan (Chickpea flour)
    Bread crumbs: 1/2 cup
    1/2 cup grated Cheese (I used Gouda Cheese, as that's what I had as cheese in my refrigerator)
    Salt and Pepper
    Oil for deep frying

    For the gravy
    ===========

    1 cup coconut milk
    1/2 cup diced pineapple
    1/2 cup tomato puree
    Onion powder (you may use sliced onions and caramelise it before adding the tomato puree to the pan)
    Mashed Garlic and minced ginger-1/4 cup together
    Fennel seed powder : 1/2 teaspoon
    Asafoetida: a pinch
    Coriander powder, Cumin powder: 1/ 2 tspn each
    Green chilly slit in middle: 4 nos
    Garam masala, Coriander leaves (chopped), Pudina leaves (chopped): for garnish
    Water: 1 cup
    Curry leaves - 3-4


    Method:

    For making Kofta
    =============
    Cook the vegetables partially. Drain the water and wipe them dry as much as you can. Chop them very finely (I used my chopper). Add all the other ingredients and mix them well. Form small balls (size of key lime) and deep fry them in oil and drain them on paper towels.

    Note: Koftas are added to the gravy only just before serving as they tend to break if soaked early.


    For making Gravy:
    ============
    In a flat pan on high heat, add 3 tablespoons oil and when its hot, reduce to medium and add all the spice powder (except Garam Masala). Add the green chillies, Curry leaves, Ginger, Garlic and saute until the raw smell goes off. Add the thickly diluted tomato puree and increase the flame and wait until the mixture starts to boil. Add the Lima beans (optional). Reduce the flame to medium and add little water, just enough to cover the Lima beans. Let the Beans cook. After it is cooked, reduce flame to medium-low and add thickly diluted coconut milk. Stir and add salt. Then increase flame a little and let the mixture heat up and then lower it . Then add Pineapple pieces and stir well. Add little water if the gravy becomes too thick. Keep flame at medium-low and cover the pan . Let the mixture cook for 3-4 minutes (lower the flame if the gravy reduces.Switch off flame and spread the garnishes.


    Add the Koftas and serve immediately with Roti, Naan, or even plain rice. I served mine with Lemon Rice :) . It had the subtle taste of Coconut milk accompanied by a tangy taste of Tomato and sweetness of Pineapple. The Koftas when mixed with gravy gave a richness to the dish.

    RM2- Day 25 - Check what my buddies are up to in their kitchen:

    1) Siri, 2) Srivalli, 3) Ranji, 4)PJ, 5) Curry Leaf, 6) Medha,
    7) Priya, 8) Bhawna, 9) Raaji, 10) Ruchii, 11) Anu, 12) Kamala,
    13)DK, 14) Divya Kudua, 15) Rekha, 16) Divya M, 17)Lakshmi,
    18)Raaga , 19) Lakshmi Venkatesh , 20) Sripriya, 21) Viji,
    22) Kamalika, 23)Pavani,>,24)Karuna,25)Roochi

    Saturday, November 22, 2008

    RM2- Day 22- Edamame, Spinach gravy


    I had written about Edamame in one of my previous posts. One of my readers asked me how it would taste if used in curries. I prepared a gravy using Edamame and Spinach. Edamame was very buttery and soft on the bite side and has a delicate flavor. I loved the combination with spinach. It gave a rich texture. Here is the gravy I made the base for which is the ingredients I made for the spicy Potato gravy which you may refer here. Just add Edamame and Spinach to it and you can have it with plain rice .
    Day 22 RM2: Check what my buddies have prepared :
    1) Siri, 2) Srivalli, 3) Ranji, 4)PJ, 5) Curry Leaf, 6) Medha,
    7) Priya, 8) Bhawna, 9) Raaji, 10) Ruchii, 11) Anu, 12) Kamala,
    13)DK, 14) Divya Kudua, 15) Rekha, 16) Divya M, 17)Lakshmi,
    18)Raaga , 19) Lakshmi Venkatesh , 20) Sripriya, 21) Viji,
    22) Kamalika, 23)Pavani,>,24)Karuna,25)Roochi

    Friday, November 14, 2008

    RM2- Day 14- Spinach Sambar

    I made this today in order to use up my left - over spinach. Added it to sambar and it gave a nice taste. Here is the recipe:

    Ingredients:

    Cooked and mashed thuvar dal - 1/2 cup

    Vegetables:
    Okra
    Green beans
    Spinach
    Carrot
    Potato
    Shallots

    Spices:

    Coriander powder - 1/2 tsp
    Chilli powder - 1 tsp
    Turmeric- a pinch
    Asafoetida - a pinch
    Tamarind paste - 1 teaspoon
    Cumin powder - 1/2 tsp
    Onion powder - 1 teaspoon

    Tampering:
    Oil- 1teaspoon
    Mustard seeds: 1 teaspoon
    Cumin seeds - 1 teaspoon
    Curry leaves - a few

    Garnish: Coriander leaves chopped


    Method:

    In a vessel on medium heat, pour 1 cup water and when it starts boiling, add all the veggies. If needed add more water. Add turmeric powder, chilli powder, salt, cumin powder, onion powder and stir to combine and then close the vessel. Then when the raw smell of the spices are gone, and the vegetables are almost cooked, add the tamarind paste and stir well. Then add the mashed thuvar dal and again close the vessel and let it simmer to cook all the flavors. Add the tampering and the garnish and sprinkle asafoetida and give it a little stir.


    Check what my other buddies have prepared:


    1) Siri, 2) Srivalli, 3) Ranji, 4)PJ, 5) Curry Leaf, 6) Medha,

    7) Priya, 8) Bhawna, 9) Raaji, 10) Ruchii, 11) Anu, 12) Kamala,

    13)DK, 14) Divya Kudua, 15) Rekha, 16) Divya M, 17)Lakshmi,

    18)Raaga , 19) Lakshmi Venkatesh , 20) Sripriya, 21) Viji,

    22) Kamalika, 23)Pavani,>,24)Karuna,25)Roochi

    Monday, November 10, 2008

    RM2- Day 10- Baingan Bartha (Mashed Eggplant curry)

    This is my post for RM2-Day 10. I made this today after three times of previously failed attempts.I have never had a good cooking experience with Eggplant (Brinjal/Bhaingan) as most of the times I have had improperly cooked version of the vegetable in all the dishes I made, except Sambar. Especially Baingan Bartha was always a mess. Recently I was experimenting with my oven broiler and making Baingan Bartha was never a problem after that.I had a perfectly charred Eggplant cooked evenly inside. I enjoyed mashing it with my electric masher. I also experimented mashing (10 sec microwaved) garlic, using a lemon squeezer. That was another trick I found useful :)


    Let me share the recipe now:

    Ingredients:

    Brinjal cooked as whole with skin - 1 medium size
    Onion sliced thin- 1 medium
    Curry leaves- 2-3 leaves
    Fennel powder- 1/2 teaspoon
    Green chilli- 2 slit in middle
    Green peas, carrots- 1/2 cup together
    Garlic mashed - 3 medium cloves
    Ginger powder - 1/2 teaspoon
    Coriander powder, Red chilli powder- 1/2 teaspoon each
    Tomato paste mixed with a little water to form a little thinner than the paste - 1 teaspoon
    Asafoetida- pinch
    Salt
    Oil- 2 tablespoons
    Garam masala - 1/2 teaspoon
    Pepper powder- 1/2 teaspoon
    Mint, coriander leaves chopped finely- for garnish

    Method:

    Peel the Eggplant after it is cooked. Mash it thoroughly with a masher.
    In a frying pan on medium heat, add oil and splutter green chillies, curry leaves, and add asafoetida, fennel powder, and Onion and saute for 2 minutes, make sure the mixture doesn't go dry. Adjust the flame accordingly. Then add the mashed garlic and mix again. Lower the fire and add coriander powder, red chilli powder and a little bit of salt. Mix well, then add the green peas and carrots and mix well. Raise flame a little more than low flame. Cover the vessel and let the ingredients cook for 2 minutes. Then add tomato paste that is prepared as I told in the ingredient section. Mix well. Then add the mashed Eggplant and mix it well with the rest of the mixture, Adjust fire accordingly so that the mixturedoesn't dry up too much. Cover and let the Bartha cook for 2 minutes. Check for salt. Sprinkle Garam Masala, freshly ground pepper, finely chopped mint, and coriander leaves. Switch off flame, give a light stir and cover for a minute before serving. This can be served as a side dish with roti, naan, chapathi, and poori


    My marathon buddies have cooked yum dishes in their blog too, so check their blogs :

    1) Siri, 2) Srivalli, 3) Ranji, 4)PJ, 5) Curry Leaf, 6) Medha,

    7) Priya, 8) Bhawna, 9) Raaji, 10) Ruchii, 11) Anu, 12) Kamala,

    13) DK, 14) Divya Kudua, 15) Rekha, 16) Divya M, 17)Lakshmi,

    18)Raaga , 19) Lakshmi Venkatesh , 20) Sripriya, 21) Viji,

    22) Kamalika, 23)Pavani

    Sunday, November 9, 2008

    RM2-Day 9-Spicy Potato Gravy (Thiksaniche Kukka Hummaan in Konkani)

    This is my post for RM2-Day 9.

    Ingredients:

    Potato: 2 medium sized, cut as long, medium thickness pieces
    Tomato paste: 1/2 tablespoon
    Salt
    Asafoetida
    Eastern sambar powder (optional) - 1 whole teaspoon
    Red Chilli powder - 1/2 teaspoon if you are adding Eastern Sambar powder, else, 1 teaspoon
    Onion powder- 1 teaspoon
    Water- 4 cups

    Tampering:
    Mustard seeds- 1 teaspoon
    Cumin seeds- 1 teaspoon
    Curry leaves- a few
    Oil- 1 tablespoon

    Method:

    Add water to a deep bottom vessel and place it on high flame. Add the potatoes when the water starts boiling, lower the fire to medium. Cover it. Add salt when potatoes are half done. Dilute the tomato paste in a little water from the bowl before adding it to the potato, to avoid lumps while adding it to the potatoes. Close the lid. Turn flame to high. When the potatoes are done, add the Eastern Sambar powder and onion powder and mix well and close the lid. Reduce fire to medium low, mash most of the potatoes to create a richness to the gravy and close the lid and let the gravy simmer. Meanwhile prepare the tampering by adding mustard seeds, cumin seeds, curry leaves to the heated oil . Add this tampering to the gravy and switch off the flame. Add asafoetida and stir well. Serve it as a side dish with Dosa, Idli, Upma.

    See what my other marathon buddies are doing in their kitchen :
    1) Siri

    2) Srivalli

    3) Ranji

    4)PJ

    5)Curry Leaf

    6)Medha

    7)Priya

    8)Bhawna

    9)Raaji

    10)Ruchii

    11)Anu

    12)Kamala

    13)DK

    14)Divya Kudua

    15)Rekha

    16)Divya M

    17)Lakshmi

    18)Raaga

    19)Lakshmi Venkatesh

    20)Sripriya

    21)Viji

    22)Kamalika

    23)Pavani

    Please do not copy

    All contents in this blog cannot be copied without written permission from the blog author.

    LinkWithin

    Related Posts with Thumbnails
    baby