Tuesday, November 28, 2006

Bhaingan fry (eggplant fry)


My Mangalorean friend Akshatha, recently send me a recipe for Bhaingan fry. I tried this and it came out good. I love Bhaingan fry. So here I am sharing it with you the recipe, my friend gave me along with the pictures of how she made it in her kitchen.
Ingredients:
------------------

Bhaingan (Eggplant)
Chilli powder: 1 tsp
Rawa: 1 tblsp
Asafoetida (hing) : as per taste
Oil
Salt

Method:
-----------
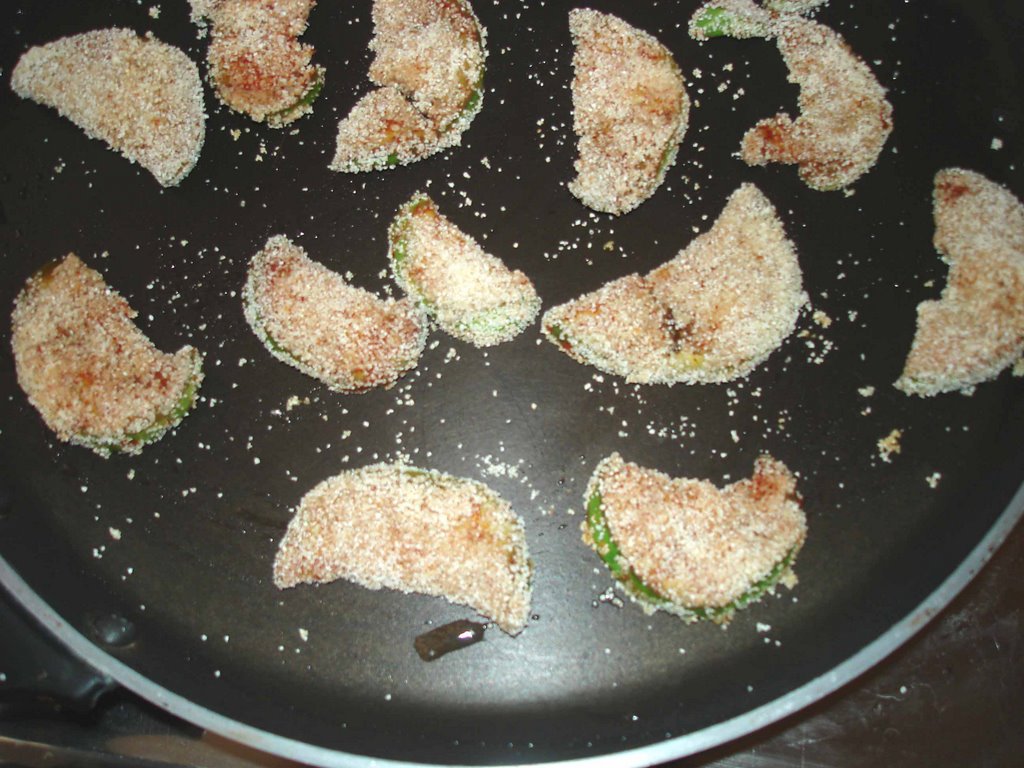
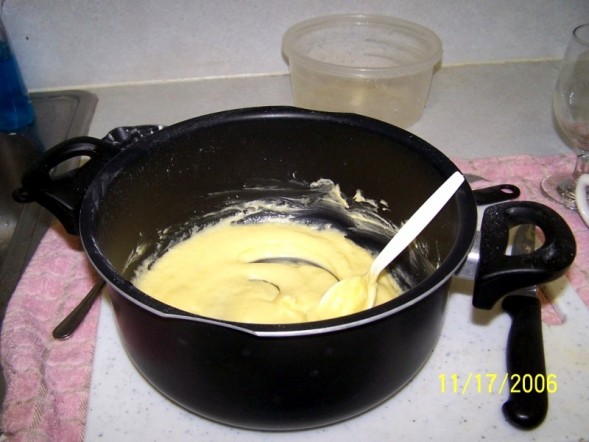
  • Mix chilli powder, asafoetida, & salt per taste with a little warm water to form a dry paste
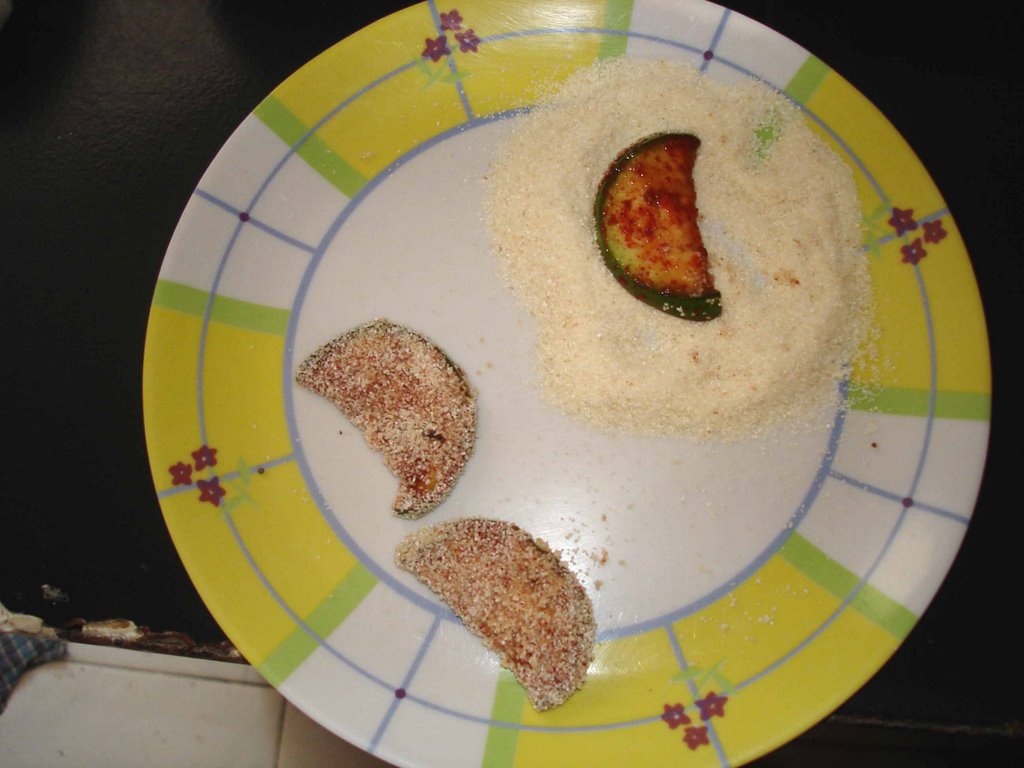
  • Slice the bhaingan into thin semi-circular pieces
  • Apply the paste to the sliced bhaingan
  • Heat frying pan (or tawa) and put a little oil
  • Dip the bhaingan pieces in rawa to form a coating over the entire surface and place on the tawa, cook on a low flame
  • You have to keep roasting the bhaingan until it is cooked, keep changing over the sides while doing so
  • Serve along with rice, or chappatthi

****FYI: To make a similar dish with potato, or bhindi, cut into semi-circle shaped thin slices (for bhindi, cut lengthwise) and then follow the same method above.

Monday, November 20, 2006

Carrot cookies

Mixing butter and sugar

Beating the egg white until stiff peaks form

Sieving the dry ingredients before combining with the wet ingredients


Combining flour to the wet ingredients


Adding shredded carrots
Mixing everything
The final dough


The cookie after baking
After decoration
The final product :)

Well, carrot has always fascinated me be it in terms of its color or its taste or the different dishes you can make with it. When I was a child, I never knew that carrot could be used to prepare other dishes apart from the dishes of "thoran" , "avial", "sambhar", "ghassi", in which my mom used carrot along with other veggies. It was our neighbour who made me interested when she prepared "Carrot payasam" one day. It was soo.. tasty that I wanted more and made one myself shortly. So when I came upon Carrot cookies, I thought why not give a try. Here is the recipe: My cookies turned out to be soft when I was expecting the harder version. If anyone knows how to make these cookies hard, please share it with me.

Ingredients:

  1. 1 cup butter
  2. 1 cup sugar
  3. 2 tablespoons orange or lemon zest
  4. 1 egg
  5. 1 1/2 cups grated carrot
  6. 2 1/2 cups all purpose flour
  7. 2 teaspoons baking powder
  8. 1 teaspoon vanilla extract
  9. 1/4 teaspoon cinnamon

Method

  • Preheat 375 deg F. Grease the baking vessel
  • Cream butter and sugar
  • To this add the orange or lemon zest
  • Combine together the dry ingredients (flour, baking powder, cinnamon) in a seperate bowl
  • Seperate the egg yolk and white. This step is optional. You can add egg just like that. Adding the egg white at a later stage after its beaten until stiff, incorporates air into the dough
  • Add the egg yolk to the butter-sugar mix
  • Add to this a little of the grated carrot. Mix using a stirring spoon used for cooking
  • Add some flour. Mix again
  • Repeat the above 2 steps in the same order until all of the carrot and flour is used and combined well. Take care not to stirr too well as this might cause the air bubbles to escape
  • Beat the egg white using a electric beater until stiff peaks form
  • Blend it with the rest of the cookie dough gently
  • Combine vanilla
  • Make small cookie shapes out of the dough and place them on the baking vessel
  • Bake for 12 minutes or until the cookie is done
  • Let it cool completly

Carrot cake


Ingredients:
1 cup flour
1 1/2 teaspoon baking powder
1/2 teaspoon cinnamon
1/2 teaspoon salt
1 1/2 cups grated carrots
2 eggs
1 cup sugar
3/4 cup vegetable oil
2 teaspoons vanilla
Method
Combine flour, baking powder, salt, cinnamon in a bowl. In a seperate bowl, beat eggs, sugar, and oil. Slowly ad flour. Blend in vanilla, and carrots. Bake in 325 deg F for 35 minutes. Check for doneness by inserting a knife which should come out clean.

Frittata (Italian omelet)


Well, the first time I heard of Frittata was in a sitcom on TV called "Everybody Loves Raymond" which I started watching after I came to US. I didnt give much thought to it as the humour part of the sitcom was way too good hehe ....It was one of my husband's cousin who got me interested. She told me it was really easy to prepare it. I searched on internet to see how it looks and that got me determined to make it. It may not look always the same as the above pic as its not always made in oven. Its made on the same pan, u make omelette. But I wanted a reason to start using my new silicon baking pan. So I made frittata in the oven. And it came out really well as you can see above. Almost looks like a pizza right? ;)
Let me share the recipe: This is for a chicken-brocolli-potato frittata. You can omit chicken if you dont like. But the egg should not be skipped (maybe u can use a substitute, i haven't tried though), else it wont be a frittata (italian "omelette") . The time taken may be more, but worth waiting :)
Ingredients:
  • 1 cup diced potato
  • 3/4 teaspoon butter
  • 1/2 teaspoon garlic (i add more coz i like the taste of garlic in the dish)
  • 1/2 onions diced
  • 1/4 cup all purpose flour
  • 1/2 cup milk
  • 2 eggs
  • 1/4 cup chopped brocolli
  • 1/4 cup sliced mushrooms
  • 1/2 cup shredded cheese (you can skip it if you dont have cheese or if you dont like it)
  • 1/4 cup cooked chicken (optional) , you can use cooked ground turkey too if you are on a diet plan to avoid chicken

Method

  • Preheat oven to 350 degree F
  • Cook potato until firm
  • Melt butter in oil
  • Saute garlic, and onion
  • Mix flour, milk, and eggs in a bowl
  • In another bowl, mix potato, garlic, onion, flourmix, mushroom, cheese , and chicken
  • Transfer to baking dish
  • Bake for around 55 minutes till eggs are properly cooked or a knife inserted in the frittata comes out clean

Your frittata is ready!

Wednesday, November 15, 2006

Warm from the oven


I always wanted to bake a cake or at least be a viewer when someone is baking a cake, because I loved cakes from the time I remember the Christmas days when one uncle (i don't seem to remember what i used to call him then) , used to always deliver cake to our house when Christmas time was nearing. It was like a reflex action for me to think those days when someone knocked during Christmas days , that it is the "cake uncle" :) .....I used to gladly collect the cake and give him a full fledged smile to show that I am very happy that he gave the cake to me. My mom could not bake as there was no oven in our home that time. But I used to listen to her very keenly how it is made. Though I knew the method, I never tried baking until after I got married. I am really grateful to my sweet husband who also encourages me in all my cooking experiments. If not for that encouragement, I would not even have the interest in starting such a blog. My hands on experience in baking cake had been a disappointment until recently. I am glad I learned from my mistakes while baking in the past. I did a lot of research on Internet and learnt what went wrong all this time. And recently I decided that I would try baking a simple cake for one last time before deciding that cake is not "my cup of tea" :)) ......glad to say that I indeed found the secret key to bake a simple cake. Now before I share it with you, let me say that this cake has eggs, but I will be including a egg less cake recipe as soon as I make one in my oven:) ........So here is the recipe:


Ingredients:

-------------


  • 1/2 cup butter

  • 1 cup white sugar (powdered sugar)

  • 1/2 tsp vanilla extract

  • 2 eggs

  • 1 1/2 tsp baking powder

  • 1/2 cup milk

  • 1 1/2 cups flour

  • 1/ pinch salt

Method:


  1. Preheat oven to 350 degree F

  2. Grease and flour the baking vessel. I use a silicon baking vessel which bakes uniformly. But it is enough if you have a good baking vessel.

  3. Using a mixing spoon, cream butter, and sugar in the vessel in which you are planning to make the cake dough. When it is being creamed, the sugar completely mixes with the butter and eventually melts into it.

  4. Mix vanilla to this mixture and again mix it using the mixing spoon until well combined. The reason why I am mentioning the mixing spoon repeatedly is because this is very important. During my previous baking trials, I was using a electric beater to mix the cake ingredients, and it never tasted sweet. In fact it got beaten too much. The main thing in making cake is the correct proportion of the ingredients. So it is always good to have the set of measuring spoons and cups while baking cakes.

  5. After the vanilla is mixed, separate egg yolk and whites. Add yolk one at a time to the mix in the previous step. Blend it well using the mixing spoon.

  6. Measure baking powder in the flour and combine both of them in a sieve. Don't forget to keep a vessel underneath the sieve while combining the baking powder and flour. Also don't forget to add the flour in this vessel to the mix in step 3 , after all the flour in the sieve is added. Remember what I told about proportion? Its important not to leave any remaining flour in any vessel.

  7. Sieve a little of the flour mix into the mix in step 3. Again blend it well with the spoon.

  8. Add a little of milk and blend it again.

  9. Repeat the process in step 7 and 8 alternately until all the flour and milk is blended into the mix.

  10. Beat the egg whites which were separated in step 5 until stiff peaks are formed. Now this step can be done with a electric egg beater or manually. When the stiff white peaks are formed, it is ready to be blended with the mix.

  11. Blend the beaten whites , gently , with the mix. Use a folding action while blending the egg whites. Using a mixing spoon, starting from the center, fold the mix, from center to outside, just like in concentric circles in a whirlpool. Its again important to note that the egg whites should never be mixed very harshly with the cake mix.

  12. Add a dash of salt and blend it well.

  13. Pour the cake batter in the greased and floured baking vessel and bake for 25 minutes or until a toothpick inserted in the cake comes out clean. Another thing to be noted is, do not peek in the oven by opening the door until the time specified in the recipe. Each time you open the oven door, the temperature varies. If you have a oven light, leave it on, so that you can see the baking process. If not, I guess its better to wait patiently:)

  14. After the cake is done, remove the cake from oven and let it cool in the baking vessel. You can start cutting the cake or decorating with frosting once the cake cools.

  15. There is something else I would want to share with you from the research I did on baking, and that is, if the recipe for cake mentions baking soda or baking powder, do not directly substitute one for the other as it affects the taste and texture of the cake. Both baking powder and baking soda are two different chemicals. I used baking soda for the first time when I was trying to bake this cake and it turned out to be bitter. If you are short of baking powder, you may use baking soda + buttermilk. I hope that you bake a wonderful cake for your near and dearest ones this Thanksgiving. Have a wonderful Thanksgiving and Christmas filled with joy, hope, and warmth!

Friday, November 3, 2006

Basic potato curry


Yesterday, I didn't have enough vegetables to cook anything special for dinner. But lucky me, I had potatoes, onions, and tomatoes. What more do I want, as my husband's dinner would be fulfilled with his favorite vegetable - potato:) .....so I decided to post it here as a bachelor recipe, because my husband also used to prepare this when he was a bachelor. So here I am including one of the simplest curry anyone new to the kitchen could make:) , its that simple.

Ingredients:
------------------
  • Potato : 1 large no
  • Onion: 1 large no
  • Tomato: 1 large no
  • Turmeric powder: 1/4th teaspoon
  • Chilli powder: 1/ teaspoon
  • Coriander powder: 1/2 teaspoon
  • Asafoetida (hing): 1/4 th teaspoon
  • Mustard seeds: 1 teaspoon
  • Cumin seeds: 1 teaspoon
  • Fenugreek seeds: 1 teaspoon
  • Garlic: 1 small piece
  • Ginger: i small piece
  • Curry leaves for garnish
  • Oil
  • Salt

Method:

-------------

  • After cleaning the vegetables, cut all the vegetables into very small pieces.
  • Heat a tablespoon of oil in a vessel. Add mustard seeds, cumin seeds, fenugreek seeds and curry leaves. Let it splutter. Add minced garlic, onion, and tomato.
  • Stir for 2 minutes
  • Add the rest of the ingredients except for the potatoes. Keep stirring uniformly
  • When the onion and tomatoes cook well, they form a paste. At this point add the potatoes and stir well. Add 1 cup water and keep the flame to medium.
  • Cover the vessel and wait until the potatoes are cooked. This can be tested by pricking with a knife or fork, if the potato crumbles and falls apart easily, it means, it is cooked
  • Garnish with coriander leaves
  • Serve as side dish along with chappathi , or rice

Wednesday, November 1, 2006

Sprouted Moong dal Curry


Sprouted lentils are a common ingredient in diet foods. These are used in salads, soups, curries etc.. These are good sources of dietary fibre. The first time I learned and saw about sprouted moong was from my mom. My mom is very particular when it concerns our health. Till date, I have her golden advices about health related topics. She used to make sprouted moong and I on the other hand had a fascination to eat the raw sprouted moong. She somehow was not found of the raw taste, nor did my brother. But she liked the fact that I used to eat the raw ones as they are very healthy. I was also very fascinated when I saw the sprouts coming out of the moong dal. Those days, she used to wake me up telling, "Don't you want to see what happened to the moong dal you soaked in water?" and I would eagerly come to the kitchen rubbing my eyes......Missing those days now.....Now to add to my surprises and my happiness, my husband also loves sprouted moong. In fact he prepares it himself. And like me, early morning, he checks what happened to the moong, as if they were his kids :), so cute. I made this curry with green moong which is a favorite of my husbands, and so is mine. We in konkani call it "kirlailene moogache ummaan" ...long name huh? :) ....lemme share the recipe now.

Ingredients:
-----------------

Green Moong dal: 1 cup
Water for soaking

For curry:
----------------

*Potato: 2 medium sized
Mustard seeds: 1 teaspoon
Tomato: 1 medium sized
Curry leaves: a few
Green chilli: 2 - 3 nos
Coriander powder: 1/2 teaspoon
Cumin seeds: 1 teaspoon
Ginger: 1 small piece
Salt
Oil

Method:
-------------

  • Soak overnight green moong in water
  • The next day drain the water and leave it until all the sprouts come out. It might take a few more hours
  • When all the sprouts come out, it is time to make the curry. Heat one tablespoon of oil in a pressure cooker. Chop the vegetables. Add all the curry items. Mix them well.
  • Add the sprouted moong dal and stir again.
  • Add sufficient water for cooking in the pressure cooker
  • Cook for 1 - 2 whistles
  • Serve along with rice, or chappathi

* People who are diet conscious can avoid potato if they do not want it in the curry. I add it because my husband loves the taste of small pieces of potatoes in this curry. Its worth adding it if you want.

Onion Utthappam


This is a dosa variety which is enjoyed by many. My mom would make this as a special breakfast on Sundays. I fondly remember me, brother, and my dad relishing taste of this dosa while watching Mahabharat serial on Sunday mornings :) ...it tasted so good as my mom used to make it very crispy. After marriage, it took me a while to know the exact way to prepare crispy and tasty dosas. Thanks to my husband who never complained about my previous versions of dosas :)) So here , after many r&ds , I am sharing with you what I learned about preparing good dosas in this recipe for onion utthappam. You can make it in the comfort of your own home rather than spending a lot in restaurants. So here is the recipe.

Ingredients:
--------------

Urad dal: 3/4th cup
White rice: 2 cups
Onion: 2 nos
Green chilly: 3-4nos
Sprouted green moong (optional)
Salt
Oil

Method:
-----------

  • Soak urad dal and rice separately in lots of water for 4-5 hours
  • After that, grind urad dal with a little water (the water should just cover the urad dal when you grind it in a mixer (I dont have a grinder. So I grind with mixer (blender)). The water that was used to soak urad dal can be used here. Make sure that you grind it part by part, so that the mixer is not overloaded and this also ensures that the urad dal is well ground.
  • Transfer the contents after grinding to a large vessel (large enough for the fermentation to take place).
  • Grind the white rice part by part with the same amount of water as was used to grind urad dal. The water used to soak the white rice can be used while grinding.
  • Transfer the contents after grinding to the same vessel in which the ground urad dal was transferred.
  • Mix both the ground contents very well until a few bubbles start appearing
  • Add 1 teaspoon of salt and mix it well again
  • Cover the vessel and leave a little vent.
  • If you are in India (or in a tropical area), there is nothing to worry about the fermentation process. So you can just leave the batter overnight for fermenting at room temperature itself.
  • If you are residing in a colder area, you may ferment the batter inside an oven. Preheat the oven to 250 degrees F. Switch off the oven when the oven indicator light turns off the first time. Leave the oven door open for around 2 to 3 minutes. Transfer the vessel with the dosa batter into the oven. Wait for another minute before closing the oven door.
  • After closing the oven door, if you have a oven light, switch it on and let it remain that way overnight. This is a good idea as the warmth of the light can help the fermentation process even after the oven temperature gets colder. The fermentation may take place properly by the next day afternoon.
  • After making sure that the fermentation process is done, mix the batter a little.
  • Transfer it to the fridge if you are not making dosas immediately.
  • To make utthappam, cut onions into very small pieces. Mince green chilly to very small pieces. Mix onions and chillies with a little salt. Also have the sprouted moong dal ready.
  • On low fire, spread a teaspoon of oil on the tawa, pour one ladleful full of batter and spread it evenly . Do not make the concentric circle as you would make for usual dosa. Just make sure that the round shape of dosa is retained. Let there be a little thickness.
  • Add the onion - chilly mixture and sprouted moong dal evenly on the dosa.
  • Turn the fire to high. Cover the tawa with a plate. Let it cook for 2 minutes or until you can see that the dosa is fully done on the edges and half done on the top.
  • Flip the dosa very carefully to avoid the uncooked batter from breaking the dosa.
  • Do not cover the tawa anymore. Keep the fire medium. Wait for another 2 minutes, before transferring it to a plate. Keep the fire low before making the next dosa. This is important as a very hot tawa makes it difficult to spread dosa batter with the ladle. So wait for 2 minutes until the tawa is not so hot.
  • While making the usual dosas, the fire can be lowered once you flip the dosa. So that you need not wait until the tawa cools down a bit after you tranfer the dosa to a plate.
  • Serve with sambhar, or coconut chutney

Please do not copy

All contents in this blog cannot be copied without written permission from the blog author.

LinkWithin

Related Posts with Thumbnails
baby