Wednesday, May 21, 2008

Jambul and Badami Mushroom from Ranji's blog and Awards!!


This week is been my happiest week as I was surprised by my dear V, with something I never expected and also my dear fellow bloggers presented me with lots of awards, in fact this weekend is a special day for me. Also we are going camping tomorrow !! Hurray :) This will be the first time me and V are going camping by ourselves.

Let me start with my first award from my dear cousin Ranji of Ranji's Kitchen Corner who got the award for "You make my day award". You really made my day Ranji!!
I am passing it to

Seena of Simple and Delicious
Kamala of Mom's Recipes

Ranji and JZ of tasty treats passed on the "Nice Matters Award" to me, Thank you so much both of you:) I was floating in the air after reading the meaning of this award!! Thanks a lot again:)

Nice Matters Award is for those bloggers who are nice people; good blog friends and those who inspire good feelings and inspiration. Also for those who are a positive influence on our blogging world.


I am passing it to :

Roopa of Roopa's Recipes


Suma and Uma , Kamala presented me with the Rocking Girl blogger award!! Thank you so much :) !! it really made my day!!


I am passing to :

Roopa of Roopa Recipes
Sudha of Bombay Bistro
Vani of Mysoorean


Last but not the least, (this one put a big smiley :) , I got the "Yummy Blog Award" :) This I got from dear Ranji :) ..Ranji, thank you so much because I never expected I would get my own award ;-) Hugs to you!!

""Yummy blog award is the award given to the blog with most yummy recipes/photos" ....well I remember the last time I wrote that line on one of my previous post ;)

Let me state my favorite desserts again as the category is changed in my taste:

1. Kaju Katli
2.Palada Payasam
3.Gulab Jamun
4.Vanilla ice cream

I am passing it to :

Sangeeth of Art of cooking Indian food
Roopa of Roopa Recipes
Anamika-The Sugarcrafter
Vaishali of Happy Burp
Vee of Past,Present and Me


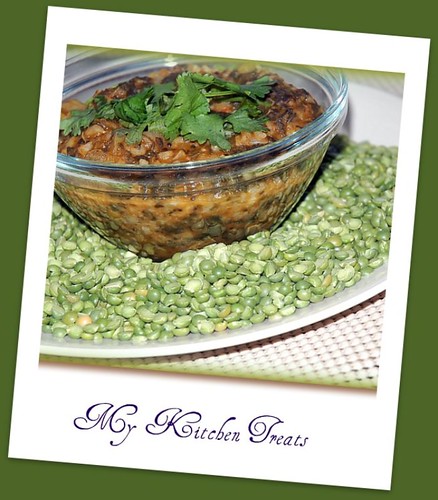
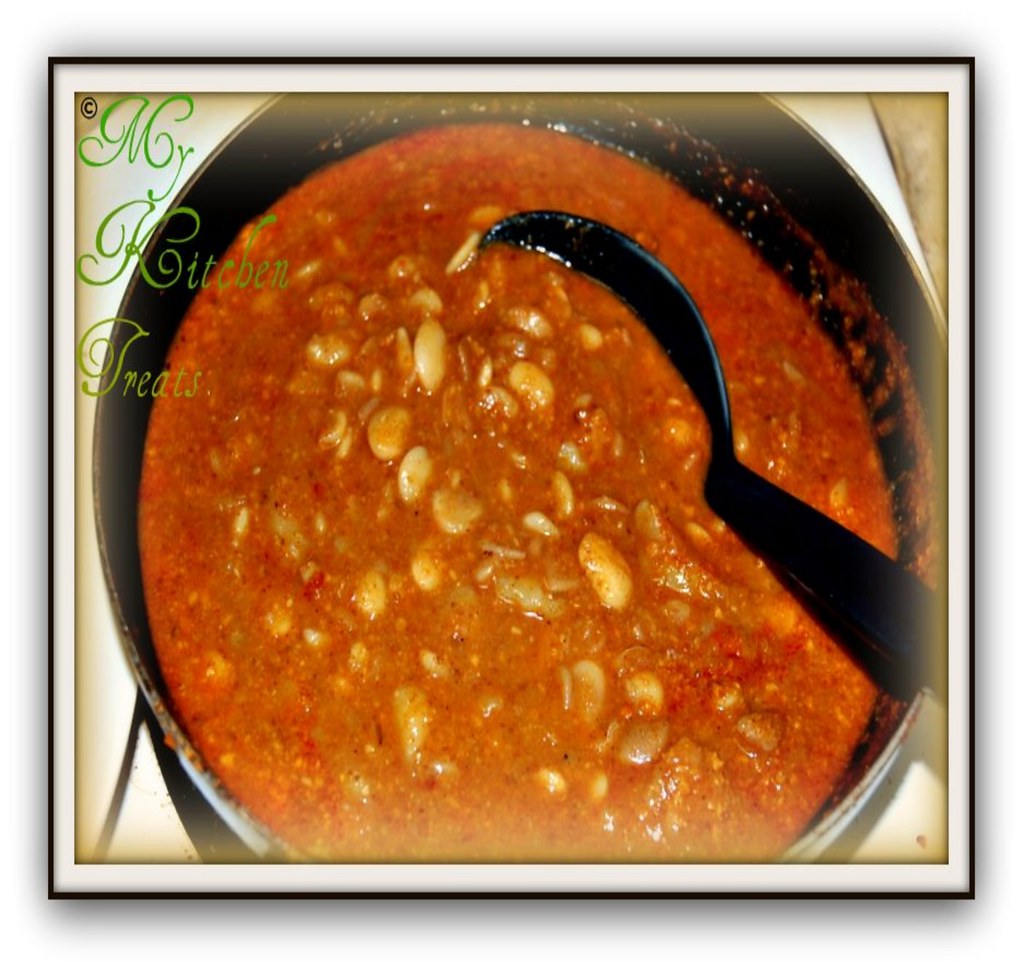
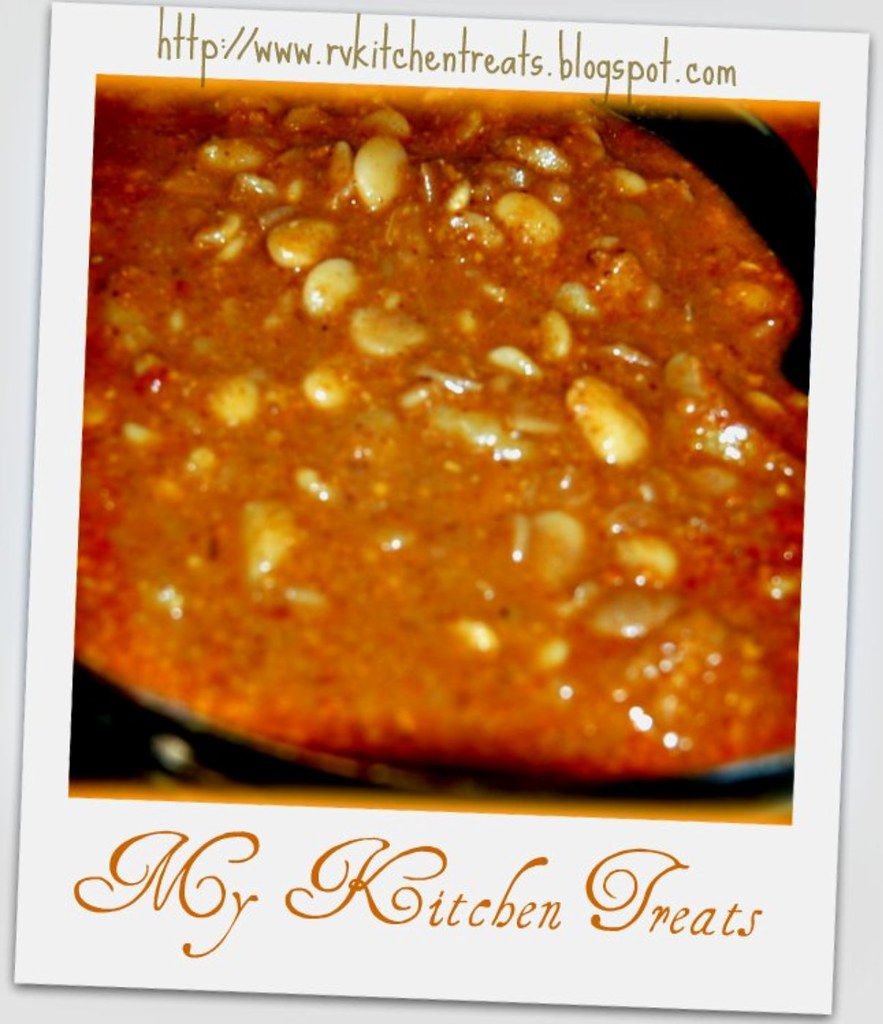
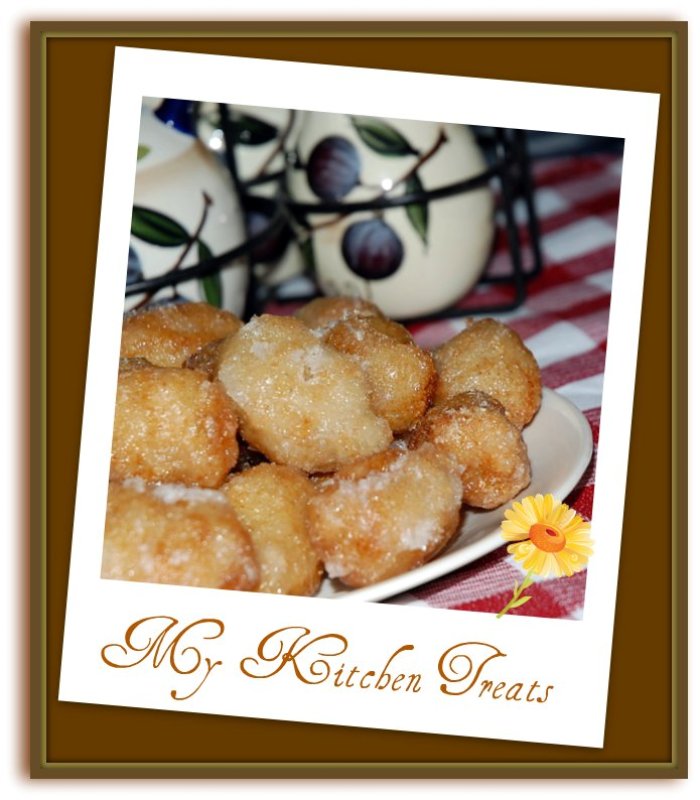
Coming to the treats from my Kitchen :) , I decided to try out some treats from "Ranji's Kitchen Corner" I made Jambul which is a Konkani sweet usually served during marriage feasts or other special occasions ...This was the first sweet I made in my new kitchen:) This Sunday both me and V were at home spending a quiet evening and V was in the mood to have some sweet. I was meaning to try these Jambuls as I never had it since I don't know when....long time back. You may refer Ranji's blog for the actual recipe. It came out well the first time I made them :)


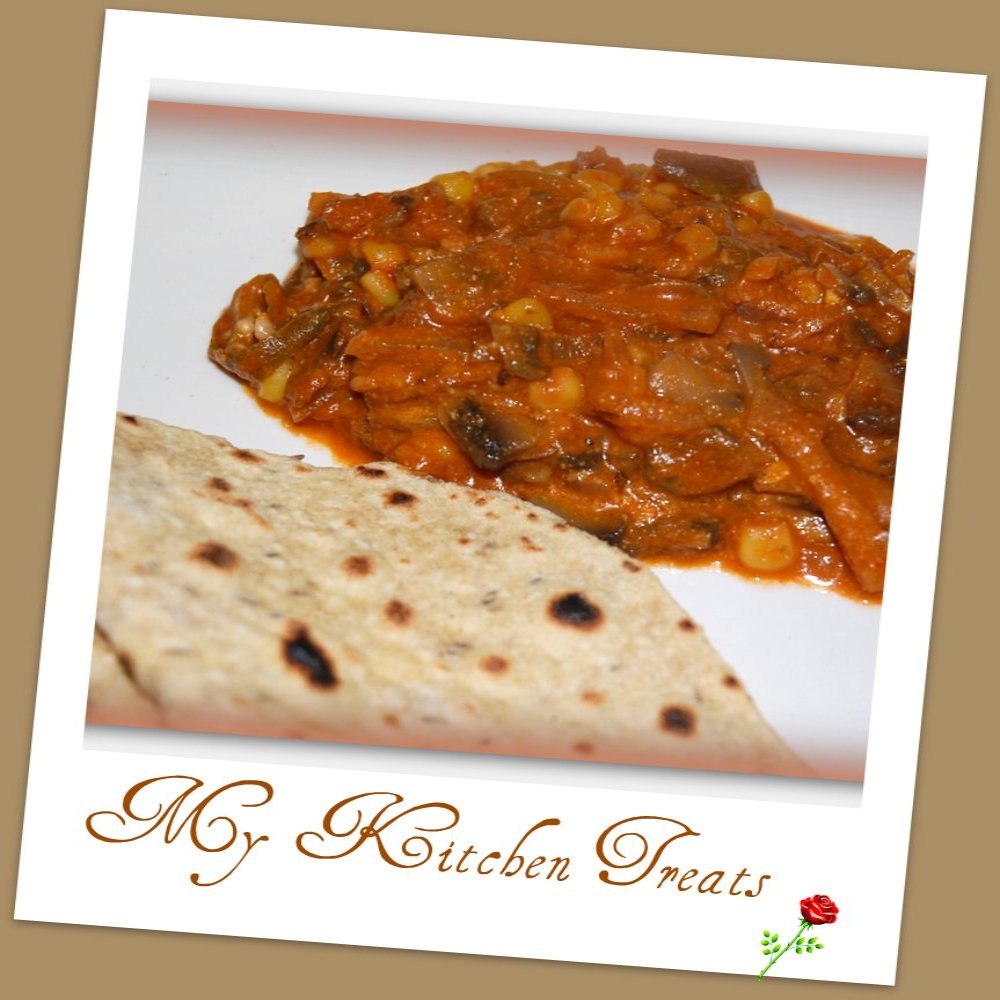
I also made her Badami Mushroom served with Jeera roti. I made a slight variation in the Badami Mushroom by adding a little of coconut milk. The taste was too good! These recipes can be found in her blog "Ranji's Kitchen Corner"


Whew....this was a long post :) but I feel happy about it :)

Tuesday, May 20, 2008

Green Split Peas stew

Hello dear readers !

Finally I got time to sit and post treats from my brand new kitchen :) Well I am so excited now, just to share my excitement I am now listening to our desi version of "Rigga digga song" while I am typing all this :)

We have finally settled in our new place. Though its in the same complex as our old place, it still feels different to be in a different building. I still haven't got adjusted to the alignment in this building , and I just laugh quietly by myself feeling embarrassed when I walk towards my old apartment by mistake :D Luckily I didn't try pushing my new keys into my old apartment which is now occupied ! :DD

Coming back to the Green Split-Peas stew , this was the first time I purchased this variety of lentils. I made this stew with soaked black beans and partly mashed potatoes for a thick gravy for the stew. It was both nutritious and tasty.

This is my entry for the "Click event - Beans 'n Lentils" hosted at Jugalbandi

Here goes the recipe:

Green Split Peas: 1 cup
Black beans (soaked overnight) : 1/2 cup
Partly mashed potatoes: 2 medium potatoes
Onion: 1 medium
Water: Just enough to cook the Black beans and Green Split Peas
Seasoning:
Coriander powder: 1/2 teaspoon
Chilly powder: 1 teaspoon
Salt: as per taste

Tampering:
Oil: 1 tablespoon
Mustard seeds: 1 teaspoon
Cumin seeds: 1 teaspoon

Garnish:
Coriander leaves: a few leaves


How to make:

1. Cook the Green-Split peas and Black beans together with just enough water to cook.
2. Mash the above beans a little after cooking and keep it aside.
3. Slice the onions and saute them in a deep pan, in a little oil until they turn light brown.
4. Add the cooked beans, salt, and the rest of the seasonings, stir well at high heat until the flavors of the seasonings mix up well.
5. Lower the fire to medium-high, add the mashed potatoes and a little water (maybe 1/2 cup). Mix it well with the rest of the mixture in the pan. Let it simmer for 30-seconds. check for salt, if needed add more.
6. Add the tampering and garnish with coriander leaves.
7.Serve it along with rice, roti.

Friday, May 9, 2008

On the move :)

Hi dear friends,

Me and V are shifting our apartment to a new one, so kind of busy in that. I am so glad to move to this new apartment mainly because of the size of the kitchen ;-)) .......You wont believe how tiny my previous kitchen was ! ....But have to admit that since it was my first kitchen that I owned and cherished, where I could cook whatever I wanted without restrictions from anybody, I will surely have a photo of it in my memories and in my album :) ......

Meantime, enjoy this video from youtube at the beginning of this page, I found it too good:) ..its a very amusing argument though you may not understand the language they speak ;D

Wednesday, May 7, 2008

Soyi Bajilli Gasshi

This is a Konkani vegetarian side dish made by preparing a spicy coconut masala paste called "Massolu". It is also an inevitable side dish served during temple feasts, marriages etc.. Though the basic coconut masala remains same, because of the various vegetables used to prepare it, its known by various names with the last word always Gasshi. I gave the name Soyi (grated coconut) Bajilli (roasted) Gasshi because I wanted to give the basic name of this dish.
The various veggies used in Gasshi are:

1.Potato
2.Dark Brown Chickpeas
3.Yam (Suran)
4.Carrot (this is not added as a main vegetable in Gasshi, but only as a extra vegetable)
5.Lima bean pulses
6. Pattani (dry peas)


I made it using combination of Lima beans and Potato. I had posted my Mangalorean friend's similar recipe a long time back. You may refer that too.

Ingredients:

Lima beans (soaked overnight): 1 cup
Water and little salt to cook Lima beans separately
Potato (cooked and cut in cubes): 1 big
Salt: as per taste
Water for gravy

For the "Massolu"
Grated coconut: 1 cup
Red Chilli: 4
Coriander powder: 2 teaspoons
Garlic (optional, I add it because I love it): 1 small piece

For tampering:

Mustard seeds: 1 teaspoon
Curry leaves: 3-4


How I made it:

1. Dry roast the ingredient , starting with grated coconut, red chilly and then at the end coriander powder. Roast on medium flame, be careful to not burn the grated coconut. Roast until the mixture turns a little dark brown. Switch off flame and let this paste cool.

After cooling, grind it without any water in a mixie, in small intervals until the paste starts becoming oily. In a separate deep pan boil 3 cups water. Add the cooked Lima beans, Potato, a little more salt, reduce fire to medium, and stir to mash the cooked Lima beans and Potato until it is mashed very very lightly. Dont mash the entire thing as a little Lima beans and Potato left as it is here and there is the proper way to prepare Gasshi. Then add the "Massolu" and lower fire and stir well to combine everything. Increase fire if needed until the gravy thickens and leaves the edges of the pan. Tamper with mustard seeds and curry leaves. Serve along with rice, dip with dosa,idli :)

Tuesday, May 6, 2008

Arusuvai Friendship surprise and my first perfect Coconut chutney !

Hi friends,

Recently I received the Arusuvai Friendship surprise ingredients from Trupti of "Recipe Center" . She send me two packets along with a handwritten letter (I must say , you have very nice handwriting Trupti :) . The packets were numbered 1 and 2 and she gave a hint about the ingredients. I guessed the number 1 packet, which was Garam Masala. The brighter number two powder packet seemed very familiar when I tasted a pinch of that powder. It had the taste of Garlic and I came to the conclusion that it is similar to the Dry Garlic Chutney powder (in Indian stores they sell it by the name "Thechaa" which me and V buy often). I e-mailed Trupti and she told me the answer
Number 1: Maharashtrian Garam Masala
Number 2: Kandyacha Masala (Goda/Black Masala with Onion and Garlic)


Please click the above link to visit Trupti's blog for the recipe to prepare these. I loved the taste of the number 2 powder, though it exceeded my spicy-meter to the extend that I kept running to the fridge and back to taste the powder again and back to the fridge :D That's what my love for spice does to me :) Trupti writes in her blog that , this powder can be added as a masala in various curries and can also be smeared with oil and had along with chapathi. Guess I didn't add the oil to it the first time I had it just like that ! But I had fun!

Anyways with all this happening, I decided to use these spice powders in various curries. I used it in the following dishes:

1)Chilly Chicken (dry and gravy version)
2)Soyi bhajjilli Ghassi (post in progress)
3)Along with Dosa as a dip (used the Kandyacha Masala smeared in oil) [refer pic in this post]

Now coming to the experimental part with my Preethi mixie:

It was purchased it from Perfect Peninsula and was delivered within few days. I am still following the instructions to clean the Mixie when its used , by using water and soap and running it for few seconds. Its like caring for a baby :) No rough handling , very careful while using it:)

I made the coconut chutney of my dreams with it. It was then V also realized what we were missing all this while with Dosa. Coming to Dosa/Idli, I am now making much better Dosa/Idli batter which ferments better than before and I use the proportion of Rice:Urad as 3:1 .

Here is the coconut chutney recipe (I was an expert in making these chutneys before marriage and now I proudly made it after a long gap) The coconut chutney I like is finely ground grated coconut, thick, very less watery:

Grated coconut: 1 cup
Green Chillies: 3 numbers
Ginger: 2 big slices
Curry leaves: 3-4 leaves
Coriander leaves: 2-3 strands with leaves
Salt as per taste
1 tablespoon chopped onion (optional if you don't like its taste in coconut chutney)

For tampering:

Mustard seeds: 1 teaspoon
Cumin seeds: 1 teaspoon
Oil: 1 teaspoon


How I made it:

Add the ingredients starting from bottom to top excluding the ingredients for tampering. This is to make coconut grating as the last ingredient going inside the Mixie. Add 1/4 cup water or as required to properly grind the coconut. Grind the ingredients together until it forms a very finely ground chutney.

Heat 1 teaspoon oil and add Mustard seeds, cumin seeds, wait until both splutter and then pour it over the coconut chutney. Serve chutney as dipping along with Dosa, Adai dosa (yes you should try that combination , refer the pic above for that :) ], Idli.

Got a Indian Mixie and joined the Great Cooks Blogroll :)

Hi friends, finally I got what I was eagerly buttering V for all these days, my new Preethi Indian Mixie. I was so happy when the delivery man came to our door with the Mixie, that I greeted him with "Thank You" instead of "Hello":D .......So now I am busy preparing all the chutneys I can find and think of !

I also joined the :"Great Cooks Blogroll" community which is also a growing food blogger's community. You may visit "Simple Daily Recipes" for more information about "Great Cooks Blogroll" .

Monday, May 5, 2008

Homemade Graham Cracker

I was craving for Cheesecakes and I never had it more than once. The new Cheesecake factory which is now come to "Natick Mall" (Now called "Natick Collections") tempts everyone driving through Route 9. But since me and V are now doing some cost cutting, we have been reducing our restaurant visits to almost nil. I decided to search for a good Homemade Graham Cracker recipe for the Cheesecake.

I got this very good link from "BakingSheet" who is posted a simple and eggless Graham Cracker recipe. I followed it with the exception of substituting Molasses with Maple Syrup as I did not have the former.

Here goes the recipe which you can also find at "BakingSheet"

Ingredients:

1/2 cup all-purpose flour
1 3/4 cups whole-wheat flour
1/2 cup sugar
1 teaspoon baking powder
1/2 teaspoon baking soda
1/2 teaspoon salt
1/4 teaspoon ground cinnamon
1/2 cup cold butter (if you are using food processor, its easy to use cold butter while combining), else you may use cold Margarine, or a less harder equivalent than cold butter, cut into 1/2 inch cubes
2 tablespoons honey
2 tablespoon Maple Syrup (Molasses)
1/4 cup cold water
1 teaspoon vanilla extract

Sieve together the flours, sugar, baking powder, baking soda, salt, and cinnamon. Add the cold butter to the dry ingredients and mix until it becomes a course texture. Add the honey, Maple Syrup, water, and vanilla. Mix until it forms a firm dough which can hold itself together. Flour a parchment paper, and transfer the dough on it. Roll the dough 1/8-inch thick using a rolling pin (used to rollchapathi). Chill for at least 1 hour, until firm.

Preheat oven to 350F. Take the dough and roll it a bit more if it is not yet 1/8-inch thick. With a sharp knife or pizza cutter, cut into 2-inch squares. Arrange the crackers on parchment lined baking sheets. With a toothpick, prick several holes in each cracker. Do not prick too much, just 4 rows and 3 columns, or like I have shown above in the pics.
Bake for 15 minutes, until lightly browned at the edges. Remove from the oven and let cool on the pan. Yields: 48 crackers. I have yet to prepare the Cheesecake with these Graham Crackers I made. So you expect that soon in my blog :) These are also good to have along with evening tea :) ..on a nice cloudy evening by the window side :)

Tips From "Baking sheet": If you cut the dough through but leave the squares together, you can break them up after they’re baked

Thursday, May 1, 2008

Chilli Chicken - Dry version, Gravy version

Its been quiet a long time since I posted any non-vegetarian recipes. I decided to experiment with making Chilli Chicken, the Indian restaurant style, in my style in my kitchen :) .

Though the dry version of Chilli Chicken didnt get that restaurant flavor, I learned a new way to prepare chilli chicken. You can see my other versions of Chilli Chicken here. I am sending this Monthly Mingle- Bollywood Cooking hosted by Meeta of "Whats for Lunch Honey"


Ingredients:
--------------

Perdue Chicken thighs (the ones you get in individual mini packets) : 1 packet (it contains about 2 thighs)

Marinade:

Salt: 4 teaspoons
Soy sauce: 3 tablespoons
Vinegar: 3 tablespoons
Paprika (the not so spicy chilli powder you get in American grocery stores, it gives a fiery red color, but at the same time doesn't make you feel like grabbing the fire extinguisher to your mouth :D ) [(You can substitute it with the usual Indian Chilli powder if you want some fire in your mouth :) ] : 2 tablespoons
Bread crumbs: 2 tablespoons


For the gravy:

-Onion: 1 big
- Capsicum: 1 big: Cut into thin stripes. I used this only for the dry version of Chilli Chicken.
-Tomato puree: 3-4 tablespoons (this too helps to add that fiery red color)
-Green chillies: 6-7 green chillies (you can vary the number according to your needs. I added more of this as this was the only source of the spicy taste when I made as I had used the harmless red paprika :))
-Ginger sliced and cut into very small pieces: 2 tablespoons
-Garlic chopped to very tiny pieces: 3 tablespoons
-Coriander powder: 1 teaspoon
-Turmeric powder: a pinch (avoid if you don't like the color)
- Oil: 1/4 cup

The next ingredient below added the most fierce to the "Chilly" part in the Chilli Chicken :) Its called "Kandyacha Masala" which is a spicy dry chutney made of Onion, Garlic and other ingredients. As Trupti is written in her blog, its used as a spice powder in various curries. It can also be had (by mixing it with little oil) along with Roti, Dosa. You may add it if you want that "Hot" flavor :) I enjoyed it ! I got this powder as a part of "Aruvusai Friendship Chain" from dear blogger friend "Trupti of Recipe Center". She also send me Maharashtrian Garam Masala. Thank you so much Trupti !

-Kandyacha Masala (Maharashtrian Onion-Garlic dry chutney powder) [For the complete recipe details please refer to Trupti's blog : Recipe Center] : 1/2 teaspoon (or as per taste)

How I made :

Cut chicken to bite size pieces. Then marinate it in the marinade. Let it marinate for at least 15-20 minutes, while you prepare the rest of the ingredients for the dry gravy.

For Chilli Chicken (Dry) (as in the above picture):

In a deep pan, heat 1/4 cup oil to high, then lower it to medium. Add Ginger, Garlic, Green Chillis and saute for 30 seconds. Add the Chicken pieces and saute it until it is half cooked. Add Onion and saute until it is quiet soft (1-2 minutes). Then add 1 teaspoon Coriander powder and saute it well with the rest of the ingredients. Add Capscicum. Stir well to combine. Add a pinch of turmeric powder and stir well. Then add the Maharashtrian Garam Masala and the Kandyacha Masala, stir well. Add the Tomato puree and reduce fire to Medium-Low. Stir well until all the ingredients starts to cook. Make sure the Capsicum is fully cooked. Switch off the fire. Serve hot just like that or as a side dish along with Roti, Chapathi, Rice,Idiyappam. Refrigerate the left over and finish it by next day by heating it before using it.


For Chilli Chicken (Gravy):

In a deep pan, heat 1/4 cup oil to high, then lower it to medium. Add Ginger, Garlic, Green Chillies and saute for 30 seconds. Add the Chicken pieces and saute it until it is half cooked. Add Onion and saute until it is quiet soft (1-2 minutes). Then add 1 teaspoon Coriander powder and saute it well with the rest of the ingredients. Add a pinch of turmeric powder and stir well. Then add the Maharashtrian Garam Masala and the Kandyacha Masala, stir well. Add the Tomato puree and reduce fire to Medium-Low. Stir well until all the ingredients starts to cook. Then add 1 - 1.5 cups water, change the fire to high, and stir until the pan ingredients starts to thicken, then lower fire to Medium-Low, simmer for 1 minute.


The result is a thick rich gravy with Chicken.
Serve hot along with Rice, Roti,Idiyappam, Chapathi. Refrigerate the left over and use it by next day by heating it before using it. I had it alongside Idiyappam which is a rocking combination! I have posted the Idiyappam recipe here.

Rasa Vada

I had previously posted about Parippu Vada made with Toor dal. Usually Parippu Vada is made with Channa dal. One popular snack in Kerala is to soak these vadas in hot rasam, allow the vada to soften for a few minutes and have it with a spoon in the same bowl with rasam.

Its been a long time since I had rasa vada. As far as I can remember the last time I had it might have been during my school days. I made these recently when V was working from home.


Ingredients:

For vada
-----------
Channa dal: 1 cup
Green chilli: 2-3 cut into thin round slices
Onion: 1 medium size, chopped up finely
Curry leaves chopped finely (optional)
Ginger: cut into thin small slices- 2 teaspoons
Salt: to taste
Oil: to deep fry the vadas
Water to soak channa dal

Rasam:

Any rasam powder available in Indian grocery stores or -->Make your own: Roast 2 teaspoons of coriander seeds, 1 teaspoon each of cumin seeds, fenugreek seeds (methi) , mustard seeds, whole black pepper, hing (asafoetida), toor dal, 5 dry red chillies together on medium flame for 1 minute. Powder them in a spice grinder.

Water: Enough to soak the vadas
Salt: to taste
Mustard seeds: 1 teaspoon
Cumin seeds: 1 teaspoon
Curry leaves (optional): 2-3 leaves
Dry red chillies: 2
Crushed tomato (optional): 2 tablespoons
Tamarind juice: 1 tablespoon

Method:

For making vada:

Soak the channa dal in enough water for at least 5 hours or until the channa dal can be broken into two by using your nails. Drain all the water after soaking. Grind it into a fine paste without any water (it need not be too fine, a little coarse texture doesn't matter). Mix it with the rest of the ingredients for vada, except oil. Take a small ball and shape it to form a small disc as shown in the pictures. Then deep fry in oil until bubbles reduce in the oil.

For rasam:

Heat sufficient water in a vessel for, add crushed tomato, and rasam powder, tamarind juice . Cook the tomatoes well. You may optionally add some garlic cloves to the rasam. Add salt. Switch off when tomatoes are cooked. Heat a little oil in a tampering vessel, add mustard seeds, cumin seeds, red chillies and wait for mustard seeds to splutter, then add curry leaves and add this tampering to the rasam. Add the vadas to the rasam.

When the vadas are soft, break them using a spoon and have it in the same bowl with rasam.

Coffee maker - Oats kanji


This was something I experimented after watching the "Good Eats" show on Food Network channel. The host was explaining about benefits about Oats and the various ways it can be used. Towards the end of the show he showed a trick of having a nice Oats porridge using the Coffee maker.

He poured the water in the coffee maker . Added the Oats, some milk and a little cinnamon to the mug where the coffee usually dispenses. When the machine was switched on, the hot water cooked the oats and in a few seconds, delicious Oats porridge was ready !

I decided to experiment with just water and Oats and a little salt, because I was not fond of having milk with Oats. It was equally good and healthy !

Pressure cooked Rose Matta rice - Vegetable biriyani

Pressure cooker cooking is one of the fastest, efficient ways to cook a variety of dishes within minutes , whose cooking time otherwise takes a long time. I prepare Biriyani mostly in pressure cooker. The rose matta rice is nutritious than the regular white rice. It is available in most Indian grocery stores. In Kerala you can find this rice used in abundance. I did not have the white rice in stock and wanted to prepare Biriyani for a guest. I experimented with this rice and it turned out equally good.


Ingredients:

Rose Matta rice : 1 cup

Vegetables-Green peas, Corn, Carrot, Cabbage,String Beans, Cauliflower,Capsicum (all vegetables should be chopped to bite size pieces)- 1 cup each

Tomato puree: 3 tablespoons or 1 big tomato crushed

Onion: 1 big cut into thin slices

Ginger and Garlic : 1/4 cup
Green chilli: 4 nos , slit vertically

Coriander powder: 1/2 teaspoon
Garam masala (or Biriyani powder) : 1 teaspoon

Oil/Butter: To saute the vegetables
Salt : to taste
Water : To cook the biriyani in pressure cooker


Method:

Heat pressure cooker on high heat. Add oil/butter to saute the vegetables. Add ginger, garlic, green chilli and saute for a few seconds, then add onions and fry until translucent and soft. Then add the veggies together and saute until the veggies soften a little. Add the spices (coriander and garam masala) and salt and mix thoroughly. Then add tomato puree, and mix until the whole masala along with veggies is half cooked. Then add the raw rice and mix it with the masala. Add water enough to cook the biriyani. The rose matta rice takes a long time to cook in Rice cookers, but in pressure cooker it just takes 3 whistles (approx 10-15 minutes). Add water just about an inch to cover the biriyani. Cover the pressure cooker with the lid and whistle and let it cook for 3 whistles. Allow the cooker to stand until all the steam goes from the whistle. Do not try to lift the whistle to make the process faster. Serve hot along with cool onion raita. Left over can be refrigerated and heated the next day.

French toast by my sweet V

Let me be honest about something, during my childhood, I used to crave for getting sick !! Just for skipping school and also for another special reason:) Wonder what? I used to get pampered by everyone especially my mom ;) You must be thinking how silly I am :) But honestly I loved it when she used to fuss over me with those warm light dinner (I used to have pej (kanji) with green moong dalithoy, and some chowli ukkeri :) (I don't know the exact name in English for chowli, it looks like string beans, but very long)..mmmm...that along with my mom's love and affection was the best medicine :) She also used to prepare chukku kaapi, also gave me Gooseberry (Amla) to munch on (According to my Amma, Amla is a very good medicine) She never favored the antibiotics (or even pain relievers) during the early onset of the fever. Salt water gargle was/is the pain reliever she recommends. She used to tell that my body's natural immunity decreases if we take tablets, when we are not that sick. I was also forced to have a Chyawanprash from a local Ayurvedic doctor , who made it using only fresh Amla. I personally tried to avoid it (though my attempts were futile as Amma somehow used to find out) as it used to make my teeth temporarily yellow in color.


All this story for what? Let me come to present tense :) I was not well past few weeks as the flu bug hit me and I was down with fever, runny nose and a very bad throat. On such days, V feels very proud to show how much he cares, so he prepares his special breakfasts for me :) He made me French toasts one such morning and I devoured it as I was hungry and still recovering from a sore throat which made it worse to swallow any food the previous night. He also made me a nice cup of hot coffee to go along with the French toast and I was feeling so good :) I remembered my childhood days. Same time, was amused to see V's beaming face when I hungrily gobbled the food he prepared.

I feel good acknowledging V's culinary attempts in my blog as I owe him for eating anything I make hehe :D . This is my second post of V's secret dish . The first post can be seen here. I have completely recovered, but the bug is now on poor V and he is down with Cold !

Puri masala

I thought of posting some basic recipes which I had not posted. I make this potato curry to go along with various main dishes, such as puri, roti, upma, lemon rice. Here is the recipe:


Ingredients:

Potato (Boiled cooked and mashed into crumbs): 1 medium
Onion (red or yellow) : 1 big
Green chilli : 2 or 3 slit vertically
Mustard seeds: 1 teaspoon
Cumin seeds: 1 teaspoon
You may add curry leaves. I didn't have curry leaves when I was making it, hence I could not add it.
Salt: as per taste
Coriander powder: 1/4 teaspoon
Hing (Asafoetida): a pinch
Turmeric powder: a pinch
Water : just for sprinkling to avoid the curry from getting stuck to the vessel.
Oil: 2 teaspoons


Method:

Chop onion into chunks (square shapes) . Keep a deep pan on medium heat, add 2 teaspoons of oil. When oil is hot,reduce heat a little and add mustard seeds, and cumin seeds. Wait until the mustard seeds splutter, Then add green chillies, saute it for 5 seconds, then add curry leaves and saute it for a sec. Add the chopped onion. Increase heat to medium. Saute the onion until it is translucent and half cooked. Add salt, coriander powder, turmeric powder, hing. Stir well to combine so that its well coated with all the spices. Then add the potatoes. Break them up so that they don't form chunks in the pan. Mix well to combine it with the onion mixture. Sprinkle water of necessary. Lower heat a little so that the curry doesn't burn. Stir in between until a nice aroma of the curry comes. This will take very less time (approx 5 minutes) as we have already added cooked potatoes. Serve as a side dish for puri, roti, lemon rice etc.. It is best served hot. You can also refrigerate the left over for later use on same day.

Please do not copy

All contents in this blog cannot be copied without written permission from the blog author.

LinkWithin

Related Posts with Thumbnails
baby