Monday, December 4, 2006

Channa fish curry with a simple chaat


It had been a while since I prepared a non-veg dish in my kitchen. Infact I was busy following a diet plan, that my husband started hinting that I was unnessasarily dragging him into my diet plan, as I never cooked any non-veg for months. It was then that I started looking through websites and found that certain animal fat like turkey, salmon, quail eggs are recommended as a part of diet foods. I also came to know that the above mentioned meats are a good source of protein. Quail eggs are a medicinal source for people having asthma. Never knew that until recently. They are very small in shape compared to the regular eggs. But high in nutrient value and at the same time, less calories. So keeping in mind all this, I decided to make a curry with Chickpeas (White Kabuli Channa) and fish (Salmon). Though the combination sounds quiet strange, you will crave for more when you taste it:) ......This is my instant recipe (didnt plan it ahead of time as to what to do) which I tried yesterday and came out so tasty that my husband was very happy and gave me a big smile of satisfaction for making non-veg after months of his waiting:))

I wanted to make channa masala, so I had soaked it oevrnight. But before going to sleep, I was thinking hard how to make something which I too can eat without deviating away from my diet plan. Then I came up with the idea of fish curry with Salmon. I had a vague idea that by adding Salmon with Channa masala, it would definitly taste good. So here I am sharing my recipe with you:


Ingredients:

-------------


  • Channa or Chickpeas: 1 1/2 cups

  • Salmon: 1 pound (you can add or reduce the amount according to your taste)
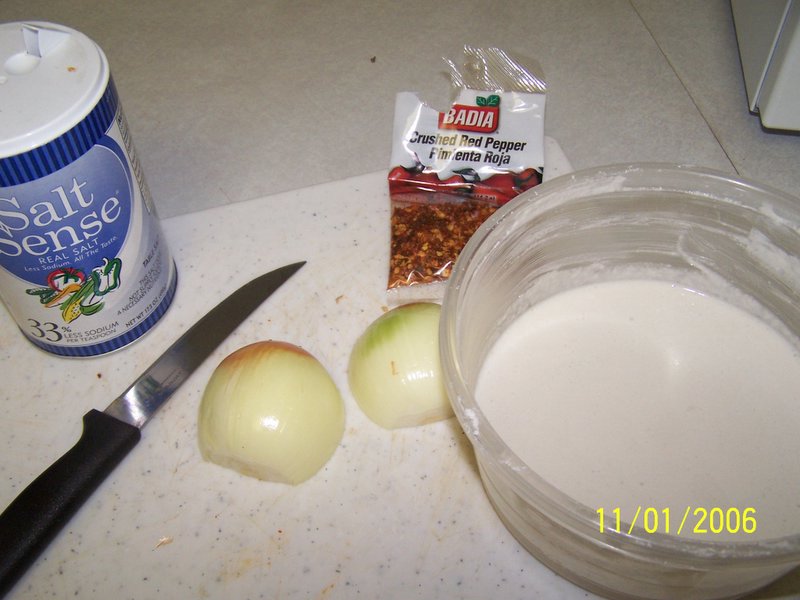
  • Large Onion: 1

  • Large Tomato: 1 (if you dont have a large tomato, use two small tomatoes)

  • Green chilli minced: 2 long ones

Masala for adding to cooked Channa:


-------------------------------------------


  • Ginger and Garlic: a lot (I dont remember how much I added. I add this a lot, especially Garlic, good for health. Always add Garlic more than Ginger, not the other way round, as the Ginger flavor is stronger than Garlic). I use the whole Garlic as well as Garlic powder and Ginger powder which you get in stores.

  • Jeera: 1 teaspoon (the fat green ones, not the thinner black ones)

  • Cloves: 2 or 3 nos (good idea to powder these before adding them)

  • Cumin powder: 1/2 teaspoon

  • Coriander powder: 1 teaspoon

  • Chilli powder: 1 teaspoon (according to your taste)

  • Cinnamon powder: 1/4 teaspoon

  • Chilly Garlic sauce (optional): 3 tablespoons (for enhancing the taste)

  • Salt: according to taste

  • Curry leaves for garnishing

Masala for marinating fish (Salmon):


------------------------------------------


  • Ginger and Garlic: according to your taste because I add them a lot

  • Coriander powder: 1 teaspoon

  • Chilli powder: 3 teaspoons (according to your taste)

  • Cumin powder: 1/2 teaspoon

  • Asafoetida powder (hing) : 1/4 teaspoon

  • Lemon extract: enough to marinate the fish pieces

  • Salt to taste

Method:


----------


  1. Soak the chickpeas overnight in water.

  2. Clean the fish. Cut the fish into small cubes.

  3. Marinate the fish with the marinating ingredients mentioned above and keep it in fridge for marination

  4. Meanwhile cook the chickpeas and drain the water into another vessel. Do not throw away that water as it can used later in the dish for gravy

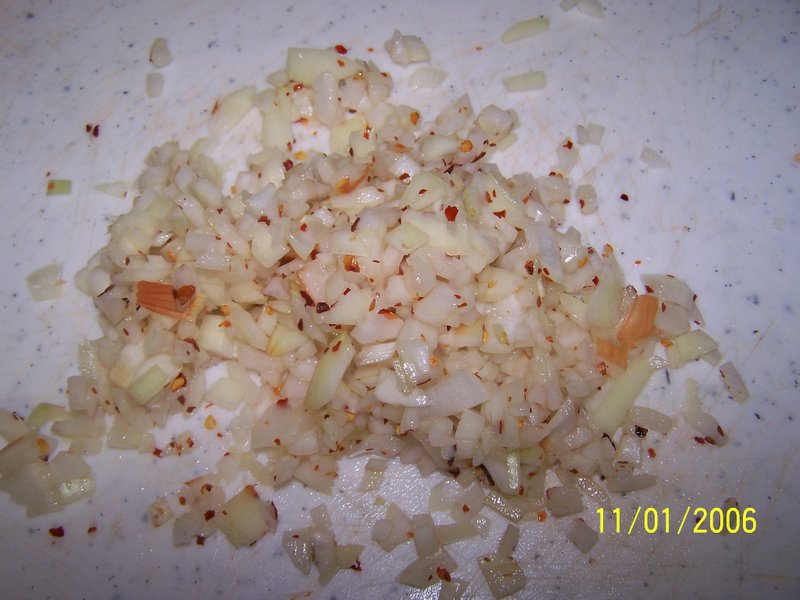
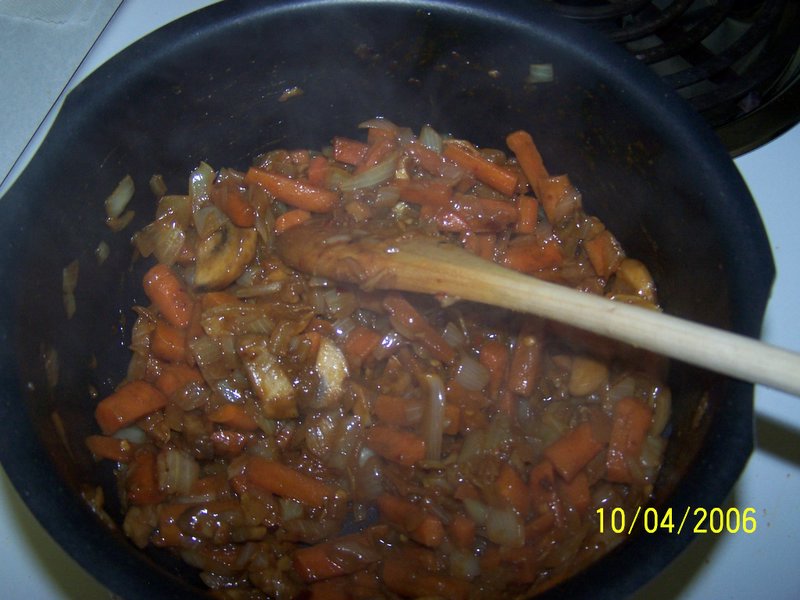
  5. Cut the vegetables (onion (long and thin), tomatoes(small cubes))

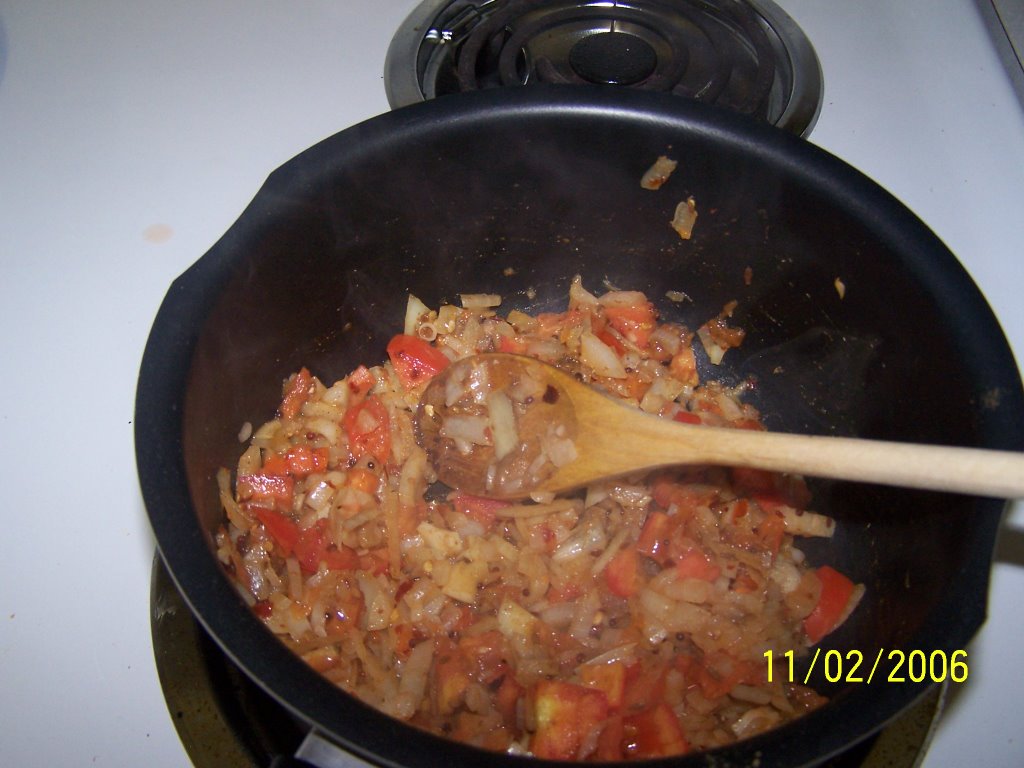
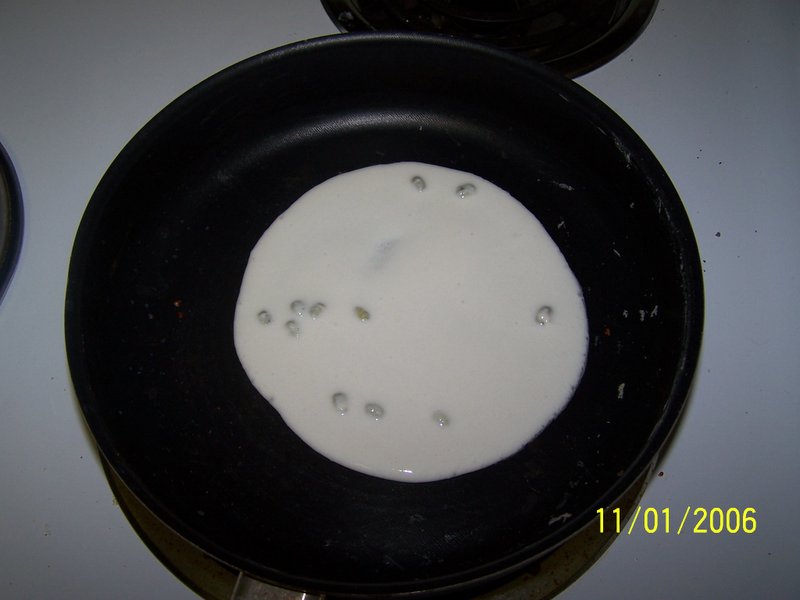
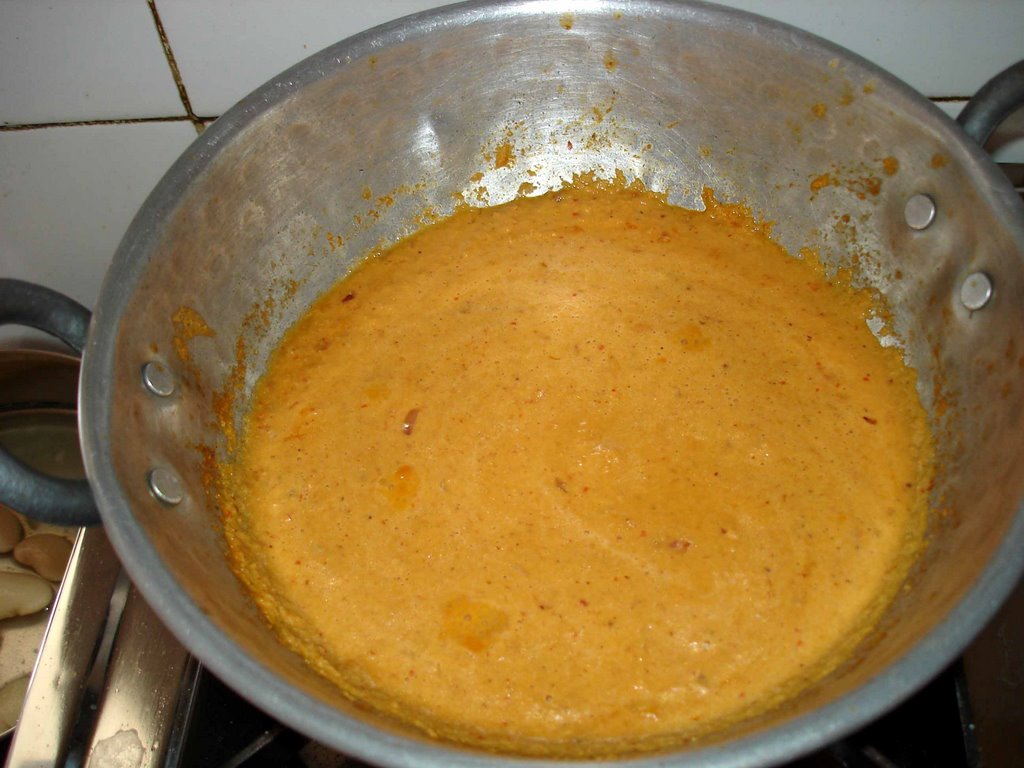
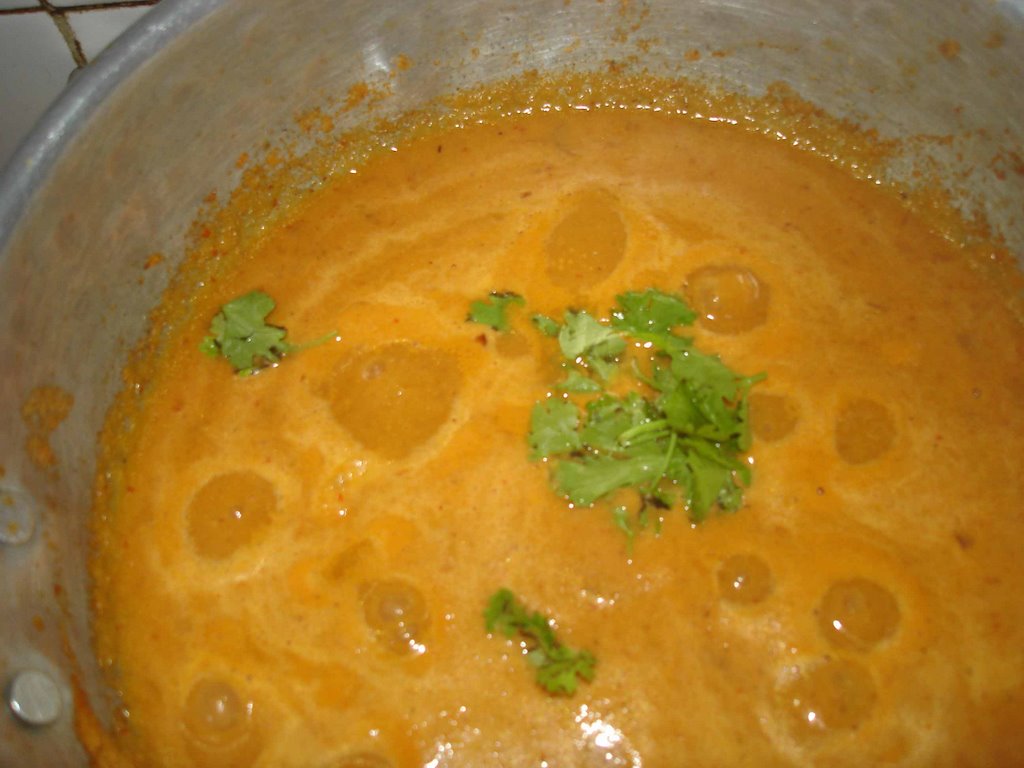
  6. In a large bottom frying pan (as shown in the pic), heat 3 teaspoons of oil. Keep the fire to a little less than high.

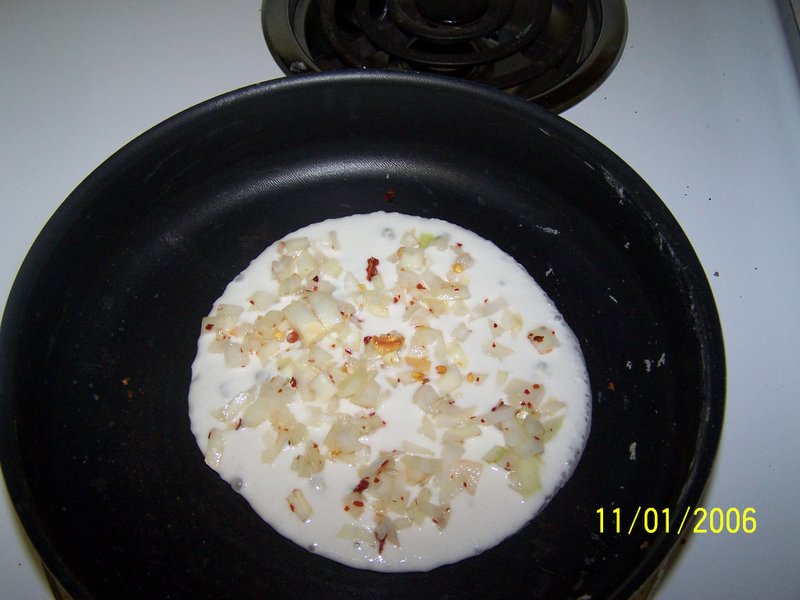
  7. Add cloves, curry leaves (I added parsely flakes later in the recipe as I was short of curry leaves), chilli, and ginger garlic paste or grated whole ginger and garlic. Do not add the ginger or garlic powder at this stage. Use the raw ginger and garlic at this stage

  8. Add onion, tomatoes and saute it for a minute. Add rest of the masalas one by one.

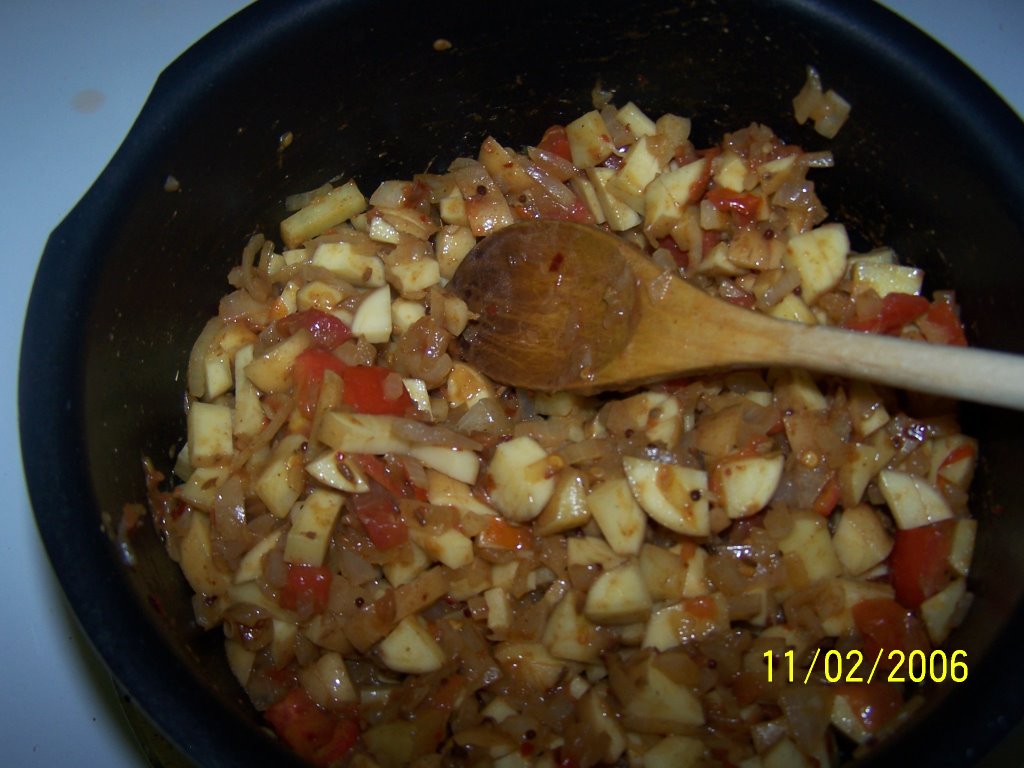
  9. Add the cooked chickpeas and mix uniformly. But always make sure that the contents dont stick to the bottom of the pan. Add a little water in which the chickpeas were cooked, to prevent sticking to the bottom.

  10. Stir well, after adding salt, give it a uniform stir again.

  11. Add the marinated fish pieces and stir uniiformly to mix chickpeas and fish. The aroma of the curry would have already filled your nostrils by now;)

  12. Drizzle a little oil over the contents and mix again.

  13. Try bringing all the contents in the pan towards the centre of the pan and cover it with a plate which is heat resistant. Lower fire to medium

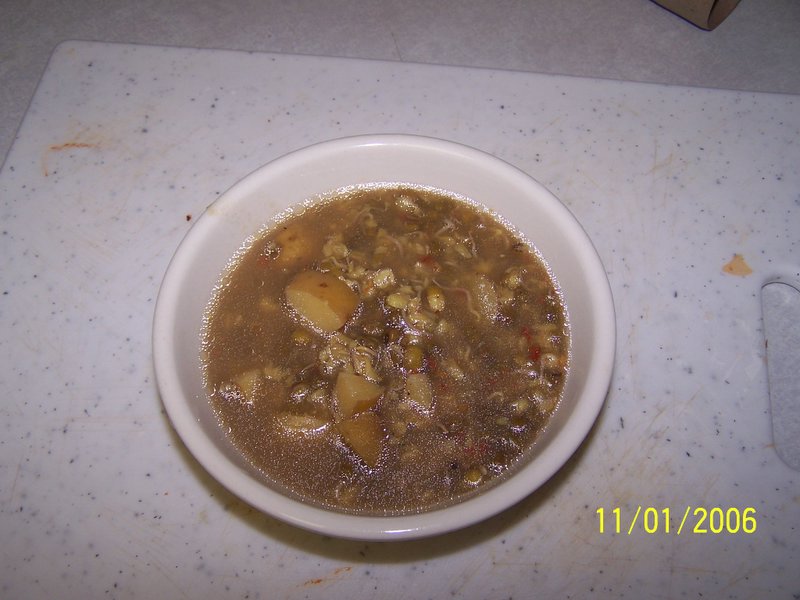
  14. Cook for 5 to 10 minutes. Check in between if the contents are cooked and doesnt stick to the bottom of the pan. When almost all water has been absorbed (a little gravy simmering on the sides is OK, as it adds the taste), turn off the fire and serve along with Roti, or Rice.

A simple chaat recipe:


-------------------------


To add a subtleness to the atmosphere, I decided to make a simple chaat along with the above recipe. Again this is not the standard chaat which you expect, its a simple one which I made to include more fibre in the dish I just made. Here is the recipe:


Ingredients:


  • Onion

  • Tomato

  • Chilli Papad or Punjabi papad (I used the Lijjath pappad brand which you get in stores)

  • Jal jeera powder(optional): a pinch

  • Salt(if you are using jal jeera powder, use less salt or no salt, as jal jeera already contains salt)

  • Minced green chilli

  • Coriander leaves

Method:


Mix Onion, Tomato and Jal jeera powder , salt and chillies. Roast the Papad on the tawa or microwave (in my microwave it takes 20 seconds, varies with microwave temperature so a trial and error is suggested before roasting in microwave)with no oil. Take a empty plastic cover, keep the roasted papad in it. Close the cover with your hand or ziplock, and mash it with a pin roller (the chappatthi roller) until the papad breaks into small pieces. Do not powder the papad though. Add this to the onion mixture. Add coriander leaves for taste. Serve it with the above dish.


My friend had a suggestion for this chaat and that was, to not break the papad into pieces, instead she suggested that it would be a good idea to add the onion mixture on top of the papad just before you eat it. Take care not to add the mixture too early before eating as the pappad gets soggy. This is the recipe for Masala Pappad which is very tasty.

I hope you enjoyed this recipe.

Tuesday, November 28, 2006

Bhaingan fry (eggplant fry)


My Mangalorean friend Akshatha, recently send me a recipe for Bhaingan fry. I tried this and it came out good. I love Bhaingan fry. So here I am sharing it with you the recipe, my friend gave me along with the pictures of how she made it in her kitchen.
Ingredients:
------------------

Bhaingan (Eggplant)
Chilli powder: 1 tsp
Rawa: 1 tblsp
Asafoetida (hing) : as per taste
Oil
Salt

Method:
-----------
  • Mix chilli powder, asafoetida, & salt per taste with a little warm water to form a dry paste
  • Slice the bhaingan into thin semi-circular pieces
  • Apply the paste to the sliced bhaingan
  • Heat frying pan (or tawa) and put a little oil
  • Dip the bhaingan pieces in rawa to form a coating over the entire surface and place on the tawa, cook on a low flame
  • You have to keep roasting the bhaingan until it is cooked, keep changing over the sides while doing so
  • Serve along with rice, or chappatthi

****FYI: To make a similar dish with potato, or bhindi, cut into semi-circle shaped thin slices (for bhindi, cut lengthwise) and then follow the same method above.

Monday, November 20, 2006

Carrot cookies

Mixing butter and sugar

Beating the egg white until stiff peaks form

Sieving the dry ingredients before combining with the wet ingredients


Combining flour to the wet ingredients


Adding shredded carrots
Mixing everything
The final dough


The cookie after baking
After decoration
The final product :)

Well, carrot has always fascinated me be it in terms of its color or its taste or the different dishes you can make with it. When I was a child, I never knew that carrot could be used to prepare other dishes apart from the dishes of "thoran" , "avial", "sambhar", "ghassi", in which my mom used carrot along with other veggies. It was our neighbour who made me interested when she prepared "Carrot payasam" one day. It was soo.. tasty that I wanted more and made one myself shortly. So when I came upon Carrot cookies, I thought why not give a try. Here is the recipe: My cookies turned out to be soft when I was expecting the harder version. If anyone knows how to make these cookies hard, please share it with me.

Ingredients:

  1. 1 cup butter
  2. 1 cup sugar
  3. 2 tablespoons orange or lemon zest
  4. 1 egg
  5. 1 1/2 cups grated carrot
  6. 2 1/2 cups all purpose flour
  7. 2 teaspoons baking powder
  8. 1 teaspoon vanilla extract
  9. 1/4 teaspoon cinnamon

Method

  • Preheat 375 deg F. Grease the baking vessel
  • Cream butter and sugar
  • To this add the orange or lemon zest
  • Combine together the dry ingredients (flour, baking powder, cinnamon) in a seperate bowl
  • Seperate the egg yolk and white. This step is optional. You can add egg just like that. Adding the egg white at a later stage after its beaten until stiff, incorporates air into the dough
  • Add the egg yolk to the butter-sugar mix
  • Add to this a little of the grated carrot. Mix using a stirring spoon used for cooking
  • Add some flour. Mix again
  • Repeat the above 2 steps in the same order until all of the carrot and flour is used and combined well. Take care not to stirr too well as this might cause the air bubbles to escape
  • Beat the egg white using a electric beater until stiff peaks form
  • Blend it with the rest of the cookie dough gently
  • Combine vanilla
  • Make small cookie shapes out of the dough and place them on the baking vessel
  • Bake for 12 minutes or until the cookie is done
  • Let it cool completly

Carrot cake


Ingredients:
1 cup flour
1 1/2 teaspoon baking powder
1/2 teaspoon cinnamon
1/2 teaspoon salt
1 1/2 cups grated carrots
2 eggs
1 cup sugar
3/4 cup vegetable oil
2 teaspoons vanilla
Method
Combine flour, baking powder, salt, cinnamon in a bowl. In a seperate bowl, beat eggs, sugar, and oil. Slowly ad flour. Blend in vanilla, and carrots. Bake in 325 deg F for 35 minutes. Check for doneness by inserting a knife which should come out clean.

Frittata (Italian omelet)


Well, the first time I heard of Frittata was in a sitcom on TV called "Everybody Loves Raymond" which I started watching after I came to US. I didnt give much thought to it as the humour part of the sitcom was way too good hehe ....It was one of my husband's cousin who got me interested. She told me it was really easy to prepare it. I searched on internet to see how it looks and that got me determined to make it. It may not look always the same as the above pic as its not always made in oven. Its made on the same pan, u make omelette. But I wanted a reason to start using my new silicon baking pan. So I made frittata in the oven. And it came out really well as you can see above. Almost looks like a pizza right? ;)
Let me share the recipe: This is for a chicken-brocolli-potato frittata. You can omit chicken if you dont like. But the egg should not be skipped (maybe u can use a substitute, i haven't tried though), else it wont be a frittata (italian "omelette") . The time taken may be more, but worth waiting :)
Ingredients:
  • 1 cup diced potato
  • 3/4 teaspoon butter
  • 1/2 teaspoon garlic (i add more coz i like the taste of garlic in the dish)
  • 1/2 onions diced
  • 1/4 cup all purpose flour
  • 1/2 cup milk
  • 2 eggs
  • 1/4 cup chopped brocolli
  • 1/4 cup sliced mushrooms
  • 1/2 cup shredded cheese (you can skip it if you dont have cheese or if you dont like it)
  • 1/4 cup cooked chicken (optional) , you can use cooked ground turkey too if you are on a diet plan to avoid chicken

Method

  • Preheat oven to 350 degree F
  • Cook potato until firm
  • Melt butter in oil
  • Saute garlic, and onion
  • Mix flour, milk, and eggs in a bowl
  • In another bowl, mix potato, garlic, onion, flourmix, mushroom, cheese , and chicken
  • Transfer to baking dish
  • Bake for around 55 minutes till eggs are properly cooked or a knife inserted in the frittata comes out clean

Your frittata is ready!

Wednesday, November 15, 2006

Warm from the oven


I always wanted to bake a cake or at least be a viewer when someone is baking a cake, because I loved cakes from the time I remember the Christmas days when one uncle (i don't seem to remember what i used to call him then) , used to always deliver cake to our house when Christmas time was nearing. It was like a reflex action for me to think those days when someone knocked during Christmas days , that it is the "cake uncle" :) .....I used to gladly collect the cake and give him a full fledged smile to show that I am very happy that he gave the cake to me. My mom could not bake as there was no oven in our home that time. But I used to listen to her very keenly how it is made. Though I knew the method, I never tried baking until after I got married. I am really grateful to my sweet husband who also encourages me in all my cooking experiments. If not for that encouragement, I would not even have the interest in starting such a blog. My hands on experience in baking cake had been a disappointment until recently. I am glad I learned from my mistakes while baking in the past. I did a lot of research on Internet and learnt what went wrong all this time. And recently I decided that I would try baking a simple cake for one last time before deciding that cake is not "my cup of tea" :)) ......glad to say that I indeed found the secret key to bake a simple cake. Now before I share it with you, let me say that this cake has eggs, but I will be including a egg less cake recipe as soon as I make one in my oven:) ........So here is the recipe:


Ingredients:

-------------


  • 1/2 cup butter

  • 1 cup white sugar (powdered sugar)

  • 1/2 tsp vanilla extract

  • 2 eggs

  • 1 1/2 tsp baking powder

  • 1/2 cup milk

  • 1 1/2 cups flour

  • 1/ pinch salt

Method:


  1. Preheat oven to 350 degree F

  2. Grease and flour the baking vessel. I use a silicon baking vessel which bakes uniformly. But it is enough if you have a good baking vessel.

  3. Using a mixing spoon, cream butter, and sugar in the vessel in which you are planning to make the cake dough. When it is being creamed, the sugar completely mixes with the butter and eventually melts into it.

  4. Mix vanilla to this mixture and again mix it using the mixing spoon until well combined. The reason why I am mentioning the mixing spoon repeatedly is because this is very important. During my previous baking trials, I was using a electric beater to mix the cake ingredients, and it never tasted sweet. In fact it got beaten too much. The main thing in making cake is the correct proportion of the ingredients. So it is always good to have the set of measuring spoons and cups while baking cakes.

  5. After the vanilla is mixed, separate egg yolk and whites. Add yolk one at a time to the mix in the previous step. Blend it well using the mixing spoon.

  6. Measure baking powder in the flour and combine both of them in a sieve. Don't forget to keep a vessel underneath the sieve while combining the baking powder and flour. Also don't forget to add the flour in this vessel to the mix in step 3 , after all the flour in the sieve is added. Remember what I told about proportion? Its important not to leave any remaining flour in any vessel.

  7. Sieve a little of the flour mix into the mix in step 3. Again blend it well with the spoon.

  8. Add a little of milk and blend it again.

  9. Repeat the process in step 7 and 8 alternately until all the flour and milk is blended into the mix.

  10. Beat the egg whites which were separated in step 5 until stiff peaks are formed. Now this step can be done with a electric egg beater or manually. When the stiff white peaks are formed, it is ready to be blended with the mix.

  11. Blend the beaten whites , gently , with the mix. Use a folding action while blending the egg whites. Using a mixing spoon, starting from the center, fold the mix, from center to outside, just like in concentric circles in a whirlpool. Its again important to note that the egg whites should never be mixed very harshly with the cake mix.

  12. Add a dash of salt and blend it well.

  13. Pour the cake batter in the greased and floured baking vessel and bake for 25 minutes or until a toothpick inserted in the cake comes out clean. Another thing to be noted is, do not peek in the oven by opening the door until the time specified in the recipe. Each time you open the oven door, the temperature varies. If you have a oven light, leave it on, so that you can see the baking process. If not, I guess its better to wait patiently:)

  14. After the cake is done, remove the cake from oven and let it cool in the baking vessel. You can start cutting the cake or decorating with frosting once the cake cools.

  15. There is something else I would want to share with you from the research I did on baking, and that is, if the recipe for cake mentions baking soda or baking powder, do not directly substitute one for the other as it affects the taste and texture of the cake. Both baking powder and baking soda are two different chemicals. I used baking soda for the first time when I was trying to bake this cake and it turned out to be bitter. If you are short of baking powder, you may use baking soda + buttermilk. I hope that you bake a wonderful cake for your near and dearest ones this Thanksgiving. Have a wonderful Thanksgiving and Christmas filled with joy, hope, and warmth!

Friday, November 3, 2006

Basic potato curry


Yesterday, I didn't have enough vegetables to cook anything special for dinner. But lucky me, I had potatoes, onions, and tomatoes. What more do I want, as my husband's dinner would be fulfilled with his favorite vegetable - potato:) .....so I decided to post it here as a bachelor recipe, because my husband also used to prepare this when he was a bachelor. So here I am including one of the simplest curry anyone new to the kitchen could make:) , its that simple.

Ingredients:
------------------
  • Potato : 1 large no
  • Onion: 1 large no
  • Tomato: 1 large no
  • Turmeric powder: 1/4th teaspoon
  • Chilli powder: 1/ teaspoon
  • Coriander powder: 1/2 teaspoon
  • Asafoetida (hing): 1/4 th teaspoon
  • Mustard seeds: 1 teaspoon
  • Cumin seeds: 1 teaspoon
  • Fenugreek seeds: 1 teaspoon
  • Garlic: 1 small piece
  • Ginger: i small piece
  • Curry leaves for garnish
  • Oil
  • Salt

Method:

-------------

  • After cleaning the vegetables, cut all the vegetables into very small pieces.
  • Heat a tablespoon of oil in a vessel. Add mustard seeds, cumin seeds, fenugreek seeds and curry leaves. Let it splutter. Add minced garlic, onion, and tomato.
  • Stir for 2 minutes
  • Add the rest of the ingredients except for the potatoes. Keep stirring uniformly
  • When the onion and tomatoes cook well, they form a paste. At this point add the potatoes and stir well. Add 1 cup water and keep the flame to medium.
  • Cover the vessel and wait until the potatoes are cooked. This can be tested by pricking with a knife or fork, if the potato crumbles and falls apart easily, it means, it is cooked
  • Garnish with coriander leaves
  • Serve as side dish along with chappathi , or rice

Wednesday, November 1, 2006

Sprouted Moong dal Curry


Sprouted lentils are a common ingredient in diet foods. These are used in salads, soups, curries etc.. These are good sources of dietary fibre. The first time I learned and saw about sprouted moong was from my mom. My mom is very particular when it concerns our health. Till date, I have her golden advices about health related topics. She used to make sprouted moong and I on the other hand had a fascination to eat the raw sprouted moong. She somehow was not found of the raw taste, nor did my brother. But she liked the fact that I used to eat the raw ones as they are very healthy. I was also very fascinated when I saw the sprouts coming out of the moong dal. Those days, she used to wake me up telling, "Don't you want to see what happened to the moong dal you soaked in water?" and I would eagerly come to the kitchen rubbing my eyes......Missing those days now.....Now to add to my surprises and my happiness, my husband also loves sprouted moong. In fact he prepares it himself. And like me, early morning, he checks what happened to the moong, as if they were his kids :), so cute. I made this curry with green moong which is a favorite of my husbands, and so is mine. We in konkani call it "kirlailene moogache ummaan" ...long name huh? :) ....lemme share the recipe now.

Ingredients:
-----------------

Green Moong dal: 1 cup
Water for soaking

For curry:
----------------

*Potato: 2 medium sized
Mustard seeds: 1 teaspoon
Tomato: 1 medium sized
Curry leaves: a few
Green chilli: 2 - 3 nos
Coriander powder: 1/2 teaspoon
Cumin seeds: 1 teaspoon
Ginger: 1 small piece
Salt
Oil

Method:
-------------

  • Soak overnight green moong in water
  • The next day drain the water and leave it until all the sprouts come out. It might take a few more hours
  • When all the sprouts come out, it is time to make the curry. Heat one tablespoon of oil in a pressure cooker. Chop the vegetables. Add all the curry items. Mix them well.
  • Add the sprouted moong dal and stir again.
  • Add sufficient water for cooking in the pressure cooker
  • Cook for 1 - 2 whistles
  • Serve along with rice, or chappathi

* People who are diet conscious can avoid potato if they do not want it in the curry. I add it because my husband loves the taste of small pieces of potatoes in this curry. Its worth adding it if you want.

Onion Utthappam


This is a dosa variety which is enjoyed by many. My mom would make this as a special breakfast on Sundays. I fondly remember me, brother, and my dad relishing taste of this dosa while watching Mahabharat serial on Sunday mornings :) ...it tasted so good as my mom used to make it very crispy. After marriage, it took me a while to know the exact way to prepare crispy and tasty dosas. Thanks to my husband who never complained about my previous versions of dosas :)) So here , after many r&ds , I am sharing with you what I learned about preparing good dosas in this recipe for onion utthappam. You can make it in the comfort of your own home rather than spending a lot in restaurants. So here is the recipe.

Ingredients:
--------------

Urad dal: 3/4th cup
White rice: 2 cups
Onion: 2 nos
Green chilly: 3-4nos
Sprouted green moong (optional)
Salt
Oil

Method:
-----------

  • Soak urad dal and rice separately in lots of water for 4-5 hours
  • After that, grind urad dal with a little water (the water should just cover the urad dal when you grind it in a mixer (I dont have a grinder. So I grind with mixer (blender)). The water that was used to soak urad dal can be used here. Make sure that you grind it part by part, so that the mixer is not overloaded and this also ensures that the urad dal is well ground.
  • Transfer the contents after grinding to a large vessel (large enough for the fermentation to take place).
  • Grind the white rice part by part with the same amount of water as was used to grind urad dal. The water used to soak the white rice can be used while grinding.
  • Transfer the contents after grinding to the same vessel in which the ground urad dal was transferred.
  • Mix both the ground contents very well until a few bubbles start appearing
  • Add 1 teaspoon of salt and mix it well again
  • Cover the vessel and leave a little vent.
  • If you are in India (or in a tropical area), there is nothing to worry about the fermentation process. So you can just leave the batter overnight for fermenting at room temperature itself.
  • If you are residing in a colder area, you may ferment the batter inside an oven. Preheat the oven to 250 degrees F. Switch off the oven when the oven indicator light turns off the first time. Leave the oven door open for around 2 to 3 minutes. Transfer the vessel with the dosa batter into the oven. Wait for another minute before closing the oven door.
  • After closing the oven door, if you have a oven light, switch it on and let it remain that way overnight. This is a good idea as the warmth of the light can help the fermentation process even after the oven temperature gets colder. The fermentation may take place properly by the next day afternoon.
  • After making sure that the fermentation process is done, mix the batter a little.
  • Transfer it to the fridge if you are not making dosas immediately.
  • To make utthappam, cut onions into very small pieces. Mince green chilly to very small pieces. Mix onions and chillies with a little salt. Also have the sprouted moong dal ready.
  • On low fire, spread a teaspoon of oil on the tawa, pour one ladleful full of batter and spread it evenly . Do not make the concentric circle as you would make for usual dosa. Just make sure that the round shape of dosa is retained. Let there be a little thickness.
  • Add the onion - chilly mixture and sprouted moong dal evenly on the dosa.
  • Turn the fire to high. Cover the tawa with a plate. Let it cook for 2 minutes or until you can see that the dosa is fully done on the edges and half done on the top.
  • Flip the dosa very carefully to avoid the uncooked batter from breaking the dosa.
  • Do not cover the tawa anymore. Keep the fire medium. Wait for another 2 minutes, before transferring it to a plate. Keep the fire low before making the next dosa. This is important as a very hot tawa makes it difficult to spread dosa batter with the ladle. So wait for 2 minutes until the tawa is not so hot.
  • While making the usual dosas, the fire can be lowered once you flip the dosa. So that you need not wait until the tawa cools down a bit after you tranfer the dosa to a plate.
  • Serve with sambhar, or coconut chutney

Thursday, October 19, 2006

Rice Kheer


Diwali season is come and this time, its a special diwali for me and my hubby as its our first diwali after marriage. So I thought I should prepare something special but not so complicated as I want it to be perfect. I immedietly think of Rice Kheer or otherwise called Ari Payasam in Malayalam. So let me share with you the most basic form of sweet item yet relished by many for Diwali and other festive occasion, which is one and only Rice Kheer. This is made in a slightly different way though.


Ingredients:

-----------------


Rice (Preferably broken rice or white rice or brown basmati rice): 1 cup

Ghee

Milk: 2 cups

Condensed milk (optional): 1/2 cup

Sugar: 1 cup (add more if you want it more sweet)

Cardamom powder or seeds: 1 teaspoon

Cashewnut : 3 0r 4 nos

Raisin: 3 or 4

Nutmeg powder (jaiphal , optional): 1/teaspoon

Saffron strands (optional): 2 or 3 nos


Method:

-------------


  1. In a vessel, heat ghee and fry the rice for 4 - minutes on low fire. This is to prevent the rice from sticking or becoming a paste when it is cooked, and also for taste enhancement.

  2. Let it cool. Then soak it in water for 3 - 4 hours.

  3. Drain the water completly. Wipe off excess water using a dry cloth.

  4. Grind this rice until it is powdery. Do not use water for grinding. As the rice was soaked in water, it will not be as hard as raw rice. So make sure the rice is just powdered and not becomes a paste.

  5. In another vessel, add milk and bring it to a boil. Then add the powdered rice and let it cook on medium fire. Stir in between to confirm that the rice is cooked, and also to prevent the rice from sticking to the bottom of the vessel.

  6. When the rice is cooked, add the sugar, condensed milk, cardamom, nutmeg powder, and saffron strands and stir again and cook for another 4-5 minutes.

  7. In a pan, heat a little ghee, and add cashewnuts and raisins and fry until the raw taste is gone and also so that it absorbs the taste of the ghee. Add cashewnuts to the kheer. In a little water add raisins and wait until the raisin bulges a little because of the water content in it. Add it to the kheer without the left over water in which it was soaked and stir uniformly.

  8. Can be served hot or chilled


Happy Diwali to one and all!!

Ambat (Konkani side dish)


Recently I had been pestering my friend, who is a Mangalorean, to send me some of her recipes. So she send me this typical konkani dish called Ambat which is prepared in Mangalore. Ambat is a konkani dish which is a main item in konkani temples during a festival or marriage feast. It has different varieties depending on the ingredients used. Sometimes ambat is prepared using ripe bananas in some parts of kerala, and sometimes using pulses. Here I am including the ambat prepared using white kidney beans. Hope you enjoy the dish.

Ingredients:
-----------------
  1. White kidney beans (Large ones): 1 small glass full
  2. Tomato : 1 no
  3. Onion: 1 no
  4. Potato: 1 no
  5. Grated Coconut: 1/4 if medium sized and 1/2 if small
  6. Red chilli: 3-4 nos depending on the spicy taste you want
  7. Tamarind : a small ball soaked in water
  8. Oil
  9. Salt
  10. Coriander leaves for garnish
Method:
  1. Soak the beans overnite.
  2. Peel the potatoes and slice them into very thin slices and cook them along with the beans in the pressure cooker for 3 whistles.
  3. Grind coconut, red chilli, and tamarind until it forms a smooth paste.
  4. Slice the tomatoes or make a tomato puree in the blender
  5. Heat a little oil in a kadai and saute the onions until they turn golden brown
  6. Add the tomatoes or puree and fry for around 20 seconds
  7. Add cooked beans and potatoes
  8. Add the coconut paste in step 3, add some water for gravy
  9. Add salt and cook until the raw smell of coconut paste is gone.
  10. Garnish with coriander leaves.
  11. Serve along with rice
Its easy to make and might take approximately 1/2 hour.

Wednesday, October 18, 2006

Samosa


This snack is loved by one and all in India. Infact its become very popular abroad too. Though the method of preparing and the ingredients used in samosa is not the best choice for health conscious people, the mere mention of the name "Samosa" makes everyone's mouth water. Its so easy to make and yet tasty (though its a bit time consuming) ......I had prepared for our friends who came to our house an evening with their 3 and 5 year old kids. Both the kids loved it. Especially the yougest one who always used to fuss about her food. I was so happy to see that she was actually enjoying my samosa:) ....and so did the others.
Enough with my story,....let me share it with you too....

Ingredients:
----------------
For the dough:

Flour ( All purpose flour, or Maida flour, or Wheat flour)
Salt: a little
Water
Oil for frying

For the filling:

Mashed potatoes - 2 or 3 potatoes
Finely chopped onions: 2 cups
Green peas: 1 cup
Finely chopped green beans: 1 cup
Finely chopped carrots: 1 cup
Minced garlic and ginger (you may use ginger garlic paste too): 1/4 th cup
Finely chopped tomatoes (can use tomato sauce also): 1/2 cup
Coriander powder: 1 tsp
Cumin seeds: 2 tsp
Mustard seeds: 2 tsp
Minced green chilli: 1 tbsp
Chilli powder: 1 tsp
Pepper powder (optional): 1 tsp
Garam masala powder (optional): 1/2 tsp
Curry leaves chopped: 1/2 cup
Coriander leaves for garnishing
Salt

Method:
----------


  1. Make the dough using the ingredients for dough just like making the chappathi dough.


  2. Cover the dough with a damp cloth and place it in a vessel. This helps the dough to not lose moisture.


  3. Make the filling ( it is similar to preparing any dry potato curry) with less or no water by using the above ingredients.


  4. Let the filling mixture cool.


  5. Meanwhile using some dough, make a thin round (say 5'' diameter)


  6. Cut it in half. Place some water along the diameter of each half.


  7. Place some filling in each half and fold the sides of the dough to form a covered cone. Makes two samosas for each roll of dough.


  8. Heat oil for deep frying. Fry the samosas in oil. Make sure not to fry the samosas on high fire as they might turn oily and soggy.


  9. Place the fried ones in a napkin to absorb the excess oil.


  10. Serve along with mint chutney or tomato sauce or tamarind chutney.


Kozhukkatta - a sweet dish


When I was little, dad, mom, me and my brother used to visit the Shiva temple in Ernakulam every Sunday evening. It wouldn't strike me about kozhukatta, until I reached the place where god Ganapathi resides in the same temple. Then my whole concentration while praying would be about kozhukkatta:-) ....This sweet is a typical kerala sweet (I am not sure if they are prepared in other parts of India as well), which is mostly prepared as an offering to Lord Ganapathi as it is his favorite sweet apart from modhak...........and so is mine :-). Whenever I think about kozhukkatta, I remember the taste of the soft white rice balls filled with coconut-jaggery mix....mmm....I feel like preparing some now itself. Though it did not come perfect (especially the dough), the first time I made it, I got to know how to prepare it well the next time. My husband had never eaten this sweet for ages and was very glad that I made this for him. Again I owe thanks to my mom from whom I learned to make it. She used to prepare it specially for me, as I liked this sweet a lot:-) ....Let me share my favorite sweet with you too.

Ingredients:
----------------
To make the dough:

Rice Flour: 1 cup
Water: 2 cups
Salt: a pinch
Oil: 1 tablespoon


For the filling:
----------------
Grated coconut: 2 cups
*Coarsely powdered jaggery: 2 cups

*You may increase or decrease the amount of jaggery according to your taste


Method:
--------------

Lets prepare the filling first as we don't want the dough to cool if it were to be prepared first.

Filling:


  1. Add a little water (just enough to make a solution of water and jaggery) to the powdered jaggery and keep it on low fire, and stir for sometime.

  2. When the jaggery completely dissolves in the water, add the grated coconut. Mix it uniformly for a minute. Take it off from fire.

  3. Allow it to cool.

Dough:


  1. Add a pinch of salt and one tablespoon of oil to 2 cups of water and bring it to a boil in a kadai.

  2. When water starts boiling, add the rice flour , and continuously stir until a smooth dough is formed. Make sure no lumps are formed while stirring. The dough should have the consistency similar to chapatti dough. Take off the fire once the desired consistency is attained.

  3. Spread some oil in the palm of both of your hands. This makes it easy to make balls out of the dough.

  4. Make small balls (lemon sized) using the dough.

  5. Make a depression in each ball (just enough to fill the coconut - jaggery mix), and stuff a small amount of filling in the depression. Make sure to not fill the depression completely with the mixture. Leave some room so that the depression can be closed after it is stuffed.

  6. **After stuffing the filling like this in each ball, place the balls on a idli stand and steam in the cooker (do not place the whistle on the cooker) until the steam coming from the cooker becomes free flowing (say an additional 2 to 3 minutes after the steam starts coming out of the vent of the cooker).

  7. Turn off the fire. Wait for a minute before taking out the cooker lid.

  8. Take out the idli stand and let it cool. Cooling is important as it prevents the kozhukkatta from breaking.

  9. And remember to offer some to Lord Ganapathi first before eating it yourself :)


**You can steam it in any vessel similar to cooker. If you do not have an idli stand, fill the cooker with some water as you would do to make idlis. Place another vessel with a little water (just a 1/4 th cup) in the cooker and cover this vessel with a plate which also fits in the cooker. Arrange the kozhukkatta balls on the plate. Cover the cooker with the lid follow the same instructions above to make kozhukkatta. This method of cooking is similar to what a double boiler does.

Monday, October 16, 2006

Vegetable Fried Rice


Whenever I pass a chinese restaurant, I always get reminded of the aroma of the hot and sour soup and fried rice which I am very fond of. I am always fond of chinese dishes. I also like the fact that chinese dishes have a lot of vegetables even in the non-vegetarian dishes. And unlike the indian restaurants here in US where the dishes are too expensive, the chinese people serve you enough amount of food for the same price to last the next day too. Anyways, I guess Iam going offtrack here....I just wanted to conclude that Vegetable fried rice can be called as a wholesome dish as it has the rice and lots of vegetables which are important source of dietary fibre. Here Iam including the recipe for vegetable fried rice which infact would appear very colorful if you were to include more vegetables.....as usual, you might find that I include a variety of spices, coz Iam a spice lover by nature:-)

Ingredients:
-------------------

Raw rice (preferably Basmati rice): 1 cup
Butter: 1 medium sized cube

Vegetables:

Onion: 2 medium sized nos
Carrot (cut lengthwise or cubes): 1 cup
Green peas: 1 cup
Corn: 1 cup
Green beans (chopped): 1 cup
Tomato (chopped to ver small pieces): 2 tomatoes
Mushroom (optional)(cut in quarters): 1 cup
Capsicum: 2 nos
Crushed Garlic: 3 segments
Minced ginger: 1 tsp
Chopped green chillies: 2 tsp
Coriander leaves: 1 cup

Spices:

Cumin seeds (jeera): 1 tsp
Cloves: 3-4nos
Coriander powder: 1 tsp
Chilli powder: 1 tsp
*Nutmeg powder (optional)(jaiphal or jaathikka in malayalam): 1/2teaspoon
Pepper powder: 1 tsp

*Nutmeg is a spice that has various medicinal values associated with it.

Sauces:

Tomato sauce: 3 tbsp
Soy sauce (optional) : 2 tbsp
Oil
Salt

Method:
-----------


  1. Take a vessel and melt butter in it. While the butter is getting melted, add the basmati rice. Keep stirring until the basmati rice starts turning slight brown. Add 2 cups of water to the vessel and cook the rice until it is just done. Make sure not to overcook the rice, else the rice might become too sticky and the texture of fried rice will not be retained.
  2. After the rice gets cooked, take off fire and let it cool.
  3. In another pan, heat 2 tablespoons of oil. Add cloves, cumin seeds, garlic and ginger and green chilli. Saute for 10 seconds. Then add onion, and mushroom. Saute until onions turn brown and the juices from the mushroom gets out (you will be able to know this as there will be a nice aroma ).
  4. **Add the rest of the vegetables, ie, green peas, carrot, green beans, tomato, capsicum, and corn. Add coriander powder, chilli powder, nutmeg powder, and pepper powder. Stir uniformly to mix the spices with the vegetables. Add the tomato sauce and soy sauce. Mix uniformly. Wait until all the vegetables are tender. Add this to the cooked rice and add salt. Mix the rice and vegetables uniformly.
  5. Garnish with coriander leaves. Serve with raita or vegetable kurma. A glass of jaljeera would serve as a drink along with this.

** Variation: You may make egg fried rice by adding one or eggs at this point and mix everything until the eggs become scrambled.


Please do not copy

All contents in this blog cannot be copied without written permission from the blog author.

LinkWithin

Related Posts with Thumbnails
baby